
A client approved a perfect sample—fit, color, stitching all excellent. They ordered 3,000 pieces. When bulk arrived, 18% failed inspection: collars twisted, colors off-shade, side seams puckered. The client was angry—"The sample was perfect!" I walked them through our production floor. Sample made by one experienced operator. Bulk made by 45 operators across three lines. Sample used lab-dip approved fabric. Bulk fabric came from a different dye lot (supplier switched batches). Sample collar had hand-applied fusible. Bulk used automatic pressing (wrong temperature). The sample proved capability. The process proved consistency—or lack of it. Understanding golf polo production is not about knowing the steps. It is about knowing where consistency breaks between sample approval and bulk delivery.
Golf polo production involves seven critical stages from tech pack to shipment, but quality consistency depends on four specific control points—pre-production fabric shrinkage testing preventing size variance, cutting room marker precision controlling material waste and fit, needle-thread-fabric matching eliminating seam puckering, and final AQL inspection criteria determining whether cosmetic defects reach customers—where factories claiming identical processes diverge in adhesive methods, stitch sequences and QC pass-rate standards that buyers cannot see in sample approval but directly affect bulk shipment acceptance rates.
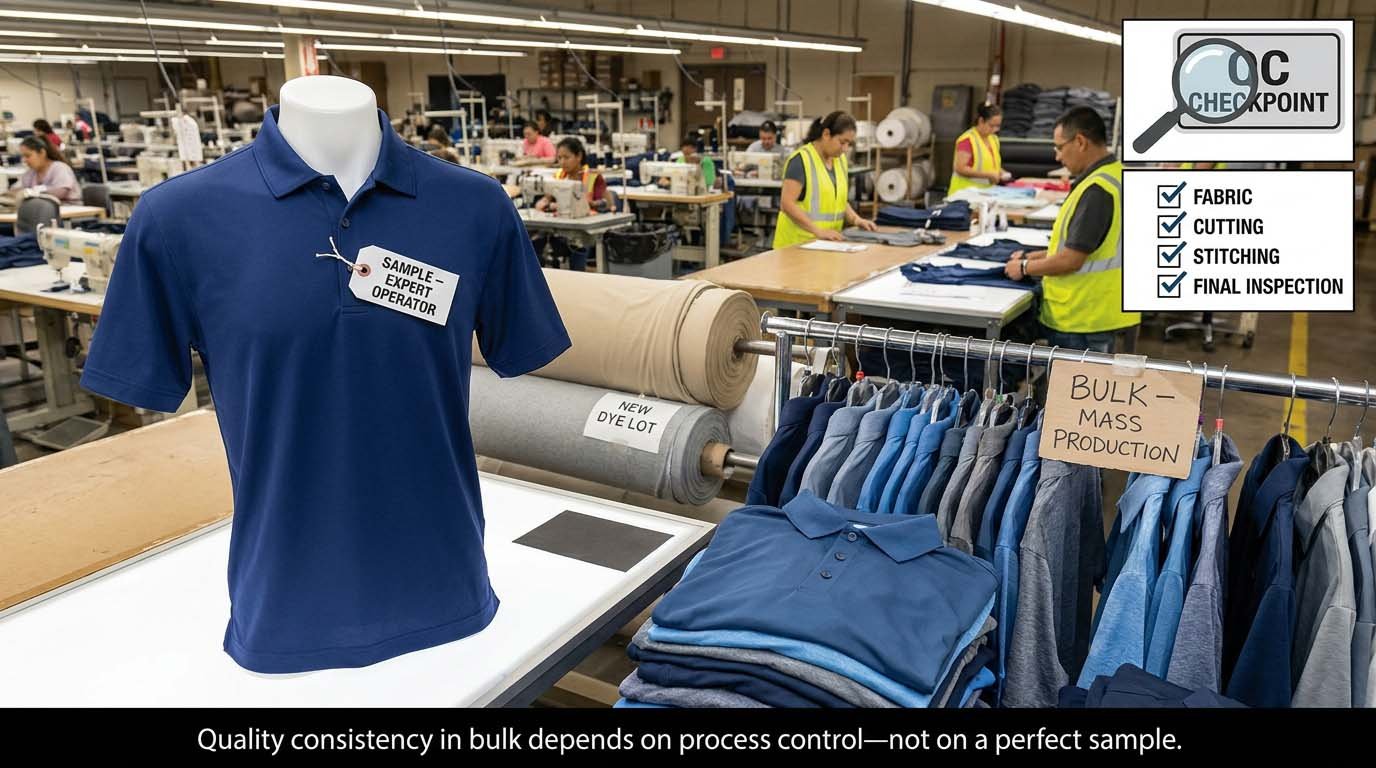
I am Will from FUWAY. Over 15 years, I have managed production for 800+ golf polo orders. I have seen shipments rejected for issues invisible in samples. I have traced quality failures back to specific process gaps—shortcuts that look identical to proper procedure but produce different outcomes at scale. This guide shows you the actual production flow and, more importantly, which steps determine whether you receive consistent quality or face rejection costs.
Quick Answers: Golf Polo Production Process
Q: Why do bulk polos fail inspection after perfect samples?
Bulk fabric not pre-shrunk. Factory skips shrinkage testing before cutting—shirts shrink 3–8% after sewing. Sizes become inconsistent. Always demand fabric relaxation & wash test before production.
Q: How long does it take to produce 1,000 golf polos after order?
Typical: 45–65 days.
- Pre-production & sample: 10–14 days
- Fabric prep: 7–10 days
- Cutting/decorating: 5–7 days
- Sewing/finishing: 10–14 days
- Final inspection/logistics: 5–7 days
Rush order (<40 days) needs stock fabric, premium cost, and quality risk.
Q: What tests should happen before bulk production?
Shrinkage (wash test), color fastness, pilling resistance, fit/measurements, seam strength, collar pressing, multiple wash cycles.
If factory can't show lab/test reports, assume shortcuts—major quality risk.
Q: What causes collar and cuff issues?
Cheaper interfacing, wrong grain, poor pressing,/stretching—mainly to save $0.05–0.15/unit. Most visible defects (curl/twist/bubble) after washing. Collar QC should be 100%.
Q: How much does it cost per golf polo at different quality levels?
- Budget: $5–7.50/unit (high defect risk, basic materials, minimal QC)
- Mid-tier: $8.50–12/unit (combed yarn or treatments, proper QC, lower defect rate)
- Premium: $13–18+/unit (microfiber/technical, strict testing, lowest defects)
| Q: What's a realistic price vs. volume table? | Order Qty | Budget | Mid-Tier | Premium |
|---|---|---|---|---|
| 300 pieces | $7.5–9 | $11–14 | $16–21 | |
| 500 pieces | $6.5–8 | $10–13 | $15–19 | |
| 1,000 pieces | $5.5–7.5 | $8.5–12 | $13–18 | |
| 3,000+ pieces | $5–7 | $8–11 | $12–16 |
Cutting QC corners always adds hidden costs and delays. "Cheap" price often ends up expensive.
From Brief to Tech Pack: Specs, BOM and Cost Targets
Tech pack development converts design concepts into manufacturing instructions through detailed measurement specifications, bill-of-materials component selection and construction method documentation—where incomplete specs force factories to guess fabric weight, interfacing type or stitch density, creating sample-to-bulk inconsistency when buyers assume visual appearance alone communicates quality standards that actually require numeric tolerances, yarn specifications and assembly sequence details determining whether quoted prices reflect buyers' expectations or factories' cost-minimization assumptions.
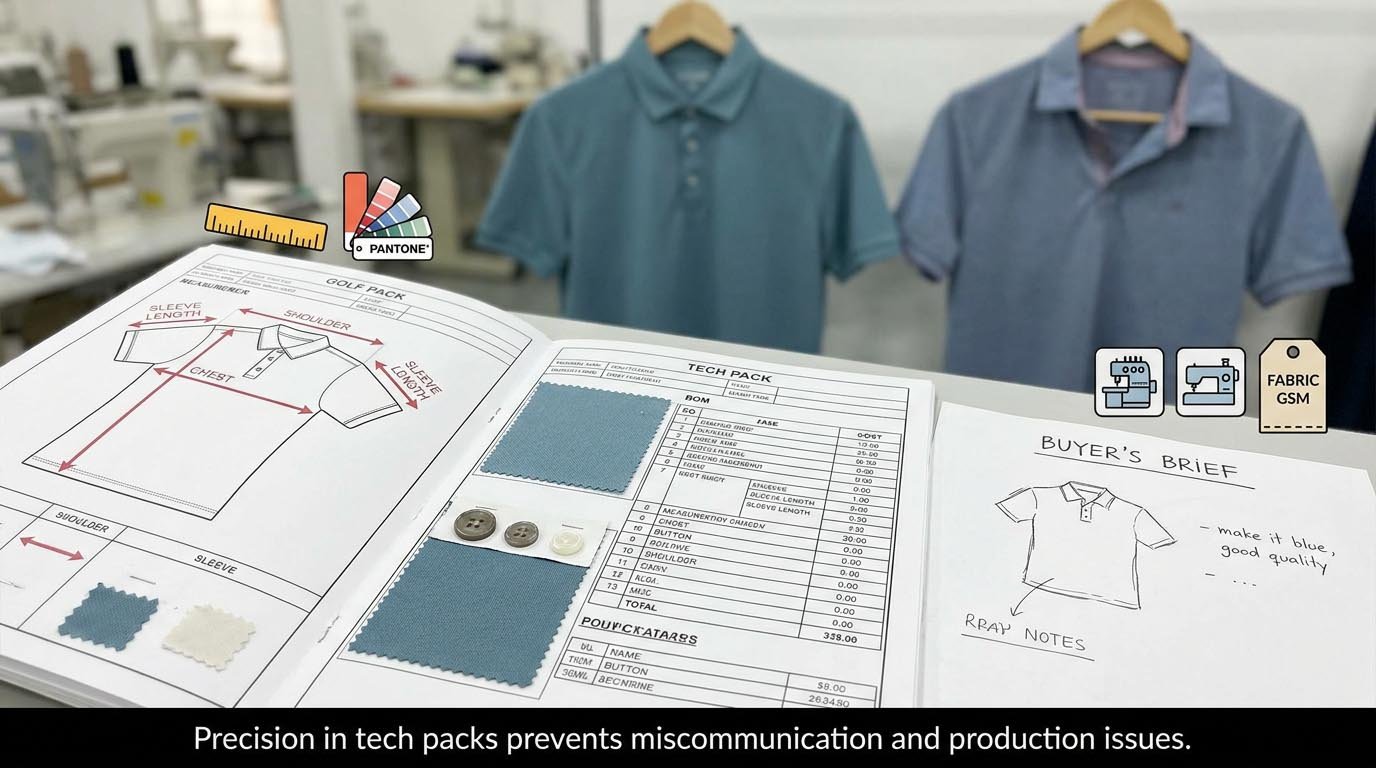
Design Brief to Technical Specification
What buyers provide (typical):
Incomplete brief:
- Photo or sketch (front/back view)
- General description: "Classic golf polo, moisture-wicking, good quality"
- Color ideas: "Navy, white, maybe red"
- Budget: "Around $8-10 per unit"
What's missing (critical):
- Fabric specification: GSM, fiber content, finish treatments
- Measurements: 12-15 point-of-measure (POM) dimensions
- Construction details: Stitch types, seam allowances, reinforcement
- Quality standards: Acceptable defect levels, testing requirements
Tech pack must answer:
Fabric section:
- Fabric type: Piqué or jersey (knit structure)
- Weight: 160-220 GSM (specific number)
- Fiber content: 100% polyester, 65/35 poly-cotton, etc.
- Yarn type: Combed, microfiber, staple (affects pilling)
- Finish treatments: Anti-pilling, moisture-wicking, UPF (specify coating types)
- Color matching: Pantone numbers OR physical fabric swatch (not "navy")
Measurements (Points of Measure):
Essential POMs for golf polo:
- Chest width (1 cm below armhole)
- Bottom width (at hem)
- Center back length (HPS to hem)
- Shoulder width (seam to seam)
- Sleeve length (shoulder seam to cuff edge)
- Armhole depth (HPS to armhole bottom)
- Neck width (front edge to edge)
- Collar height (stand and fall)
- Collar width
- Placket length
- Cuff height
- Side slit height (if applicable)
Why precision matters:
- ±1 cm tolerance typical for body measurements
- ±0.5 cm tolerance for details (collar, cuffs)
- Measurement method specified: Laid flat, stretched to natural width, etc.
Construction details:
Stitch specifications:
- Shoulder seam: Overlock 504, 12 stitches/inch
- Side seam: Safety stitch 516, 12 stitches/inch
- Hem: Coverstitch 406, 13 stitches/inch
- Collar attachment: Lockstitch 301, 12 stitches/inch
- Buttonhole: Lockstitch 304, bar-tack ends
Reinforcement:
- Shoulder tape: 100% cotton twill, 20 mm width
- Stress points: Bar-tack at side slits, placket bottom
- Collar interfacing: 100 GSM fusible interlining, full collar coverage
Bill of Materials (BOM) Costing
BOM breaks down every component and its cost:
Main fabric:
- Quantity per unit: 1.6-2.0 yards (depends on size, marker efficiency)
- Price per yard: $3.50-7.00 (depends on specs)
- Cost per unit: $5.60-14.00 (largest single cost)
Trim components:
Buttons:
- Quantity: 2-4 pieces (2-button or 3-button placket + 1 spare)
- Type: Polyester button, 13 mm diameter
- Cost: $0.02-0.15 per button (budget to premium)
- Total: $0.04-0.60 per unit
Thread:
- Quantity: ~150-200 meters per polo
- Type: 40s/2 polyester core-spun or 100% polyester
- Cost: $0.08-0.15 per unit
Interlining (fusible interfacing):
- Quantity: 0.1-0.15 yards (collar, placket)
- Type: 80-120 GSM woven or non-woven fusible
- Cost: $0.05-0.20 per unit
Labels:
- Main label: Woven or printed (brand, size, care)
- Size label: Separate or integrated
- Hang tag: Optional branding
- Cost: $0.15-0.80 per unit (basic to premium)
Packaging:
- Polybag: $0.03-0.08
- Sticker/barcode: $0.02-0.05
- Box (if applicable): $0.25-0.50
- Total: $0.05-0.65 per unit
BOM cost example (mid-tier polo):
| Component | Specification | Quantity | Unit Price | Total Cost |
|---|---|---|---|---|
| Main fabric | 190 GSM piqué, anti-pill | 1.8 yards | $4.50/yard | $8.10 |
| Buttons | 13mm polyester | 3 pcs | $0.08/pc | $0.24 |
| Thread | 40s/2 poly | 180 meters | - | $0.12 |
| Interlining | 100 GSM fusible | 0.12 yards | $1.20/yard | $0.14 |
| Labels | Woven + care | 2 pcs | $0.25 total | $0.25 |
| Packaging | Polybag + sticker | 1 set | - | $0.08 |
| Subtotal materials | $8.93 | |||
| Labor | Cutting, sewing, QC | - | - | $2.50 |
| Overhead | Factory indirect costs | - | - | $1.30 |
| Testing | Shrinkage, colorfastness | Amortized | - | $0.20 |
| Profit margin | 12-15% | - | - | $1.57 |
| Total FOB | $14.50 |
Cost target alignment:
If buyer's target is $10 FOB:
- Materials budget: Max $6.50-7.00 (65-70% of FOB)
- Must reduce: Fabric to $3.50-4.00/yard (180 GSM basic jersey)
- Or reduce: Trim to minimum (basic buttons, no hang tag)
- Or reduce: Testing/QC (skip pre-production tests)
Tech pack revision based on cost:
- Buyer sees target cannot meet premium specs
- Option 1: Increase budget to $12-14 (realistic for specs)
- Option 2: Reduce specs (lighter fabric, simpler construction)
- Option 3: Increase MOQ to 2,000-3,000 (lower per-unit cost)
Common Tech Pack Gaps
Gap 1: "Good quality fabric"
Problem: "Good" means different things
- Budget factory: 180 GSM staple yarn = "good enough"
- Premium factory: 180 GSM microfiber combed = "entry-level"
Solution: Specify yarn type, GSM, finish treatments numerically
Gap 2: "Like the sample"
Problem: Sample might use different fabric batch or hand-construction not replicable at scale
Solution: Approve pre-production proto made on actual production line with bulk fabric
Gap 3: "Industry standard stitching"
Problem: Standards vary by factory tier—12 stitches/inch vs 14 stitches/inch
Solution: Specify stitch type (ISO notation) and stitch density per seam
Gap 4: "Match Pantone 19-4052"
Problem: Pantone is for paper/ink, not fabric dye (different color systems)
Solution: Provide physical color swatch OR use fabric-specific Pantone TCX (textile colors)
I emphasize: A complete tech pack prevents 95%+ of sample-bulk discrepancies. Buyers who skip tech pack development spend 3-5x more time managing quality complaints during bulk production. The 2-3 days invested in proper tech pack saves weeks of corrections later.
Materials & Partners: Yarns, Fabrics, Trims and Vendor Sourcing
Material sourcing determines whether bulk production matches sample quality through yarn construction specifications, fabric mill capability verification and trim component consistency checks—where buyers assume "polyester" or "woven label" communicates sufficient detail but fabric mills interpret unspecified requirements as cost-minimization opportunities, substituting staple yarn for combed yarn, reactive dyes for disperse dyes, or C-grade interlining for A-grade fusibles without notification unless tech packs specify testing standards, supplier qualifications and material approval processes preventing silent downgrade between sample and bulk.
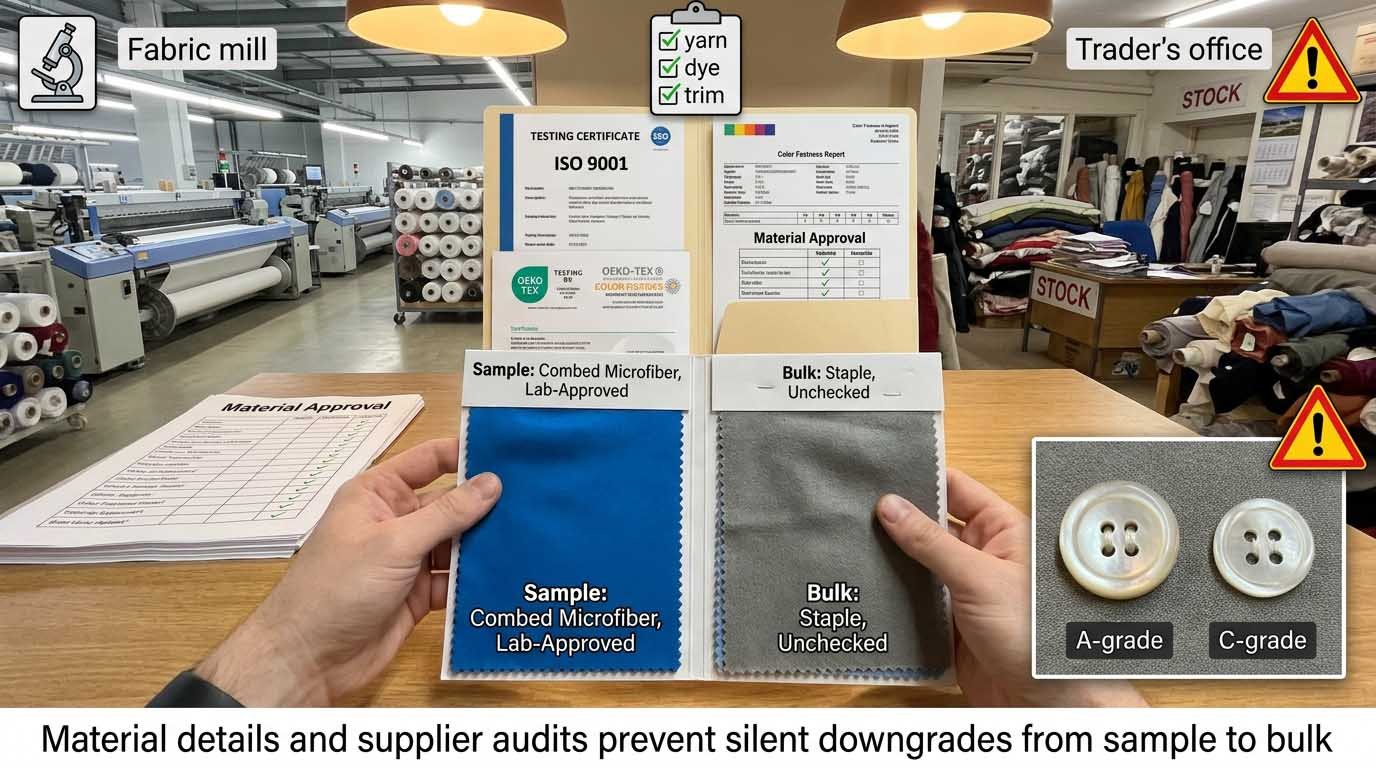
Fabric Sourcing: Mills vs Traders
Sourcing structure:
Direct from knitting mill:
- Advantages: Control over yarn selection, dye process, finish treatments
- MOQ: 1,000-2,000 yards per color minimum
- Lead time: 15-25 days (knitting + dyeing + finishing)
- Cost: 10-20% cheaper than traders (no middleman markup)
- Best for: Large orders (1,500+ polos), custom fabric development
Through fabric trader:
- Advantages: Lower MOQ (300-500 yards), faster delivery (stock fabrics)
- MOQ: 300-500 yards (trader holds inventory)
- Lead time: 3-7 days (if in stock)
- Cost: 10-20% markup over mill price
- Best for: Small orders, urgent production, standard fabrics
Quality control differences:
Direct from mill:
- Lab dip approval: You approve dye color before bulk production
- Shrinkage testing: Mill provides test report (if you request it)
- Consistency: Better batch-to-batch (single source)
Through trader:
- Lab dip: May skip (trader uses stock dye lot)
- Testing: Often skipped (trader assumes mill-tested)
- Consistency: Risk if trader switches mills between orders
When material issues arise:
Common fabric defects:
- Dye lot variance: Color 5-10% different between batches
- Width inconsistency: Fabric 150 cm vs 160 cm (affects marker)
- GSM variance: Actual 185 GSM vs spec 190 GSM (lighter than ordered)
- Finish defects: Uneven coating, skip marks, snags
Resolution by source:
- Direct mill: Replacement fabric within 7-10 days (mill controls production)
- Trader: Negotiation required (10-21 days, depends on trader-mill relationship)
Yarn Specifications Critical to Quality
Yarn types and performance:
Staple fiber polyester (cheapest):
- Construction: Short fibers 2-5 cm twisted together
- Characteristics: Softer hand, warmer feel
- Weakness: Pills easily (fiber ends break off)
- Cost: $3.00-4.00/yard fabric cost
- Best for: Budget tier (<$7 FOB) where pilling acceptable after 30-40 washes
Combed polyester (mid-tier):
- Construction: Short fibers combed to remove weak strands before spinning
- Characteristics: Smoother, less pilling than staple
- Performance: Acceptable pilling (60-80 washes)
- Cost: +$0.60-1.00/yard vs staple
- Best for: Mid-tier ($8-12 FOB)
Continuous filament polyester (premium):
- Construction: Long continuous fibers (no ends to pill)
- Characteristics: Smoothest, strongest
- Performance: Minimal pilling (100+ washes)
- Cost: +$1.20-2.00/yard vs staple
- Best for: Premium tier ($13+ FOB)
Microfiber polyester (luxury):
- Construction: Ultra-fine continuous filaments (<1 denier per fiber)
- Characteristics: Silky soft, excellent drape
- Performance: Superior moisture-wicking + minimal pilling
- Cost: +$2.00-3.50/yard vs staple
- Best for: High-end positioning ($18+ FOB)
Why yarn spec matters:
Scenario: Buyer orders "180 GSM polyester jersey" without yarn specification
Budget factory sources:
- Staple fiber, 180 GSM: $3.50/yard
- Pills after 15-25 washes
- Customer complaints: "Low quality"
Premium factory sources:
- Continuous filament, 180 GSM: $5.20/yard
- Pills after 90-120 washes
- Customer feedback: "Excellent durability"
Both met tech pack (180 GSM polyester) but delivered completely different products.
Trim Component Consistency
Buttons (small cost, big impact):
Button grades:
- C-grade: $0.02-0.04 per button (thin, breaks easily)
- B-grade: $0.05-0.08 (standard thickness)
- A-grade: $0.10-0.15 (reinforced, branded)
Button quality check:
- Drop test: Button survives 1-meter drop without cracking
- Washing durability: Survives 50+ wash cycles without color fading
- Attachment strength: Thread pull test ≥8 lbs
Problem: Supplier switches from B-grade to C-grade between sample and bulk (saves $0.15-0.30 per polo)
Result: 5-10% button breakage during customer use or washing
Labels:
Label types:
- Woven label: $0.08-0.30 (durable, professional)
- Printed label: $0.03-0.10 (cheaper, fades faster)
- Heat transfer: $0.05-0.15 (no bulk, comfortable)
Common issue: Sample uses woven label (looks premium), bulk uses printed label (cost-saving)
Impact: Customer perceives lower quality (label fading after 20 washes)
Interlining (fusible interfacing):
Grades:
- C-grade: $0.80-1.50/yard (weak adhesive, bubbles after washing)
- B-grade: $1.80-2.50/yard (standard adhesive)
- A-grade: $3.00-4.50/yard (high-recovery adhesive, survives 100+ washes)
Testing interlining quality:
- Peel test: Fused sample should require >500 grams force to separate
- Wash test: No bubbling after 5 wash cycles at 40°C
Problem: Factory uses A-grade for sample, C-grade for bulk (saves $0.08-0.12 per unit)
Result: Collar bubbling complaints after 10-20 washes (15-30% return rate)
Vendor Qualification and Audits
Material supplier qualification checklist:
Fabric mill assessment:
Production capacity:
- Can produce required MOQ within lead time?
- Backup capacity if urgent re-order needed?
Quality systems:
- ISO 9001 certification (process control)
- OEKO-TEX Standard 100 (chemical safety)
- Internal testing lab (color fastness, shrinkage)
Track record:
- 3+ years supplying similar customers
- <5% defect rate in deliveries
- On-time delivery rate: ≥90%
Audit red flags:
During mill visit:
- No testing equipment visible (how do they verify quality?)
- Inconsistent dye lot labeling (tracking system weak)
- Fabric stored outdoors (moisture damage risk)
- No temperature control in dye house (color consistency impossible)
Trim supplier assessment:
Component consistency:
- Color matching: Buttons/labels match ±ΔE 1.0 between batches
- Dimensional consistency: Button diameter ±0.2 mm
Delivery reliability:
- MOQ acceptable for order volume
- Lead time: ≤7 days for re-orders
Supply chain backup:
Risk mitigation:
- Qualified secondary supplier for each critical component (fabric, buttons, thread)
- Cost premium: 5-10% higher but ensures no production stoppage
Scenario: Primary fabric mill has dye machine breakdown
Without backup: Production delayed 10-14 days (wait for mill repair)
With backup: Switch to secondary mill within 3 days (slight color variance but delivery on time)
I have learned: 80% of bulk production failures trace back to material inconsistency—fabric shrinkage not tested, yarn switched without notice, trim grade downgraded. Buyers must verify materials at pre-production stage, not discover issues at final inspection when correction is expensive and late.
Pre-Production: Samples, Fit Approvals, Lab Tests and PP Sign-off
Pre-production sample approval validates that bulk materials and production-line construction replicate approved sample quality through fit measurement verification, fabric performance testing and construction method documentation—where buyers assume sample approval means production-ready but experienced manufacturers distinguish between development samples made under controlled conditions and pre-production prototypes made with actual bulk fabric and production operators, catching material shrinkage, dye-lot variance and construction inconsistencies before cutting thousands of garments that cannot be corrected without full re-work.
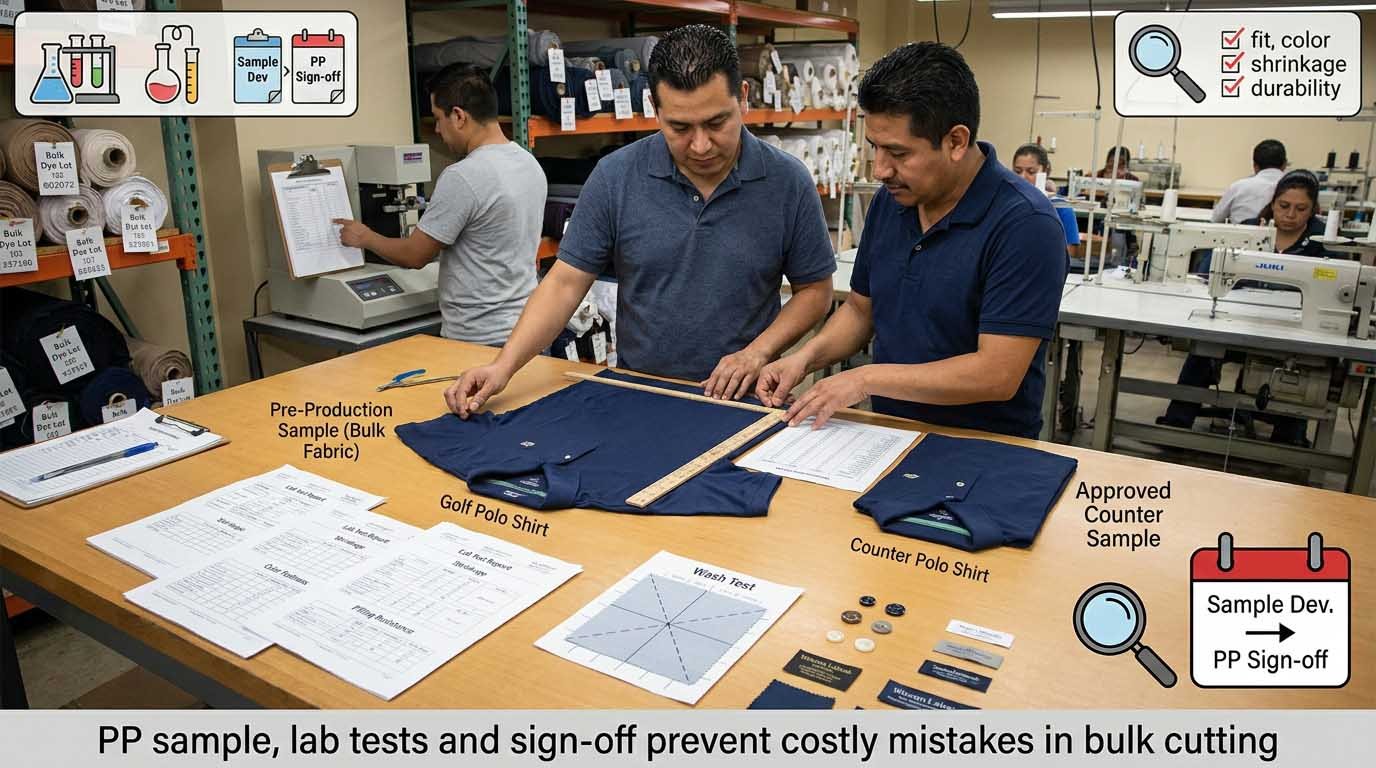
Sample Development Sequence
Sample types and purposes:
1. Proto sample (first sample):
- Made by: Sample room technician (highly skilled)
- Materials: Whatever fabric available (often not exact spec)
- Purpose: Validate design concept, general fit, construction feasibility
- Accuracy: 70-80% match to tech pack (close but not exact)
- Timeline: 5-7 days after tech pack finalized
2. Fit sample (size set sample):
- Made by: Sample room
- Materials: Closer to spec fabric (may still be lab-controlled)
- Purpose: Perfect fit measurements, test across 3-5 sizes
- Accuracy: 90-95% measurement accuracy
- Timeline: 7-10 days (includes adjustments from proto)
3. Counter sample (factory sample for approval):
- Made by: Sample room with production-intent construction
- Materials: As close to bulk fabric as possible (may not be exact dye lot)
- Purpose: Final appearance, color, construction approval by buyer
- Accuracy: 95%+ match to final product intent
- Timeline: 7-10 days after fit sample approved
4. Pre-production sample (PP sample):
- Made by: Production line operators (not sample room)
- Materials: Actual bulk fabric from the mill (exact dye lot for order)
- Purpose: Verify bulk materials + production process match approved sample
- Accuracy: 100% representation of bulk output
- Timeline: 1-3 days after bulk fabric arrives, before cutting starts
Critical difference: Counter sample vs PP sample:
| Factor | Counter Sample | Pre-Production Sample |
|---|---|---|
| Maker | Sample room technician | Production line operator |
| Fabric | Lab-controlled (pre-washed, stabilized) | Bulk fabric (as-received from mill) |
| Construction | Hand-attention to detail | Actual production method |
| Purpose | Prove capability | Verify consistency |
| Defects | Hidden by skilled maker | Reveals real production issues |
Why PP sample catches problems:
Case 1: Fabric shrinkage
- Counter sample fabric: Pre-washed by lab (stable dimensions)
- Bulk fabric: Direct from mill (not pre-washed)
- PP sample result: Shrinks 4-6% after cutting, measurements fail spec
Case 2: Dye lot variance
- Counter sample: Dye lot #A1234 (approved color)
- Bulk fabric: Dye lot #A1235 (different batch, 5% darker)
- PP sample result: Color mismatch visible when comparing to approved sample
Case 3: Production method feasibility
- Counter sample: Collar interfacing hand-applied perfectly
- Bulk production: Collar interfacing machine-fused (temperature inconsistent)
- PP sample result: Bubbling on collar edges (production method flaw)
Fabric Testing Before Cutting
Critical pre-production tests:
1. Dimensional stability (shrinkage):
Test method:
- Mark 50 cm × 50 cm square on fabric
- Wash at care label settings (e.g., 40°C, tumble dry low)
- Dry and measure again
- Calculate shrinkage percentage in warp (length) and weft (width)
Acceptable standards:
- Warp shrinkage: ≤5% (most critical for garment length)
- Weft shrinkage: ≤5% (affects chest width)
- Combined variance: ≤7% total
If exceeds tolerance:
- Pattern adjustment: Add shrinkage allowance (e.g., +6% length)
- Fabric re-processing: Request mill to pre-shrink fabric (sanforizing)
- Reject fabric: If shrinkage >8% (unstable)
Cost of skipping test:
- Medium polo spec: Chest 104 cm, Length 72 cm
- 6% shrinkage: Chest becomes 98 cm, Length 68 cm (sizes small, nearly unwearable)
- Rejection rate: 80-100% of order
2. Color fastness (wash and light):
Wash fastness test (AATCC 61):
- Wash fabric with multi-fiber strip
- Check color bleeding onto white strip
- Grade: 1 (severe bleeding) to 5 (no bleeding)
- Acceptable: Grade 4-5
Light fastness test (AATCC 16):
- Expose fabric to UV light (40-80 hours)
- Compare to original color
- Grade: 1 (severe fading) to 5 (no fading)
- Acceptable: Grade 4 minimum (Grade 5 for light colors)
If fails:
- Re-dye: Fabric returned to mill for color correction
- Alternative: Use UV-inhibitor finish (adds $0.40-0.80/yard)
3. Pilling resistance:
Test method: Martindale or random tumble pilling tester
- Abrade fabric for 1,000-5,000 cycles
- Grade: 1 (severe pilling) to 5 (no pilling)
- Acceptable: Grade 3-4
If fails (Grade 2 or below):
- Anti-pilling treatment applied (chemical or enzyme)
- Cost: +$0.30-0.60/yard
- Alternative: Reject fabric, source better yarn quality
4. Fabric weight verification:
Test method: GSM cutter (100 cm² sample) + scale
- Cut 10 samples from different parts of roll
- Weigh each, calculate average
- Compare to spec
Acceptable variance: ±5% of target GSM
Example:
- Spec: 190 GSM
- Acceptable range: 180-200 GSM
- If tested at 172 GSM: Reject (too light, affects opacity, durability)
Fit Approval Process
Measurement verification (PP sample):
Standard tolerance:
- Body measurements: ±1 cm (chest, length, shoulder, sleeve)
- Detail measurements: ±0.5 cm (collar, cuffs, placket)
Measurement method consistency:
- Laid flat, not stretched (unless spec says "stretched to natural width")
- Measured at specific points (chest measured 1 cm below armhole, not at widest point)
Comparison:
- PP sample vs approved counter sample (should match within tolerance)
- PP sample vs tech pack spec (should match exactly)
If PP sample fails fit:
Common causes:
- Fabric shrank during relaxation or pre-wash (pattern needs adjustment)
- Operator stretched fabric during sewing (re-train operators)
- Pattern grading error (size Medium correct, but Large/XL off)
Correction:
- Minor (0.5-1 cm): Adjust sewing allowance (e.g., take deeper side seam)
- Major (>1 cm): Re-cut pattern, re-mark, re-cut fabric
Lab Testing Documentation
Testing reports buyers should request:
Before bulk production:
- Fabric shrinkage report (dimensional stability)
- Color fastness report (wash + light)
- Pilling resistance (if applicable to price tier)
- Fiber content analysis (confirms polyester %, cotton %)
After PP sample made:
- Appearance after wash (3-5 wash cycles)
- Seam strength (if buyer requires)
- Colorfastness to crocking (color rub-off, for dark colors)
Testing cost:
- Individual test: $50-150 per test type
- Full package: $400-800 per style
- Amortized over 1,000-unit order: $0.40-0.80 per unit
What premium buyers require:
- OEKO-TEX Standard 100 (no harmful chemicals)
- CPSIA compliance (lead, phthalates for US market)
- Full test reports with lab logo and date
What budget buyers skip:
- All external testing (trust factory internal checks)
- Risk: No verification, quality issues discovered after bulk shipment
Pre-Production Sign-Off Checklist
Before bulk cutting starts, verify:
Materials received and approved:
- Bulk fabric: Correct GSM, color, finish, tested and passed
- Trims: Buttons, thread, labels, interlining match approved samples
- Packaging: Polybags, boxes, stickers ready
PP sample approved:
- Fit measurements: Within tolerance
- Appearance: Matches counter sample (color, construction)
- Wash test: No shrinkage, color bleeding, pilling after 3+ washes
Production plan confirmed:
- Cutting date: Confirmed (fabric relaxed 24-48 hours before cutting)
- Sewing line assigned: Experienced operators, QC plan in place
- Timeline: Cutting → Sewing → Inspection → Packing schedule finalized
Documentation ready:
- Tech pack: Final version (no pending changes)
- Approved sample: On production floor for operators to reference
- QC checklist: Inspection criteria documented
Sign-off process:
- Factory sends: PP sample photos + measurement sheet + test reports
- Buyer reviews: Compares to approved sample
- Buyer approval: Written confirmation (email or formal sign-off)
- Cutting starts: Only after buyer approval received
Risk of skipping PP approval:
Scenario: Factory cuts 1,000 pieces before PP sample approved
- Fabric shrinks 6% (discovered after cutting)
- All pieces undersized by 2-3 cm
- Loss: $6,000-8,000 fabric wasted + 2-3 week delay for re-cutting
With PP approval:
- $200 testing + 2 days catches shrinkage
- Pattern adjusted before cutting
- Zero waste, on-time delivery
I insist: PP sample approval is non-negotiable. Buyers who pressure factories to skip this step (to save 2-3 days) create the exact delays they are trying to avoid when bulk production fails and requires re-work.
Bulk Fabric: Knitting, Dyeing/Finishing and In-Process Quality Control
Bulk fabric production quality depends on knitting tension consistency, dye process parameter control and finishing treatment uniformity—where mills optimize for cost efficiency by adjusting temperatures, cycle times and chemical concentrations between sample and bulk runs, creating color variance, shrinkage differences and hand-feel changes that tech pack specifications cannot prevent unless buyers verify in-process controls, request mill process documentation and conduct fabric inspection before cutting authorization rather than assuming fabric matching sample appearance alone guarantees production readiness.
Knitting Process Control
Knit structure consistency:
Key parameters:
Gauge (stitches per inch):
- Standard jersey: 18-24 gauge
- Standard piqué: 16-20 gauge
- Variance tolerance: ±1 gauge (affects fabric weight and drape)
Tension settings:
- Too tight: Fabric stiff, less stretch, may cause needle breaks
- Too loose: Fabric unstable, wavy edges, dimensional issues
Yarn feeding:
- Consistent yarn tension prevents slubs (thick spots) and thin areas
- Automatic tensioners better than manual (less operator variance)
Quality check during knitting:
Visual inspection (every roll):
- No horizontal lines (indicates tension changes)
- No dropped stitches (holes in fabric)
- Even edges (no waving or curling)
Width consistency:
- Measure fabric width at beginning, middle, end of each roll
- Tolerance: ±2 cm across entire roll
- If variance >2 cm: Fabric width inconsistency affects marker efficiency (pattern layout)
GSM verification:
- Sample every 50-100 meters
- Weigh fabric (100 cm² sample)
- Variance tolerance: ±5% of target
Knitting defects that cause rejection:
Common defects:
- Holes: From needle breaks or dropped stitches
- Slubs: Thick spots from yarn irregularity
- Barre: Horizontal stripes from tension variation
- Oil spots: Machine lubrication contamination
Defect grading:
- Grade A: 0-2 defects per 100 meters (premium fabric)
- Grade B: 3-8 defects per 100 meters (acceptable for mid-tier)
- Grade C: >8 defects per 100 meters (budget only, high rejection risk)
Dyeing Process Consistency
Dye process variables affecting color:
1. Temperature:
- Reactive dyes (cotton): 60-80°C (higher = better fixation)
- Disperse dyes (polyester): 110-135°C under pressure
- Variance tolerance: ±3°C (beyond this, color shifts)
2. Time:
- Standard process: 4-6 hours (includes heating, holding, cooling)
- Short-cut process: 2.5-3.5 hours (mill saves energy but reduces color depth)
3. Dye concentration:
- Formula: X grams dye per kg fabric (precise recipe)
- Variance: Even ±0.5% changes visible color
4. pH level:
- Acidic vs alkaline affects dye absorption
- Optimal range: Depends on dye type (e.g., pH 6.5-7.5 for reactive dyes)
Lab dip approval process:
Step 1: Mill provides lab dip
- Small sample (~30 cm × 30 cm) dyed to match target color
- Buyer compares to Pantone swatch or physical reference
Step 2: Approval or revision
- If approved: Mill uses same formula for bulk
- If rejected: Mill adjusts formula, submits 2nd lab dip
Step 3: Bulk dye verification
- First batch dyed: Mill submits bulk header (sample from first production dye lot)
- Buyer verifies: Matches approved lab dip
Color tolerance standards:
Delta E (ΔE) color difference:
- ΔE <1.0: Imperceptible difference (only detectable by machine)
- ΔE 1.0-2.0: Minimal difference (premium standard)
- ΔE 2.0-3.5: Noticeable under direct comparison (acceptable for mid-tier)
- ΔE >3.5: Obvious difference (rejection)
Dye lot management:
Problem: Same dye formula on different dates produces slightly different colors
Causes:
- Water quality variation (mineral content affects dye absorption)
- Machine maintenance (clean vs dirty dyeing chamber)
- Ambient temperature (seasonal differences)
Solution:
- Dye sufficient fabric for entire order in one lot (avoid multiple dye runs)
- If multiple lots required: Mark rolls by dye lot number, separate during cutting
Order size requiring multiple lots:
- Single lot capacity: 1,500-3,000 meters typical
- Order >3,000 meters: Multiple lots necessary
- Risk: ΔE 1.5-2.5 variance between lots
Finishing Treatments and Quality Control
Finishing processes:
1. Heat setting (polyester):
- Purpose: Stabilize fabric, reduce shrinkage
- Temperature: 180-200°C for 30-60 seconds
- Effect: Locks in dimensions, improves dye fastness
2. Sanforizing (cotton/blends):
- Purpose: Pre-shrink fabric (mechanical compression)
- Shrinkage reduction: From 8-10% (untreated) to 2-3% (sanforized)
- Cost: +$0.15-0.30/yard
3. Anti-pilling treatment:
- Chemical method: Enzyme treatment removes loose fibers
- Mechanical method: Singeing (burn off surface fibers)
- Cost: +$0.20-0.50/yard
4. Moisture-wicking finish:
- Hydrophilic coating: Spreads moisture across fabric surface
- Durability: 30-50 washes (then gradually fades)
- Cost: +$0.30-0.80/yard
5. Softener (hand-feel enhancement):
- Silicon-based softener: Adds smooth, luxurious feel
- Risk: Over-application reduces moisture-wicking performance
- Application: Controlled in finishing bath
Finishing defects:
Uneven coating:
- Symptom: Fabric feels smooth on one end, rough on other end
- Cause: Improper bath concentration or fabric feeding speed
Shading (color variation):
- Symptom: Fabric darker at edges or center
- Cause: Uneven dye penetration or heat-setting
Crease marks:
- Symptom: Permanent fold lines from finishing rollers
- Cause: Excessive heat or pressure
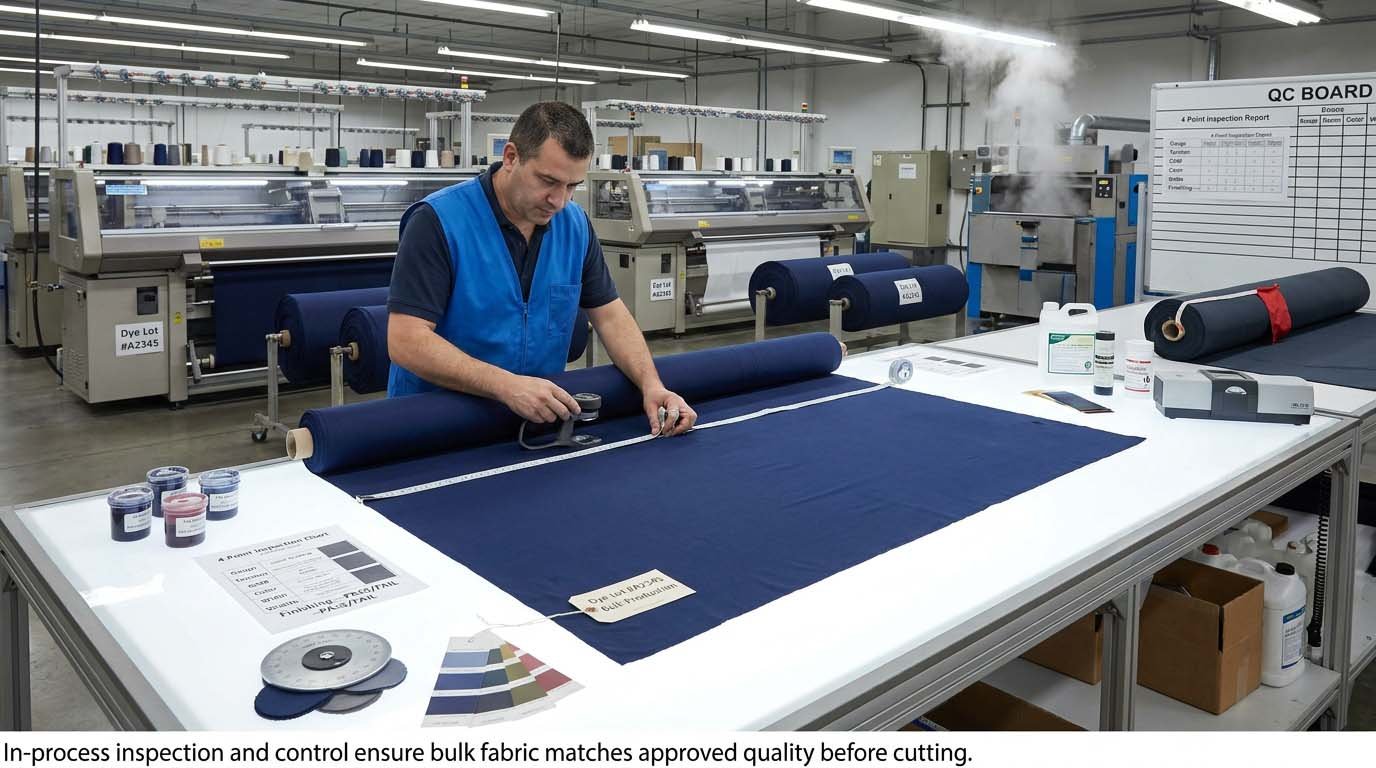
Fabric Inspection Before Acceptance
4-point inspection system:
Defect grading:
- 1 point: Defect ≤3 inches
- 2 points: Defect 3-6 inches
- 3 points: Defect 6-9 inches
- 4 points: Defect >9 inches
Acceptable score:
- Premium fabric: ≤20 points per 100 yards
- Standard fabric: ≤30 points per 100 yards
- Budget fabric: ≤40 points per 100 yards (higher risk)
Inspection process:
- Sample inspection: Check 10-20% of rolls
- If defects exceed standard: Inspect 100% of rolls
- Rejection: Entire lot returned if average score exceeds limit
Inspection catches:
- Holes, tears, oil spots
- Dye defects (uneven color, spots)
- Width variance (pattern layout issues)
Factory responsibility:
- Inspect fabric before cutting authorization
- Segregate defective areas (mark and avoid during cutting)
- Claim compensation from mill if defects excessive
I have seen: Factories skip fabric inspection (time pressure), cut defective fabric, then 5-10% of garments have visible holes or spots at final inspection. Rework impossible (cannot fix holes), garments scrapped. $5,000-8,000 loss on 1,000-unit order. Prevention: $200-400 inspection cost.
Cutting, Decoration & Sewing: Markers, Embroidery/Print and Assembly
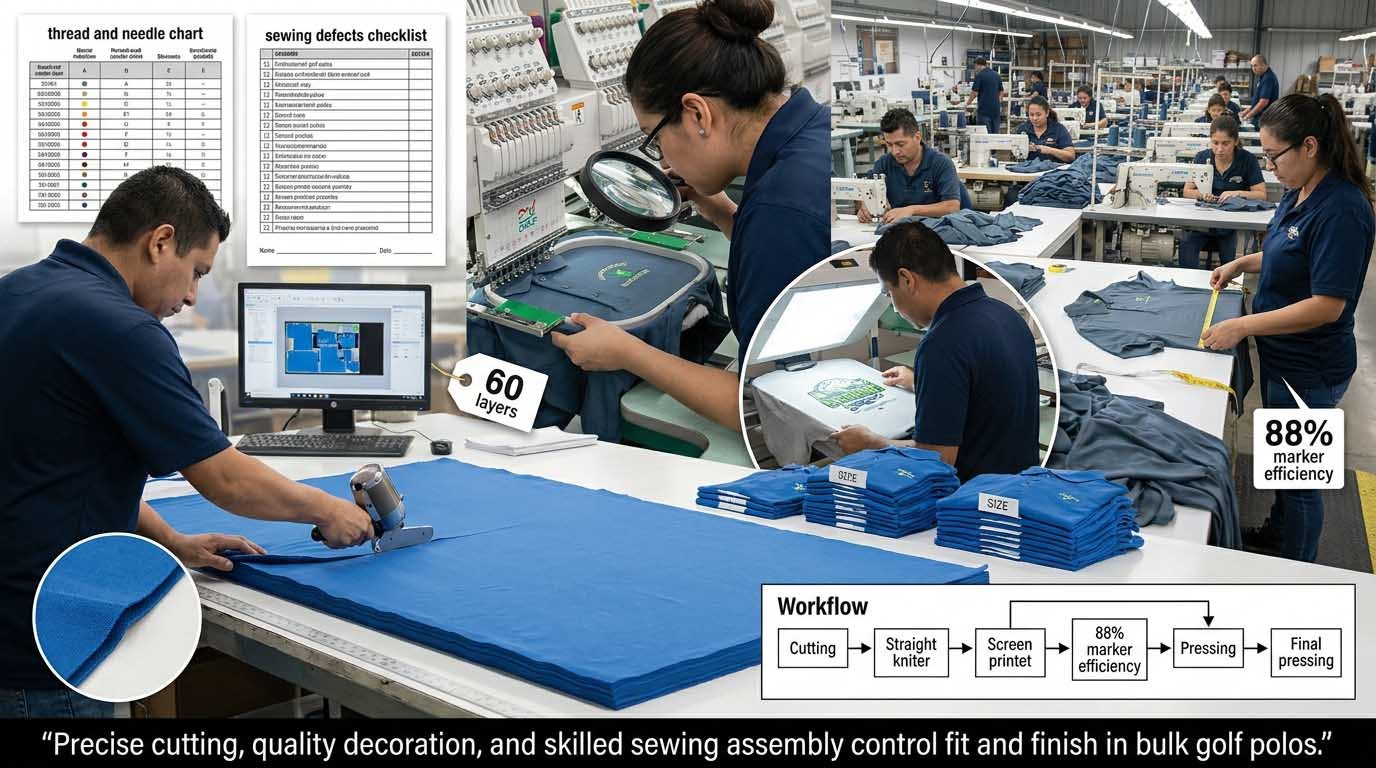
Cutting room accuracy determines fit consistency across bulk production through marker efficiency balancing fabric utilization against layer-count limitations, spreading tension control preventing stretch-induced size variance, and cutting blade maintenance ensuring clean edges without fraying—where factories optimize fabric yield by spreading maximum layers or tight pattern nesting but sacrifice dimensional accuracy when compression distorts bottom layers or blade dullness creates jagged seam allowances affecting sewing precision and final garment measurements beyond tech pack tolerance.
Marker Making and Fabric Efficiency
Marker (pattern layout) objectives:
Fabric utilization target:
- Premium marker: 85-90% (minimal waste, tight nesting)
- Standard marker: 80-85% (balance efficiency and cutting accuracy)
- Safety marker: 75-80% (extra space, easier cutting, less waste)
Trade-off:
- Higher efficiency = less fabric waste = lower cost
- But: Tighter nesting = harder to cut accurately, especially at high layer count
Example:
- 88% efficiency marker: Pattern pieces 1-2 cm apart
- Cutting 80 layers: Risk of cutting into adjacent piece (operator error)
- Result: 3-5% fabric waste from cutting errors (negates efficiency gain)
Marker considerations:
Grain line respect:
- Body pieces: Must follow fabric grain (lengthwise direction)
- Off-grain cutting: Fabric twists, garment hangs asymmetrically
- Sleeve/small pieces: Some bias cutting acceptable (allows tighter nesting)
Pattern matching:
- Stripe or pattern fabric: Requires matching at seams
- Efficiency loss: 10-20% (large gaps between pieces for alignment)
Size ratio:
- Marker includes: Multiple sizes (e.g., S:M:L:XL = 1:2:2:1 ratio)
- Efficiency: Mixing sizes uses fabric better than single-size marker
Fabric Spreading and Layer Control
Spreading process:
Manual spreading:
- Operator pulls fabric across cutting table
- Speed: 30-50 meters per minute
- Risk: Fabric tension varies (operator pulls harder as tires)
Automatic spreading:
- Machine spreads fabric at consistent tension
- Speed: 40-60 meters per minute
- Advantage: Uniform tension, better for stripes/patterns
Layer count limits:
Cutting accuracy by layer count:
- 1-30 layers: Excellent accuracy (±2 mm)
- 30-60 layers: Good accuracy (±5 mm)
- 60-80 layers: Acceptable accuracy (±10 mm = 1 cm)
- >80 layers: Poor accuracy (>15 mm, bottom layers distorted)
Compression effects:
- 80 layers of 180 GSM fabric: ~15 cm compressed stack height
- Weight: 40-50 kg pressing on bottom layers
- Compression: Bottom layers can compress 5-8% (dimensional distortion)
Solution:
- Limit layers to 50-60 for dimensional-critical pieces (body, sleeves)
- Small pieces (collar, cuffs): Can cut 70-80 layers (less critical)
Fabric relaxation before spreading:
- Purpose: Let fabric release tension from roll (fabric "relaxes" in flat position)
- Duration: 24-48 hours laid flat
- Effect: Reduces shrinkage variance across fabric width
Cutting Methods and Precision
Cutting equipment:
Straight knife cutter (manual):
- Operator guides knife through layers
- Accuracy: Depends on operator skill
- Best for: Low-volume or complex curves
Band knife cutter (semi-automatic):
- Continuous loop blade (like band saw)
- Accuracy: ±2-5 mm (operator follows marker line)
- Best for: Medium volume, moderate curves
CNC cutting machine (automatic):
- Computer-controlled blade follows digital marker
- Accuracy: ±1 mm (no operator variance)
- Speed: 2-3x faster than manual
- Cost: $80,000-200,000 (only premium factories have this)
Blade maintenance:
Sharp blade:
- Clean cut edges (no fraying)
- Accurate dimensions (blade follows marker precisely)
- Sewing easier (smooth edges feed through machine better)
Dull blade:
- Frayed edges (loose threads)
- Dimensional errors (blade "wanders" from marker line, ±5-10 mm)
- Sewing problems: Puckering, thread breaks (rough edges catch)
Blade sharpening frequency:
- Every 500-1,000 layers for manual cutting
- Every 1,500-2,000 layers for CNC cutting
Cost of dull blade:
- Cutting accuracy: ±10-15 mm error (size variance)
- Sewing efficiency: 15-20% slower (operators struggle with frayed edges)
- Defect rate: +5-8% (seam puckering, uneven hems)
Embroidery and Printing Decoration
Embroidery quality control:
Design digitization:
- Stitch density: 3-4 stitches per mm (too dense = fabric puckers)
- Underlay stitching: Base layer stabilizes fabric (prevents puckering)
Fabric stabilizer:
- Cut-away stabilizer: Permanent backing (best for jersey, stretch fabrics)
- Tear-away stabilizer: Removed after embroidery (for stable piqué)
- Cost: $0.10-0.30 per unit
Machine setup:
- Tension: Adjust for fabric weight (lighter = less tension)
- Needle type: Sharp point (woven) vs ball point (knits)
- Speed: 800-1,000 stitches per minute (too fast = thread breaks)
Common embroidery defects:
Puckering:
- Cause: Fabric pulled by tight stitches (incorrect tension or no stabilizer)
- Prevention: Proper stabilizer + reduce stitch density
Thread breaks:
- Cause: Dull needle, wrong tension, or thread quality issue
- Result: Incomplete design, must re-embroider (time loss)
Registration errors:
- Cause: Fabric shifts during embroidery (hooping too loose)
- Result: Design off-center (±5-10 mm)
Quality check:
- Inspect first 5-10 pieces (catch setup errors)
- Random checks every 50 pieces during bulk
Screen printing quality:
Print setup:
- Ink type: Plastisol (durable, sits on surface) vs Water-based (softer, absorbs into fabric)
- Mesh count: 110-230 threads per inch (higher = finer detail)
- Cure temperature: 160-180°C for 30-60 seconds (ink fully dries)
Common print defects:
Cracking:
- Cause: Too much ink (thick layer) or under-cured (not fully dried)
- Prevention: Thin ink layer + proper cure temperature
Color mismatch:
- Cause: Ink color shifts between batches or under-mixed
- Prevention: Mix sufficient ink for entire order, use Pantone-matched ink
Smudging:
- Cause: Ink not fully cured before garment folded
- Prevention: Allow 24-hour cure time before packing
Sewing Assembly Process
Sewing line organization:
Assembly sequence (typical golf polo):
- Shoulder seam: Join front and back body
- Collar assembly: Interface, fold, stitch collar band
- Collar attachment: Attach collar to neckline
- Sleeve attachment: Set sleeves into armholes
- Side seam: Close body sides
- Cuff attachment: Attach ribbed cuffs to sleeves
- Hem: Bottom hem (coverstitch)
- Placket/buttonhole: Stitch placket, make buttonholes
- Button attachment: Sew buttons
- Thread trimming: Remove excess threads
- Final pressing: Press entire garment
Production line types:
Straight line (progressive bundle):
- One operator per operation (e.g., Operator 1 does shoulders, Operator 2 does collar)
- Advantage: Specialization (operators become very fast at one task)
- Disadvantage: Bottleneck risk (if one operator slow, entire line delays)
Modular line:
- Team of 5-8 operators handle complete garment (all operations)
- Advantage: Flexibility, less bottleneck risk
- Disadvantage: Slower per-unit speed (operators do multiple tasks)
Line efficiency:
- Target: 85-95% (operators productive 85-95% of work time)
- Below 80%: Line imbalance (some operators waiting, others overloaded)
Quality control during sewing:
In-line QC (roving inspector):
- QC walks line, checks random pieces after each operation
- Frequency: Every 20-30 pieces per operation
- Catches: Seam misalignment, skipped stitches, puckering
End-of-line QC:
- 100% check of finished garments before pressing
- Criteria: Measurements, construction quality, thread trimming
- Defect rate target: <5% at end-of-line (caught before final inspection)
Common sewing defects:
Seam puckering:
- Cause: Fabric stretched during sewing, thread tension too tight, or wrong needle
- Prevention: Use stretch needle (SES) for jerseys, adjust tension
Skipped stitches:
- Cause: Dull needle, wrong needle type, or fabric feeding too fast
- Result: Weak seam (will separate under stress)
Uneven stitching:
- Cause: Operator inconsistency or machine vibration (poor maintenance)
- Result: Visible stitch wobble, unprofessional appearance
Needle and thread selection:
Needle type by fabric:
- Woven fabrics: Sharp point needle (SPI)
- Knit fabrics (jersey/piqué): Ball point needle (SES)
- Heavy fabrics: Size 100-110 (thicker needle)
- Lightweight fabrics: Size 70-80 (thinner needle)
Thread type:
- Polyester core-spun: 40s/2 (standard strength)
- 100% polyester: 40s/3 (higher strength, for stress points)
Wrong needle/thread combination:
- Sharp needle on jersey: Damages fabric (creates runs/holes)
- Weak thread: Breaks during sewing (production stops)
I have observed: 60-70% of sewing defects trace to incorrect needle or thread selection—not operator error. Factories using one needle type for all fabrics (cost-saving) create avoidable defects. Proper needle selection costs $0.02 per garment but prevents 3-5% defect rate worth $150-250 loss per 1,000 units.
Final Inspection, Finishing & Logistics: AQL, Pressing, Packing and Ship
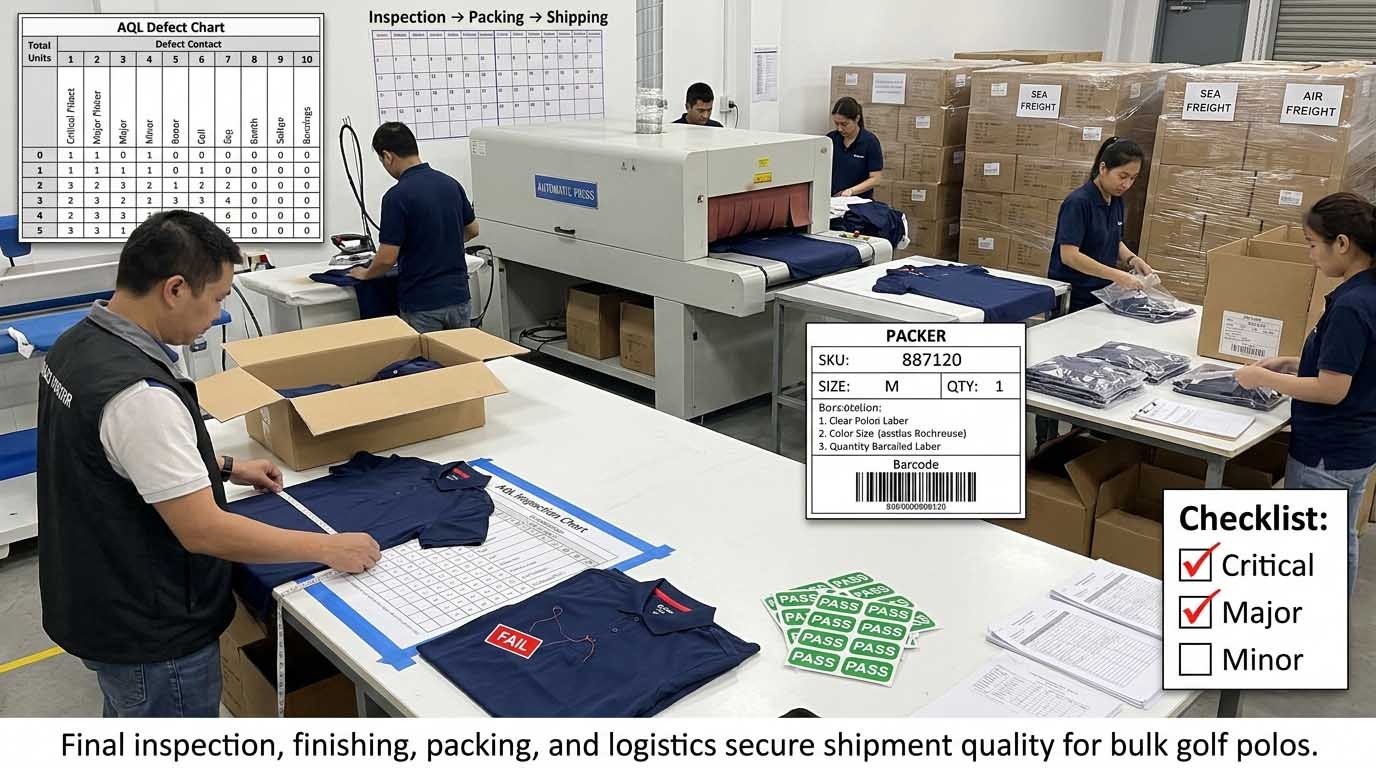
Final inspection determines shipment acceptance through AQL sampling plans defining critical, major and minor defect classifications—where buyers assume "good quality" means zero defects but statistical sampling allows calculated defect rates matching retail positioning and price point, making AQL level selection a strategic decision where stricter standards increase rejection risk and re-work costs while looser standards enable faster production but higher customer return rates, requiring buyers to align inspection criteria with brand quality expectations rather than copying competitors' AQL levels without understanding cost implications.
AQL Inspection Standards
AQL (Acceptable Quality Limit) explained:
AQL levels and defect allowances:
| AQL Level | Critical Defects | Major Defects | Minor Defects | Typical Use |
|---|---|---|---|---|
| AQL 0 | 0% | 0% | 0% | Medical, safety products |
| AQL 1.0 | 0% | 1.0% | 2.5% | Ultra-premium ($120+ retail) |
| AQL 1.5 | 0% | 1.5% | 4.0% | Premium ($80-120 retail) |
| AQL 2.5 | 0% | 2.5% | 6.5% | Mid-tier ($50-80 retail) |
| AQL 4.0 | 0% | 4.0% | 10.0% | Budget ($30-50 retail) |
Defect classifications:
Critical defects (0% allowance, always rejected):
- Safety hazards: Sharp objects, broken needles embedded
- Non-functional: Missing buttons, holes, separated seams
- Un-sellable: Wrong size label, severe stains, completely wrong color
Major defects (affect usability/appearance):
- Measurement failure: Outside tolerance (e.g., chest 98 cm vs spec 104 cm)
- Visible construction flaws: Collar twisting, sleeve puckering, uneven hem
- Color mismatch: ΔE >3.5 from approved sample
- Severe pilling/snagging: Visible from 1 meter distance
Minor defects (cosmetic, do not affect function):
- Loose threads: Not trimmed completely
- Slight puckering: Visible close-up but not from distance
- Small stains: <1 cm, removable by customer
- Uneven stitching: Slight wobble but seam intact
Sampling plan:
Inspection sample size (per AQL 2.5):
| Order Quantity | Sample Size | Accept if ≤ Major Defects | Reject if ≥ Major Defects |
|---|---|---|---|
| 150-280 units | 32 pieces | 3 | 4 |
| 281-500 units | 50 pieces | 5 | 6 |
| 501-1,200 units | 80 pieces | 7 | 8 |
| 1,201-3,200 units | 125 pieces | 10 | 11 |
| 3,201-10,000 units | 200 pieces | 14 | 15 |
Example:
- Order: 1,000 units
- AQL: 2.5
- Sample: 80 pieces inspected
- Result: 7 major defects found = Pass (≤7 allowed)
- Result: 9 major defects found = Fail (≥8 triggers rejection)
Inspection process:
Random sampling:
- Inspector randomly selects pieces from different cartons (not all from one box)
- Ensures sample represents entire order
Inspection points (typical golf polo):
- Measurements: 8-12 points checked per garment
- Construction: Seams, collar, cuffs, hem inspected
- Appearance: Color, cleanliness, pressing quality
- Functionality: Buttons secure, buttonholes clean, no holes
Inspection time:
- 80-piece sample: 2-4 hours (depends on complexity)
- Full 1,000-unit order: 1-2 days (including measurements, paperwork)
Finishing Process
Thread trimming:
Manual trimming:
- Operator cuts excess threads with scissors
- Time: 30-60 seconds per garment
- Risk: Missed threads (5-10% miss rate typical)
Automatic thread trimmer:
- Machine vacuums and cuts loose threads
- Time: 10-15 seconds per garment
- Better consistency but misses threads in pockets, hidden seams
Final pressing:
Purpose:
- Remove wrinkles from sewing
- Set shape (collar stand, placket flatness)
- Professional appearance (ready for retail)
Pressing methods:
Steam press (manual):
- Operator uses steam iron + pressing board
- Temperature: 130-160°C (depends on fabric)
- Pressure: Applied by operator hand
- Time: 60-90 seconds per garment
- Advantage: Operator can adjust for each garment (custom attention)
- Disadvantage: Inconsistent (operator fatigue, pressure variance)
Automatic tunnel press:
- Garment passes through heated tunnel on conveyor
- Temperature: 140-160°C, controlled automatically
- Time: 30-45 seconds per garment
- Advantage: Uniform temperature, faster
- Disadvantage: Less flexibility (one setting for all)
Pressing quality issues:
Shine marks:
- Cause: Press too hot or held too long (melts fabric surface)
- Result: Shiny spots on fabric (permanent damage)
- Prevention: Correct temperature + use pressing cloth (barrier between iron and fabric)
Collar flattening:
- Cause: Excessive pressure on collar (crushes interfacing)
- Result: Collar loses stand (looks limp)
- Prevention: Light pressure on collar area, or hand-press collar separately
Incomplete wrinkle removal:
- Cause: Press too fast or insufficient steam
- Result: Wrinkles remain (unprofessional appearance)
Packing and Logistics
Packing methods:
Individual polybag:
- Standard packing (each polo in plastic bag)
- Cost: $0.03-0.08 per bag
- Protection: Dust, moisture during shipping
Polybag + hanger:
- Retail-ready (hang directly in store)
- Cost: +$0.15-0.25 per unit
- Advantage: No unpacking labor for retailer
Individual box:
- Premium presentation (e-commerce, gift market)
- Cost: +$0.30-0.60 per unit
- Advantage: Better protection, brand presentation
Carton packing:
Assortment packing:
- Mixed sizes in each carton (e.g., 2S, 4M, 4L, 2XL per carton)
- Advantage: Retailer can open one carton and stock multiple sizes
- Disadvantage: More complex (each carton must be packed precisely)
Solid packing:
- One size per carton (e.g., all Medium in one box)
- Advantage: Simple, fast packing
- Disadvantage: Retailer must open multiple cartons to stock
Carton labeling:
- SKU, size, quantity, color clearly marked
- Barcode for warehouse scanning
- "Fragile" or "This Side Up" if applicable
Shipping documentation:
Commercial invoice:
- Item description, quantity, unit price, total value
- Used for customs clearance
Packing list:
- Detailed breakdown: Carton number, contents, measurements, weight
Certificate of origin:
- Country of manufacture (affects import duties)
Quality inspection report:
- AQL inspection results (pass/fail, defect summary)
Timeline from final inspection to ship:
Day 1: Inspection + approval
- Inspection: 1-2 days
- Buyer approval: Same day (if no issues) or +1-3 days (if re-work needed)
Day 2-3: Finishing + packing
- Thread trimming: 0.5 day
- Pressing: 1 day
- Packing: 0.5-1 day
Day 4-5: Documentation + loading
- Prepare documents: 0.5 day
- Load container: 0.5 day
Total: 4-7 days from inspection to container departure
Shipping methods:
Sea freight (most common for bulk):
- Lead time: 20-35 days (Asia to US), 15-25 days (Asia to Europe)
- Cost: $2-4 per unit (depends on volume, destination)
- Best for: Orders >500 units (cost-effective)
Air freight (rush orders):
- Lead time: 5-7 days door-to-door
- Cost: $8-15 per unit (2-4x more expensive than sea)
- Best for: Small urgent orders (<200 units), seasonal rush
I emphasize: Final inspection is the last gate before shipment. 80% of rejected orders fail due to unclear AQL standards or buyer not specifying inspection criteria before production. Defining defect classifications in tech pack prevents disputes at inspection stage.
FAQ: Golf Polo Production Process
What happens if bulk fabric fails color or shrinkage test after arrival?
Minor issues (ΔE 2.0-3.5 or shrinkage 5-7%):
- Accept with 5-15% discount (no delay) OR re-dye (+7-14 days, $0.80-1.50/yard)
Major issues (ΔE >3.5 or shrinkage >7%):
- Reject and re-order: +15-25 days delay (fabric supplier bears cost)
- Source alternative fabric: +10-18 days (color match risk)
- Cancel order: Buyer may lose 10-30% deposit
Real example:
- 2,000-unit order needed in 45 days
- Fabric tested at 8.5% shrinkage (spec <5%)
- Mill re-processed fabric (+12 days)
- Final delivery: 57 days (client accepted delay)
Prevention: Pre-approve fabric before bulk knitting, build 10-14 day buffer in timeline. 30-40% of delays come from skipping pre-production fabric testing.
Can I change specifications after sample approval but before bulk production?
Impact depends on timing and change type:
Minor changes (labels, packing, small color tweaks):
- Cost: $0-50
- Timeline: 0-2 days
Moderate changes (buttons, embroidery position, ±1 cm sizing):
- Cost: $100-500
- Timeline: +3-7 days (re-make PP sample)
Major changes (fabric type, fit, construction method):
- Cost: $1,000-3,000+ (new materials, patterns)
- Timeline: +10-21 days (restart pre-production)
Critical cutoff points:
- Before fabric ordered: Any changes acceptable
- After cutting starts: Nearly impossible without 50-100% cost penalty
I advise: Finalize specs before PP approval. Buyers making ongoing tweaks face 15-30% cost overruns and 2-3 week delays.
How do I verify a factory actually has quality control processes?
During factory visit, check:
QC structure:
- Ask: QC inspector ratio (1 per 15-20 operators = good)
- Ask: Inspection checkpoints (fabric + in-line + end-line + final = good)
Physical evidence:
- Fabric area: 4-point inspection table with light box, defect logs
- Sewing floor: QC inspectors walking lines, red-tag system for defects
- Final inspection: Dedicated area with measurement tools, defect chart posted
Documentation check:
- Daily inspection reports (defect rates by line/operation)
- Fabric test reports (shrinkage, colorfastness)
- Realistic defect rates: 5-12% end-of-line, 2-5% final (honest answer)
On-site test:
- Randomly pull 10 pieces from current production
- Measure yourself (chest, length, sleeve)
- Compare to spec—if measurements fail, internal QC is ineffective
Red flags:
- No written records or 0% defect claims (unrealistic)
- "Final inspection only" (no prevention)
- Won't show rework area (hiding problems)
I recommend: Visit unannounced during production. Real QC is visible daily—not just during audits.
What is the main difference between a $7 polo and $12 polo from a factory?
Cost breakdown comparison:
| Component | $7 Polo (Budget) | $12 Polo (Mid-Tier) |
|---|---|---|
| Fabric | $2.20 (staple yarn, no treatment) | $4.50 (combed + anti-pill + wicking) |
| Trims | $0.50 (basic) | $0.90 (quality buttons, woven label) |
| Labor/QC | $1.80 (10-12 SPI, final QC only) | $2.60 (12-14 SPI, multi-stage QC) |
| Testing | $0 (skipped) | $0.30 (shrinkage + colorfastness) |
| Overhead | $1.00 | $1.40 |
| Profit | $1.50 | $2.30 |
| Total | $7.00 | $12.00 |
Performance difference:
| Factor | $7 Polo | $12 Polo |
|---|---|---|
| Durability | Pills after 20-30 washes | Pills after 60-90 washes |
| Defect rate | 5-10% | 2-4% |
| Size consistency | ±2-3 cm variance | ±1 cm tolerance |
Where the $5 goes:
- +$2.30: Better yarn + treatments
- +$0.80: More QC + skilled labor
- +$0.30: Pre-production testing
- +$1.60: Overhead + profit
I have seen: Buyers choose $7 option, then face 8-12% rejection at inspection. Rework costs $2-3/unit, making effective cost $7.16-7.24 (same as mid-tier) plus 2-week delay. Real question: Can factory deliver $7 quality without 10% rejection? Most cannot.
Conclusion
Golf polo production quality depends on identifying control points where consistency breaks—pre-production fabric testing, cutting layer limits, needle-thread matching and AQL standards—rather than trusting all factories follow identical processes. Buyers who verify shrinkage tests before cutting, limit fabric spread to 50-60 layers, specify stitch types per seam and define defect classifications before inspection reduce rejection risk from 8-15% to 2-4%, avoiding rework costs and delays worth 3-5x the prevention investment.