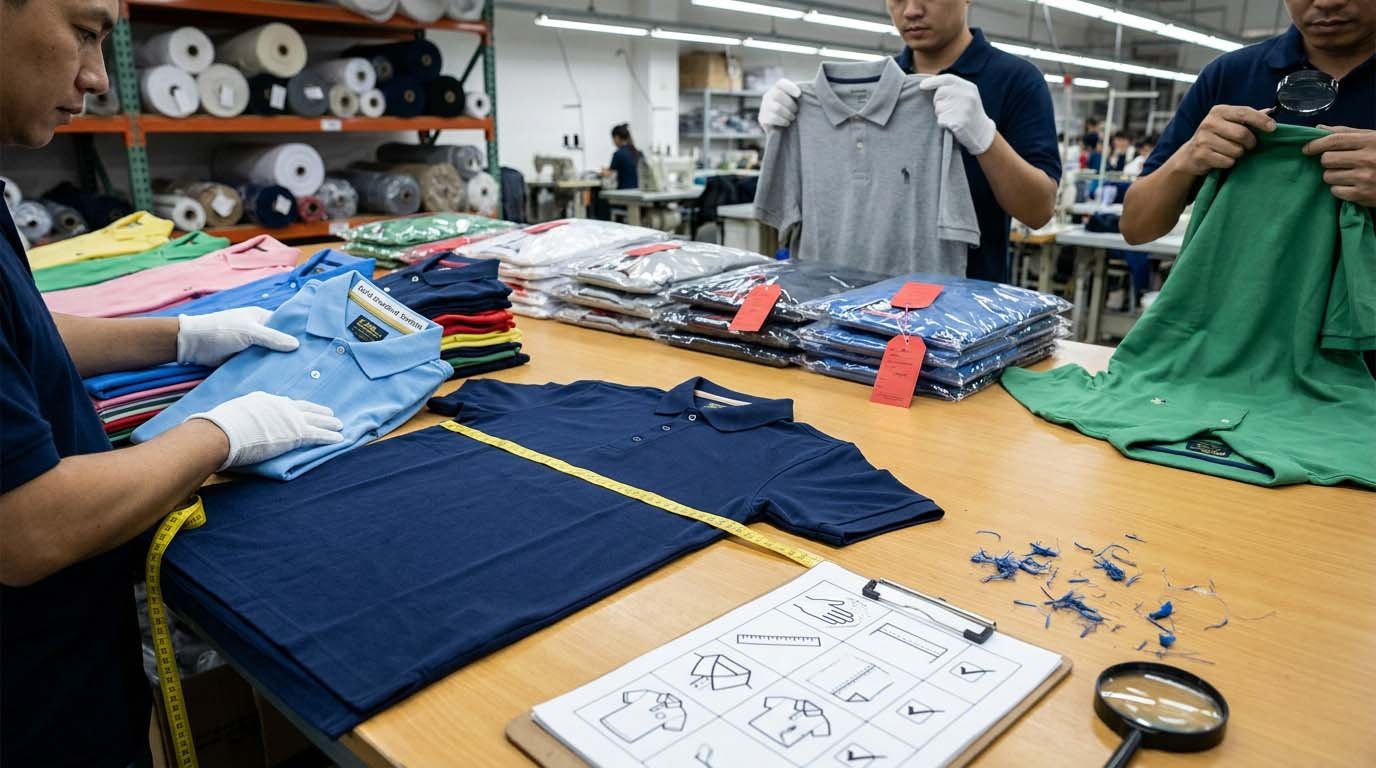

I have watched too many buyers approve beautiful samples, then receive bulk orders filled with defects. Last month, a client discovered uneven stitching in 300 pieces only after shipment. This guide shows you what to check before you approve.
Check fabric hand feel consistency across different dye lots, measure five critical body dimensions with ±2cm tolerance, inspect hidden seam stress points at underarms, verify collar symmetry by folding the polo in half, and always compare bulk pieces directly against your approved sample.
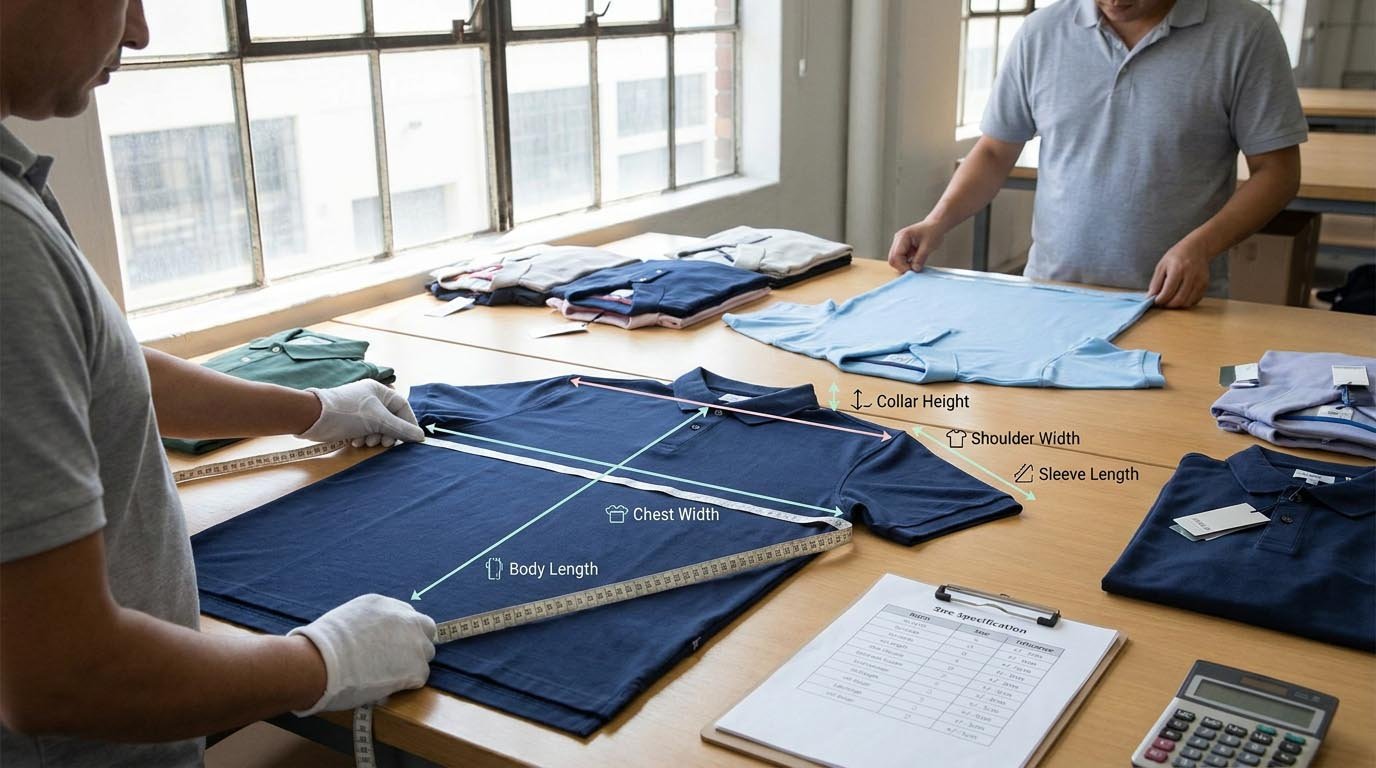
The gap between sample approval and bulk production is where most quality problems hide. Our three-stage inspection process at FUWAY catches defects that quick visual checks miss. I designed this system after seeing patterns emerge: factories deliver perfect samples using skilled workers, then switch to faster production methods for bulk orders. The difference shows up in places buyers rarely look—seam density, fabric consistency, measurement symmetry. This guide walks you through the exact checkpoints we use before any shipment leaves our facility.
Quick Answers: 5 Essential Quality Checks You Can Do in 60 Seconds
1. The Fold Test for Collar Symmetry
Fold the polo vertically down the center and lay it flat. The collar points should align perfectly. Mismatched collar tips indicate rushed cutting or poor pattern marking—a defect that looks unprofessional on retail hangers.
2. The Stretch-and-Release Test
Pull the fabric at chest area with both hands, stretching about 10-15cm, then release. Quality knit fabric snaps back to original shape within 2 seconds. Slow recovery or permanent distortion signals low-grade yarn or loose knitting tension.
3. The Underarm Seam Check
Turn the polo inside out and examine the underarm seams under natural light. Count the stitches in a 3cm section—we maintain 12-14 stitches for durability. Lower density means the seam will split under normal wear stress.
4. The Dye Lot Comparison
Lay three random pieces from different cartons side by side under daylight. The color should match perfectly. Even slight shade variation between pieces indicates mixed dye lots—a sign of poor inventory control that will cause returns.
5. The Sample-to-Bulk Swap
Place your approved sample next to a random bulk piece. Compare fabric thickness by pinching both between thumb and finger. Check if the bulk piece feels lighter or thinner. Weight difference you can feel by hand usually means 15-20 GSM lower—a material downgrade.
What to Inspect First: Fabric Handfeel, Knit Quality and Shade Consistency?

Start with fabric consistency before checking any construction details. The three fabric checkpoints—hand feel, knit tightness, and color matching—reveal whether the factory maintained your approved material standard across the entire production run.
I learned this priority the hard way. Three years ago, we approved a shipment where all stitching looked perfect, but the fabric felt different from the sample. The buyer rejected 2,000 pieces because retail customers could feel the quality difference just by touching the garments. Since then, fabric consistency became our first checkpoint.
Check Fabric Hand Feel Across Multiple Pieces
Pull 10-15 random pieces from different cartons and touch them one by one. The fabric should feel identical in thickness, softness, and weight. Here is what inconsistency feels like:
- Rough patches on some pieces but not others suggest mixed yarn lots
- Slippery feeling on certain garments indicates excessive softener to mask lower fiber quality
- Stiff areas that differ from the sample mean the factory changed the fabric treatment process
We recommend the pinch test: squeeze the fabric between thumb and index finger on your sample, memorize that thickness, then repeat on bulk pieces. Your fingers can detect 10-15 GSM differences—enough to signal a material switch.
Inspect Knit Structure Under Direct Light
Hold the polo up to a bright light source or window. Look through the fabric. Quality knit fabric shows:
| Quality Indicator | What You See | Red Flag |
|---|---|---|
| Knit Density | Uniform small holes, consistent spacing | Large gaps, irregular hole sizes |
| Yarn Consistency | Even thickness throughout | Thick-thin variations create streaks |
| Fabric Integrity | No thin spots or weak areas | Light passes through certain zones more easily |
The light test reveals problems that touch alone misses. I have seen factories use lower yarn count in bulk production—the difference is invisible in normal lighting but obvious when backlit. If more than 5% of pieces show knit irregularities under light inspection, stop and request fabric batch verification.
Verify Shade Consistency Across Dye Lots
This is where most factories fail. Even premium suppliers struggle with perfect dye lot matching. Our inspection protocol:
- Select pieces randomly from at least 5 different cartons
- Lay them flat on a table under natural daylight (fluorescent lights hide shade differences)
- Stand 2 meters back and scan the row—your eyes detect color breaks better from distance
- Pay special attention to white and light colors—they show dye lot variation most clearly
Acceptable shade variation falls within Grade 4 on the Grey Scale (a tool buyers can request from suppliers). In practical terms, if you can spot the color difference from normal viewing distance, the batch fails. We reject any shipment where more than 2% of pieces show visible shade mismatches.
I remember a navy blue polo order where the factory mixed three dye lots. The buyer approved one piece during inspection but received customer returns because retail customers picked polos from the same display rack that clearly did not match. The cost of that mistake: $4,800 in chargebacks plus damaged brand reputation.
Fit & Measurements: How to Measure Polos and Set Realistic Tolerances?
Establish measurement points that match your size spec sheet, check five critical dimensions on at least 10 random pieces, and accept ±2cm tolerance for body measurements—tighter tolerances sound professional but create unnecessary rejections for normal production variance.
Most buyers measure only one or two pieces and assume the rest match. This approach misses the real quality indicator: measurement consistency across the production run. Last year, we caught a batch where chest width varied by 5cm between smallest and largest pieces in the same size category. Individual measurements looked acceptable, but the range revealed poor pattern cutting.
The Five Critical Measurement Points
Lay the polo flat on a table, smooth out wrinkles, and measure these dimensions:
1. Chest Width (Armpit to Armpit)
Measure straight across from one armpit seam to the other, 2.5cm below the armhole. This is your most critical dimension—customers notice fit problems here first.
2. Body Length (High Point Shoulder to Hem)
Measure from the shoulder seam at the neckline straight down to the bottom hem. Keep the tape measure parallel to the center front placket.
3. Shoulder Width (Seam to Seam)
Measure across the back from one shoulder seam endpoint to the other. This dimension affects how the polo sits on the wearer—too wide looks sloppy, too narrow restricts movement.
4. Sleeve Length (Shoulder Seam to Cuff)
Measure from the shoulder seam down the center of the sleeve to the cuff edge. Many factories cut sleeves shorter to save fabric—a 2cm shortage is noticeable when worn.
5. Collar Height (Fold Line to Top Edge)
Stand the collar upright and measure from the fold line to the top edge. Collar height affects the polo's formal appearance—we maintain 7cm for golf polos.
Set Realistic Tolerances Based on Production Reality
Here is the tolerance table we use for our production:
| Measurement Point | Standard Tolerance | Tight Tolerance (Premium) |
|---|---|---|
| Chest Width | ±2cm | ±1.5cm |
| Body Length | ±2cm | ±1.5cm |
| Shoulder Width | ±1.5cm | ±1cm |
| Sleeve Length | ±1.5cm | ±1cm |
| Collar Height | ±0.5cm | ±0.3cm |
Buyers who demand ±1cm tolerance across all measurements often face production delays and higher rejection rates without meaningful quality improvement. The human body varies more than 1cm between individuals in the same size category. Focus tighter tolerances on customer-visible dimensions like collar and sleeve length.
Check Left-Right Symmetry—The Hidden Defect
This check catches pattern cutting problems most buyers miss. Fold the polo vertically down the center and compare:
- Both sleeves should measure exactly the same length
- Both armhole curves should align when folded
- The hem should be perfectly even on both sides
Asymmetry reveals rushed cutting or poorly maintained cutting equipment. We found that 15-20% of factory defects involve left-right mismatches that quick measurements miss. A polo that measures correctly overall but has uneven sides looks cheap on the hanger and fits poorly when worn.
I measure 10 pieces minimum and calculate the range. If the chest width range exceeds 3cm in a single size run, the factory lost pattern control during cutting. Request the factory to re-measure and separate pieces into tight-tolerance and loose-tolerance groups—you can decide whether to accept the loose group at a discount.
Workmanship & Trims: Collars, Plackets, Seams, Buttons and Side Vents?
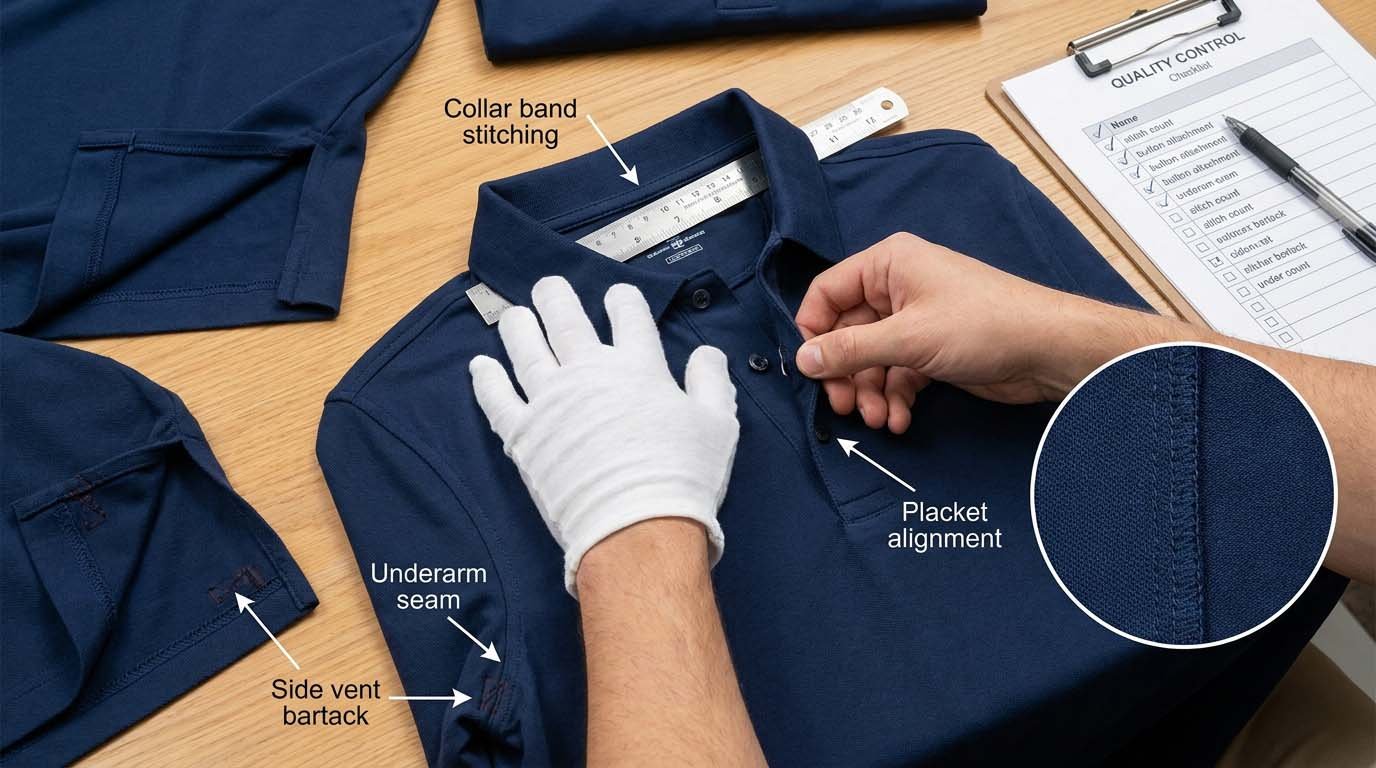
Inspect construction details where stress concentrates during wear—collar points, placket stitching, underarm seams, and side vents—because these zones show the true skill level of the sewing team and predict garment durability in customer hands.
Beautiful front-view stitching means nothing if the collar curls after one wash or the side vent rips open. I designed our inspection sequence to focus on stress points because that is where factories cut corners under production pressure. A perfectly straight decorative stitch takes 30 seconds. A reinforced underarm seam takes 90 seconds. Guess which one gets skipped when the factory runs behind schedule?
Collar Construction—The Visual Quality Indicator
The collar is the first thing customers see. Turn the polo inside out and check:
Collar Band Stitching
The stitching that attaches collar band to the body should show consistent stitch density—we maintain 14 stitches per 3cm. Uneven spacing indicates the operator rushed this seam. Check if the stitching line follows the collar curve smoothly or shows jagged sections where the operator corrected mistakes.
Collar Point Symmetry
Lay the polo flat and fold it vertically. The collar points should align within 2mm. Mismatched points look unprofessional and signal poor pattern marking. I have seen factories where collar points vary by 1cm between pieces—a defect visible from 3 meters away on a retail display.
Interfacing Bubble Check
Press your thumb firmly against the collar at multiple points and release. The collar should return to flat shape immediately. Bubbling or wrinkling suggests the interfacing was not fused properly—a defect that worsens after washing.
Placket and Button Attachment
The center front placket takes constant stress when customers put on and remove the polo. Check these points:
- Button stitching density: We attach each button with 20-25 stitches minimum. Count the stitches on the back side—fewer stitches mean buttons will pop off during customer use
- Buttonhole bartack: The reinforcement bar at both ends of the buttonhole should be dense and tight. Loose bartacks allow the buttonhole to fray and tear
- Placket alignment: Place the polo on a flat surface and button it completely. The placket should lie perfectly flat without pulling or gaping. Gaps between buttons indicate the buttonhole placement is off
I recommend the stress test: button the polo and pull the fabric apart at each button with moderate force. The button should hold without the stitching stretching. If any button attachment feels loose during this test, the entire batch likely has weak button stitching.
Seam Inspection Under Stress
Turn the polo inside out and check every seam. Focus on high-stress areas:
Underarm Seams
This is where polos fail first during customer use. Stretch the underarm seam gently with both hands—the stitching should hold without thread breaks or needle holes widening. Count stitches in a 3cm section:
- 12-14 stitches: Acceptable for most markets
- 10-11 stitches: Marginal—request reinforcement
- Below 10 stitches: Reject—will not survive normal wear
Shoulder Seams
Check if the shoulder seam is reinforced with tape or double-stitching. Golf polos need this reinforcement because golfers stress shoulder seams during their swing. A single-stitch shoulder seam will stretch and deform within 10-15 wears.
Side Seams and Hem
Run your finger along the entire side seam from armhole to hem. Feel for:
- Puckering or gathered fabric that indicates tension problems
- Skipped stitches where the thread missed the fabric
- Uneven seam allowance that shows up as thick-thin variations
Button Quality and Side Vent Construction
Buttons seem like a small detail but they signal overall attention to quality. We check:
| Button Defect | Impact | Check Method |
|---|---|---|
| Loose threads | Unprofessional appearance | Tug each button gently |
| Cracked surface | Cheap look, breaks easily | Inspect under bright light |
| Wrong shade | Color mismatch visible | Compare against sample |
| Missing security stitch | Button falls off after few wears | Check back-side stitching |
Side vents (the small slits at the bottom hem on each side) must have reinforcement bartacks at the top of each vent. Press your thumbnail into the bartack and try to spread it—quality bartacks resist this pressure. Weak bartacks allow the vent to tear upward during normal wear.
Last month, we stopped a shipment where 8% of pieces had weak side vent bartacks. The buyer thanked us later—one of their previous shipments from another factory generated 200+ returns due to torn side vents. The cost of fixing this during production: $0.15 per piece. The cost of returns and damaged reputation: immeasurable.
Logos & Decorations: Embroidery, Printing and Badges—Defect Checks?
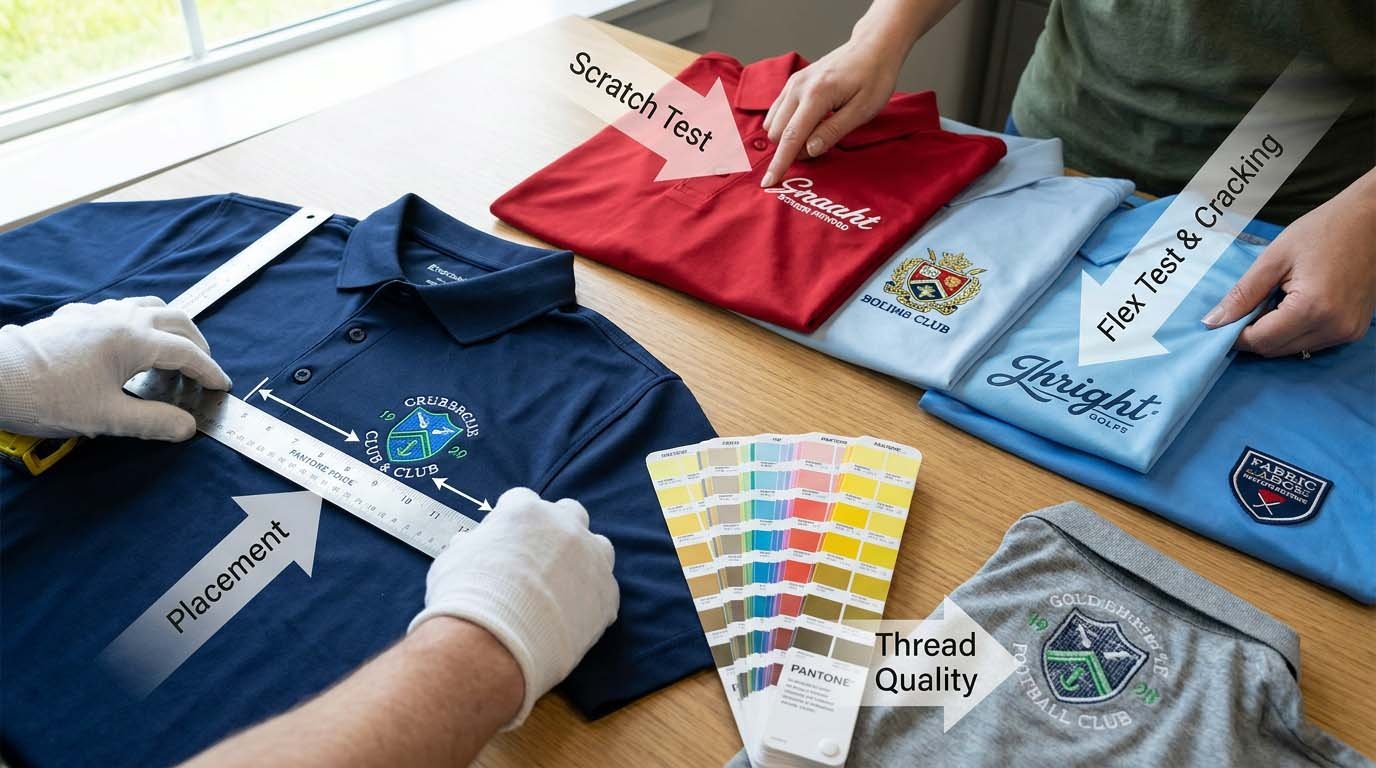
Check logo placement consistency by measuring from fixed reference points, inspect embroidery density and thread quality under close examination, and verify that printed logos survive the scratch test—decoration defects are the most common cause of shipment rejection because they are impossible to fix after production.
I have seen perfect polos rejected because the logo sat 2cm too low or the embroidery thread started unraveling. Decoration defects frustrate buyers most because the garment itself may be flawless. Our pre-shipment inspection caught a batch last quarter where the embroidery machine tension gradually loosened, causing the logo quality to degrade across 400 pieces in the middle of the production run.
Embroidery Inspection Points
Pull 15-20 pieces randomly and lay them flat. Check these embroidery defects:
Placement Accuracy
Measure logo position from the placket edge and from the shoulder seam. We use this standard for chest logos:
- 7cm down from the shoulder seam
- 12cm from center front placket edge
The placement should not vary more than ±3mm between pieces. Greater variation means the operator manually positioned the logos instead of using fixed hoops—a sign of poor process control.
Thread Density and Quality
Look at the embroidery from 15cm away. Quality embroidery shows:
- No gaps where the base fabric shows through
- Even stitch density across the entire logo
- No loose thread ends sticking up
Turn the polo inside out and check the back of the embroidery. The thread should form neat parallel lines without tangled knots or loose loops. Messy backside stitching indicates the machine was not properly maintained—threads will eventually pull loose from the front side.
Color Accuracy
Compare the embroidered logo color against your approved sample or Pantone reference. This check matters most for brand logos where color matching is critical. We use natural daylight for color verification—fluorescent factory lights hide color discrepancies.
Edge Definition
Examine the edges of letters and shapes in the logo. Sharp, clean edges indicate proper digitizing and tension settings. Fuzzy or frayed edges suggest:
- Low-quality digitizing file
- Wrong needle size for the thread weight
- Machine tension set incorrectly
Screen Printing and Heat Transfer Checks
Printed logos require different inspection methods:
The Scratch Test
Run your fingernail firmly across the printed logo several times. The print should not flake, crack, or show wear marks. If material comes off during this test, the ink adhesion is poor—customer washing will destroy the logo within 3-5 cycles.
Stretch and Recovery
For logos on stretchy fabric areas, pull the fabric to 110-120% of its resting width and check if the print cracks. Golf polos stretch during wear—logos must flex with the fabric. Cracks during this test predict customer complaints.
Opacity and Color Density
Hold the polo up to a light source. The printed logo should completely block light—no base fabric color should show through. Semi-transparent printing indicates:
- Too few print passes
- Diluted ink to save costs
- Wrong ink type for the fabric
Alignment on Patterned Fabric
If your polo has stripes or patterns, check if the logo aligns with the pattern correctly. Misalignment looks careless and amateur. We position logos so they center on a stripe or fall between stripes—never cutting a stripe in half.
Badge and Patch Application
Sewn-on badges and patches require these checks:
| Check Point | Acceptable Standard | Rejection Trigger |
|---|---|---|
| Stitching visibility | Thread matches badge edge color | Contrasting thread color shows |
| Attachment security | Withstands firm pulling | Badge edges lift or wave |
| Position accuracy | ±3mm from marked position | Greater than 5mm off-center |
| Puckering | Fabric lies flat around badge | Gathered or wrinkled fabric |
I test badge attachment by pinching the badge edge and pulling gently away from the polo. The badge should not lift or create fabric tension. Weak attachment or puckering means the badge was sewn at wrong tension or the backing was not properly prepared.
Common Decoration Defects to Reject
These decoration problems should trigger immediate rejection:
- Registration errors where multi-color prints or embroidery elements do not align
- Color bleeding where ink or thread colors mix at boundaries
- Thread breaks in embroidery that create visible gaps
- Hooping marks (circular pressure marks) that remain visible around the logo
- Transfer residue from heat transfers that shows as shiny patches around the logo
Last year, we rejected 1,200 pieces because the embroidery thread color was one shade darker than the approved sample. The difference was subtle, but the buyer's brand guidelines specified exact thread color matching. That rejection taught me that decoration specs are non-negotiable—customers notice logo quality first.
Sampling & Testing: AQL Plans, Inline/Final QC and Essential Lab Tests?
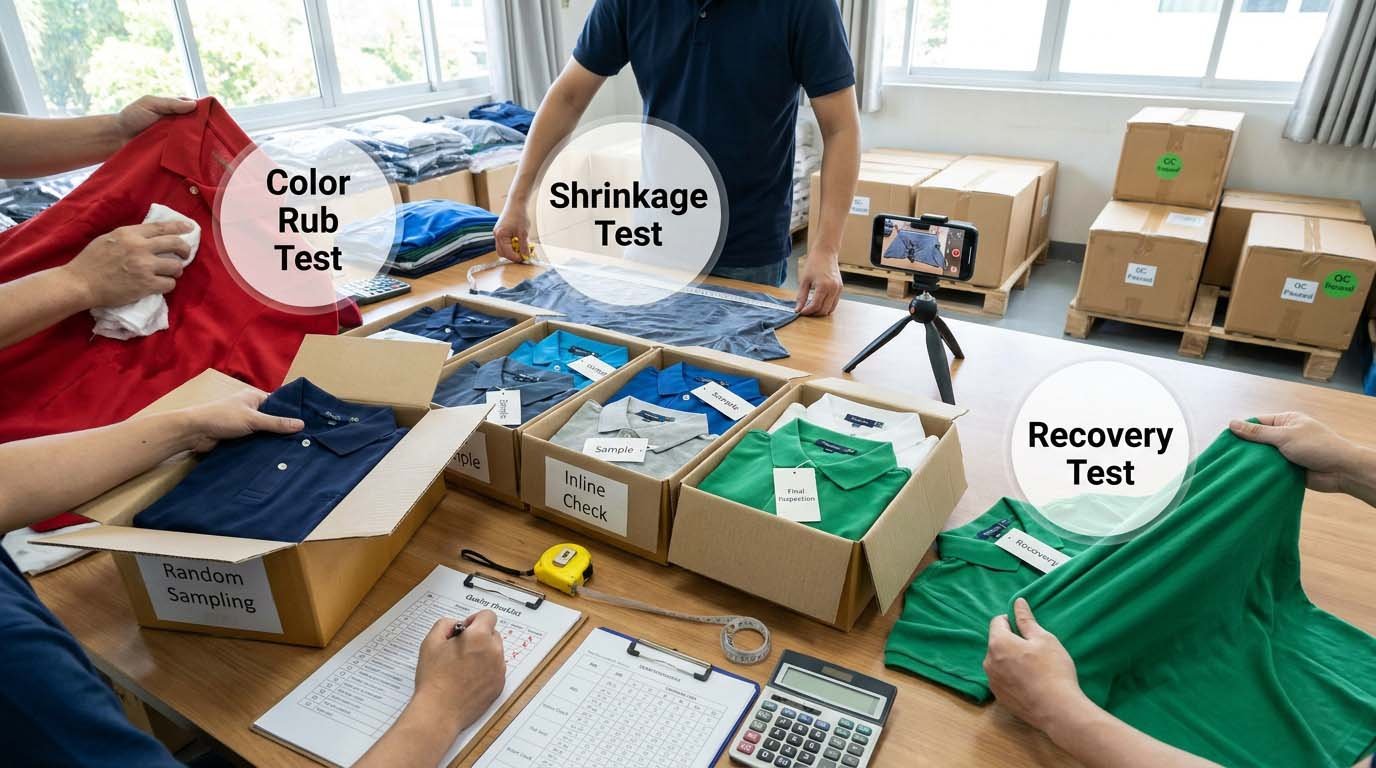
Implement a sampling inspection using AQL 2.5 standard for major defects, conduct inline checks at 50% completion to catch problems before full production, and request basic wash testing for colorfastness and shrinkage—these three inspection stages prevent defective shipments without requiring laboratory equipment.
The biggest mistake buyers make is waiting until production finishes to inspect quality. By then, fixing problems means re-making hundreds or thousands of pieces. Our three-stage inspection catches defects when correction costs $0.20 per piece instead of rejecting finished goods worth $15 per piece.
Understanding AQL Sampling for Golf Polos
AQL (Acceptable Quality Level) tells you how many pieces to inspect and how many defects you can accept before rejecting the batch. We use AQL 2.5 for major defects (things customers notice immediately) and AQL 4.0 for minor defects (small issues that do not affect function).
Here is the practical sampling table for typical golf polo orders:
| Order Quantity | Sample Size to Inspect | Accept if Defects ≤ | Reject if Defects ≥ |
|---|---|---|---|
| 100-500 pieces | 50 pieces | 3 major defects | 4 major defects |
| 501-1,200 pieces | 80 pieces | 5 major defects | 6 major defects |
| 1,201-3,200 pieces | 125 pieces | 7 major defects | 8 major defects |
| 3,201-10,000 pieces | 200 pieces | 10 major defects | 11 major defects |
How to select samples: Pull pieces randomly from different cartons throughout the shipment. Never inspect only the first pallet or the pieces the factory suggests—that is where they put their best work.
What counts as a major defect in our inspection:
- Wrong size labels or missing care labels
- Holes, cuts, or stains larger than 2mm
- Seam breaks or skipped stitching visible from 50cm distance
- Logo placement off by more than 5mm
- Shade variation visible from 1 meter in daylight
- Measurement exceeding tolerance by more than 1cm
Inline Quality Control—The 50% Checkpoint
Do not wait until production finishes. We conduct inline inspection when the factory completes 50% of the order. This timing allows:
- Time to correct cutting or sewing problems before they affect the entire batch
- Verification that the factory maintains sample standards in bulk production
- Early warning if the factory switched materials or processes
During inline inspection, we check 30 pieces from the completed portion and focus on:
- Consistency with approved sample: Compare one inline piece directly against your original sample—fabric, color, stitching quality, measurements
- Process stability: Check if piece #10, #50, and #100 off the line show the same quality or if standards are slipping
- Hidden construction: Turn multiple pieces inside out and verify that internal stitching quality matches what you saw in the sample
If inline inspection reveals problems, you have time to stop production and make corrections. Last year, we caught a measurement error at 50% completion that saved a buyer from rejecting 2,000 finished pieces. The cost of that early catch: $600 in delayed production. The cost of discovering it at final inspection: $30,000 in rejected goods.
Final Pre-Shipment Inspection
This is your last checkpoint before the factory ships. Schedule final inspection only after:
- All pieces are complete, pressed, and folded
- Cartons are packed and labeled
- Packing list matches your PO
Final inspection sequence:
- Random carton selection: Check at least 10% of cartons randomly across the shipment
- Full AQL sampling: Inspect the number of pieces shown in the AQL table above
- Workmanship defect scan: Check seams, collars, buttons, logos using the methods described earlier in this guide
- Measurement verification: Re-measure 10 pieces to confirm tolerances
- Packing quality: Verify folding, polybags, carton labeling, and count accuracy
Document everything with photos. Our inspection reports include:
- Overall defect rate by category (stitching, fabric, measurements, logos)
- Photos of any defects found
- Comparison photos showing bulk piece versus approved sample
- Clear pass/fail decision with reasoning
Essential Tests Without Laboratory Equipment
You can perform these basic tests on-site:
Wash Shrinkage Estimate
Take two pieces and measure them carefully. Wash one piece following the care label instructions (you will need access to washing facilities). Dry and measure again. Calculate shrinkage percentage:
Shrinkage % = (Before measurement - After measurement) / Before measurement × 100
Acceptable shrinkage for golf polos: 3-5% maximum. Higher shrinkage means customers receive garments that fit well initially but become unwearable after first wash.
Colorfastness Rub Test
This simple test predicts color transfer problems:
- Wet a white cotton cloth with room temperature water
- Rub the wet cloth firmly against the polo fabric for 30 strokes
- Check if color transferred to the white cloth
Any significant color transfer means the fabric was not properly dyed or finished. Customers will experience color bleeding in their first wash.
Fabric Recovery Test
Stretch a section of the polo fabric to 120% of resting width and hold for 60 seconds. Release and wait 30 seconds. The fabric should return to within 5% of original dimensions. Poor recovery indicates:
- Low-quality yarn with insufficient elastane
- Loose knitting tension
- Degraded fabric from storage or processing issues
These simple tests require no specialized equipment but predict customer complaints effectively. We perform them on at least 3 pieces per color in every shipment.
FAQ: Inspecting Golf Polo Shirts
What is the minimum sample size I should inspect for an order of 500 golf polos?
Inspect at least 50 pieces randomly selected from throughout the shipment, not just the top layer of cartons. This sample size follows AQL 2.5 standards and gives you 95% confidence that the defect rate in the full batch matches what you find in your sample. If you find 4 or more major defects in those 50 pieces, you should reject the shipment or request the factory to sort and replace defective items.
How can I verify fabric quality without laboratory testing equipment?
Use the tactile pinch test to compare fabric thickness between your approved sample and bulk pieces—your fingers can detect 10-15 GSM differences. Hold the fabric up to a light source to check knit density and consistency. Perform the stretch-and-release test to verify fabric recovery speed. These three checks catch 80% of fabric quality issues without any equipment. We have trained our QC team to identify fabric downgrades using only these hand-based methods.
What tolerance should I accept for chest width measurements?
Accept ±2cm tolerance for chest width on most golf polo orders. This tolerance reflects normal production variance in cutting and sewing. Tighter tolerances like ±1cm are possible but increase production time and cost by 15-20% without meaningful customer benefit. The key is not absolute precision but consistency—if 90% of pieces fall within ±1.5cm and none exceed ±2.5cm, the batch has good process control.
When should I schedule inline inspection versus final inspection?
Schedule inline inspection when the factory completes 40-50% of your order. This timing catches systematic problems early while leaving time for corrections. Schedule final inspection only after 100% completion, pressing, and packing are finished—usually 2-3 days before the planned ship date. Never skip inline inspection for orders over 1,000 pieces, because the cost of catching defects mid-production is $0.20-0.50 per piece versus $12-15 per piece for finished goods rejection.
How do I check if the factory switched fabric between sample and bulk production?
Perform a direct side-by-side comparison using your approved sample. Check these indicators of fabric substitution: different hand feel when pinched (thickness or softness changed), faster or slower recovery in the stretch test (different elastane content), different appearance when backlit (knit density changed), and shade mismatch under natural light (different dye recipe). Also weigh both pieces if you have a scale—a 10-15 gram difference in a size M polo indicates significant fabric weight change.
What embroidery defects should I consider critical enough to reject a shipment?
Reject the shipment if more than 2% of pieces show these critical embroidery defects: logo placement error exceeding 5mm from spec position, visible thread breaks or gaps in the design, thread color that clearly mismatches your approved sample, or embroidery that puckers the fabric causing permanent distortion. Minor issues like single loose thread ends that can be trimmed are acceptable under AQL standards. Document all defects with photos and measurements to support your rejection decision.
Can I perform shrinkage testing without a laboratory?
Yes, conduct a basic shrinkage test at the factory or warehouse. Measure 5 pieces carefully at multiple points (chest width, body length, sleeve length) and record all dimensions. Wash two of those pieces according to the care label instructions using available facilities. Dry them and re-measure the same points. Calculate shrinkage percentage for each dimension. Acceptable shrinkage: 3-5% maximum. This field test is not as precise as lab testing but catches serious shrinkage problems before shipment.
What is the most commonly missed defect during polo shirt inspection?
Left-right asymmetry in sleeve length and collar point position—defects that only show up when you fold the polo vertically down the center. Buyers typically measure one sleeve and assume both match, but we find 10-15% of factory batches have asymmetric sleeves differing by 1-2cm. This defect looks obvious on a hanger and gets noticed immediately during retail quality checks. Always fold each sample piece to verify symmetry.
Conclusion
Quality inspection protects your investment by catching defects before shipment approval. Focus on fabric consistency, measurement accuracy, stress-point workmanship, logo precision, and staged inspection timing. These checkpoints turn surface-level sample approval into reliable bulk production verification.