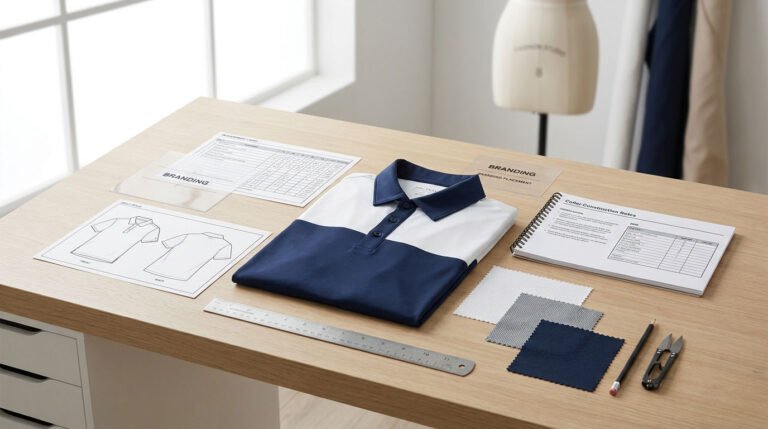
A golf polo logo may look perfect in the design file but develop wrinkles or ripples once embroidered onto the fabric. This problem, known as embroidery puckering, is especially common on lightweight, moisture-wicking, and stretch golf polos.
For golf apparel brands, puckering affects more than appearance. It can make a premium shirt look poorly manufactured, reduce comfort, and create inconsistent results between samples and bulk production.
Quick Answer: To embroider a golf polo without puckering, match the embroidery design to the fabric's stretch and stability. Use appropriate cutaway backing, optimize stitch density and pull compensation, hoop without stretching the fabric, and adjust needle and thread tension. Always test the actual logo on production fabric before approving bulk manufacturing.
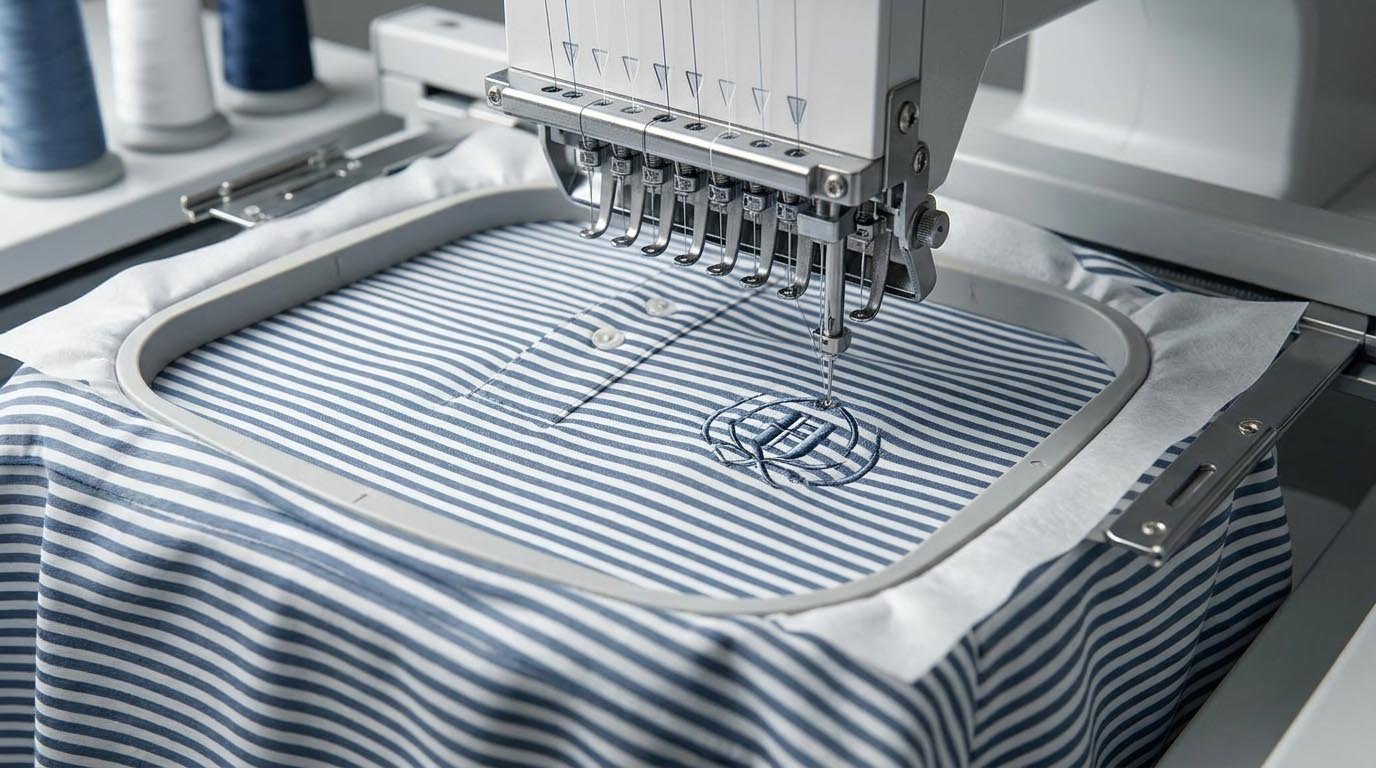
At FUWAY, embroidery quality is considered during product development, not just after the logo reaches the embroidery machine. The following six steps explain how brands and manufacturers can reduce puckering while maintaining the comfort and appearance of performance golf polos.
Why Does Golf Polo Embroidery Pucker?
Embroidery puckering occurs when the fabric around a stitched design gathers, wrinkles, or becomes distorted.
Golf polos are particularly vulnerable because their knitted fabrics are often softer and more flexible than woven garments. Embroidery thread creates localized tension, while the surrounding fabric stretches and recovers.
When these forces are not balanced, the material pulls inward around the logo.
Common Causes of Embroidery Puckering
| Cause | Why It Creates Puckering |
|---|---|
| Lightweight or stretchy fabric | Moves or contracts around relatively rigid stitches |
| Excessive stitch density | Concentrates too much thread tension in a small area |
| Insufficient backing | Allows the knit fabric to shift during stitching |
| Incorrect hooping | Stretches or distorts the garment before embroidery |
| Excessive thread tension | Pulls fabric inward and may distort the logo |
| Poor digitizing | Creates uneven stitch forces or inadequate compensation |
For example, a compact logo with heavy fill stitching may appear smooth on a relatively stable piqué polo but cause visible rippling on a lightweight polyester-spandex jersey.
The solution is not simply using more backing or tightening the embroidery hoop. Each variable must be adjusted to suit the actual fabric and design.
How to Prevent Golf Polo Embroidery Puckering: 6 Steps
Step 1: Evaluate the Golf Polo Fabric Before Embroidery
Start by checking the fabric's construction, weight, elasticity, and recovery.
Not every golf polo responds to embroidery in the same way.
| Golf Polo Fabric | Main Embroidery Concern | Recommended Approach |
|---|---|---|
| Polyester piqué | Textured surface and possible stitch distortion | Select suitable backing and adjust underlay |
| Lightweight polyester jersey | Limited stability and visible puckering | Use lighter stitching and appropriate cutaway support |
| Polyester-spandex blend | Stretch and recovery around the logo | Reduce concentrated stitch forces and avoid stretching during hooping |
| Interlock knit | Surface distortion around dense designs | Balance stitch density, underlay, and backing |
These are starting considerations, not fixed embroidery settings. Actual performance depends on the fabric construction, finish, logo size, and stitch pattern.
A lighter fabric is not automatically unsuitable for embroidery. However, it may require a simplified design or additional development testing.
Factory tip: Confirm the final production fabric before approving the embroidery file. A logo tested on substitute fabric may behave differently during bulk production.
Fabric selection should therefore be coordinated with the decoration method. FUWAY's fabric sourcing service helps brands evaluate material options during golf apparel development.
Step 2: Optimize Logo Digitizing and Stitch Density
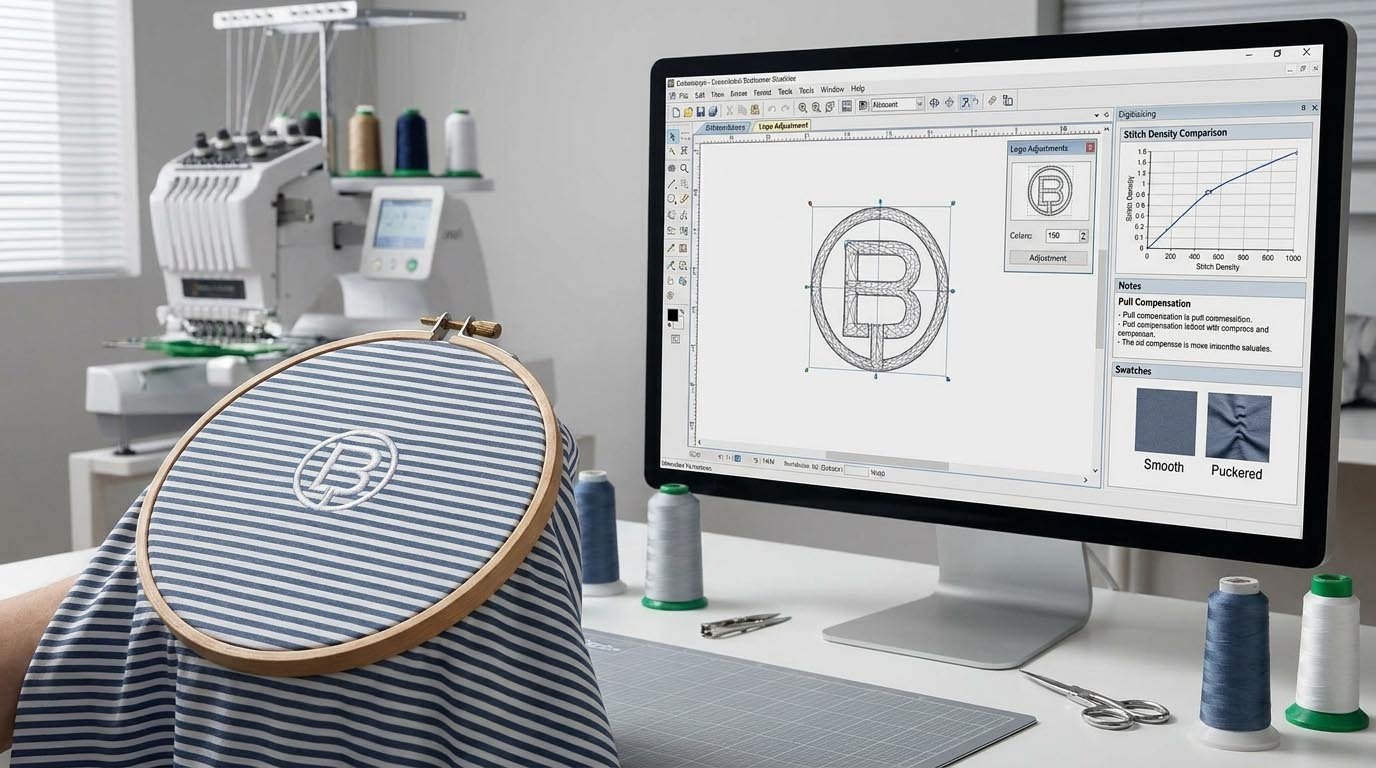
Digitizing converts logo artwork into the stitch instructions used by an embroidery machine.
A logo that works well in print does not necessarily translate into embroidery without modification.
Dense fills, narrow lettering, overlapping stitch areas, and excessive underlay can create concentrated pulling forces.
Focus on three digitizing adjustments:
1. Control stitch density
Avoid placing unnecessary stitches into a small area. Where appropriate, reduce fill density or simplify heavily embroidered sections without sacrificing logo coverage.
2. Adjust pull compensation
Embroidery stitches naturally pull fabric in the direction of stitching.
Pull compensation adjusts the digitized shapes to account for this movement, helping the finished design retain its intended dimensions.
The required adjustment depends on stitch type, fabric elasticity, and actual test results.
3. Optimize underlay and stitch direction
Underlay stitches help stabilize the fabric and support the top stitching. However, excessive underlay can increase stiffness and needle penetration.
Stitch direction and sequence should also be planned to manage fabric movement and avoid concentrating distortion in one area.
For brands developing custom logos, our golf polo embroidery service provides an overview of embroidery applications and customization options.
Key takeaway: The goal is not simply to minimize stitch count. It is to create sufficient logo coverage with the least unnecessary fabric distortion.
Step 3: Choose the Right Embroidery Backing
Backing, also called a stabilizer, supports the fabric during embroidery and helps prevent movement around the stitched design.
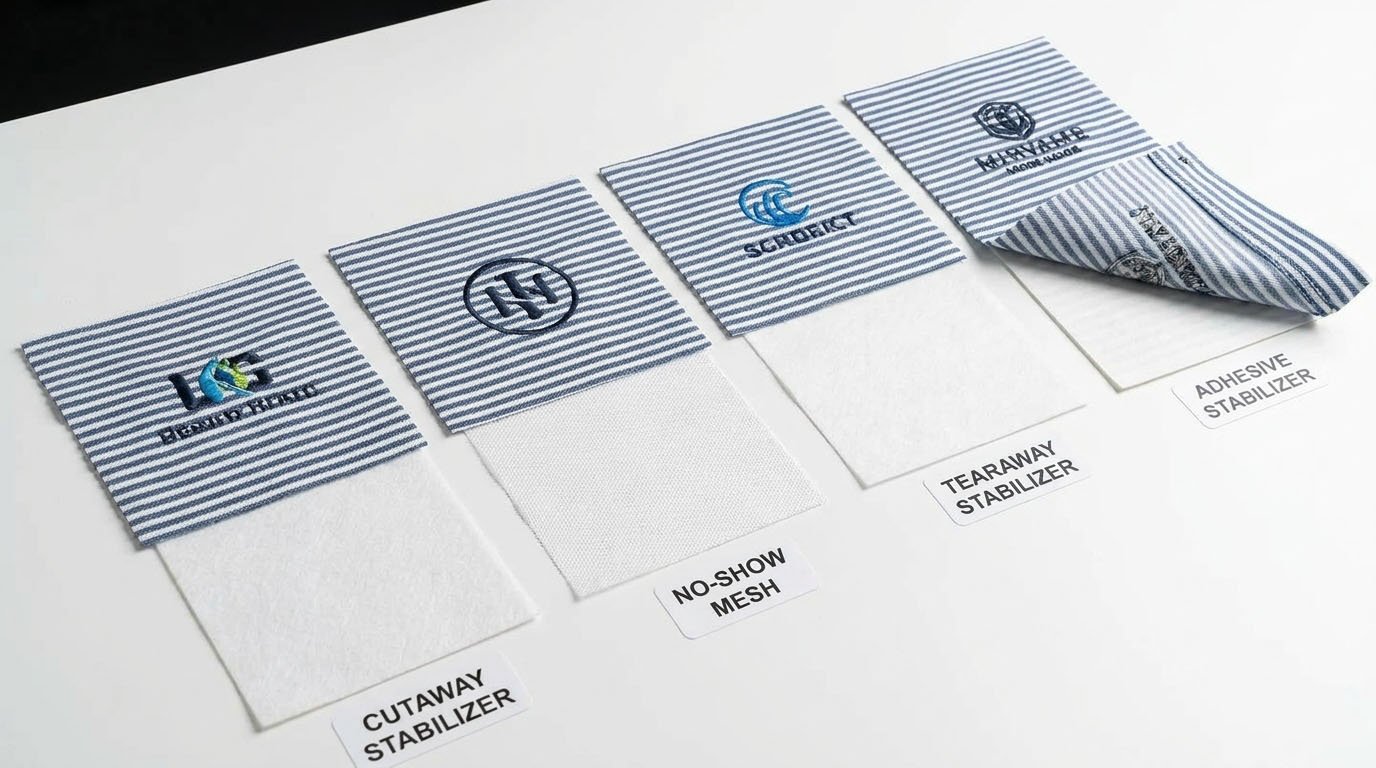
For many lightweight or stretch golf polos, a suitable cutaway backing provides more consistent support than a basic tearaway backing.
However, the correct choice depends on the fabric and embroidery design.
| Backing Type | Potential Benefit | Main Consideration |
|---|---|---|
| Tearaway | Easy removal and minimal remaining material | May provide insufficient ongoing support for stretchy knits |
| Standard cutaway | Maintains support after embroidery | Must be matched to fabric weight and comfort requirements |
| No-show mesh cutaway | Lightweight, flexible support | Useful to evaluate on lighter performance fabrics |
| Specialty adhesive or fusible backing | Helps control fabric movement | Compatibility with fabric finish and application conditions must be checked |
Why More Backing Is Not Always Better
Adding heavier or multiple layers of backing may reduce visible movement during stitching, but it can also make the chest logo feel stiff.
For performance golf polos, embroidery quality should balance:
- Fabric stability
- Logo appearance
- Garment flexibility
- Softness against the skin
- Appearance after laundering
On textured piqué fabrics, a water-soluble topping may also help keep stitches visible above the knit surface. However, topping mainly improves stitch definition; it does not replace proper structural backing.
Factory tip: Evaluate the front appearance and the inside feel of the embroidered polo. A logo that looks flat but feels uncomfortable is not necessarily an acceptable result.
Step 4: Hoop the Golf Polo Without Stretching the Fabric
Incorrect hooping is a common reason embroidery looks smooth in the hoop but puckers after removal.
When stretch fabric is pulled tightly into a hoop, it can contract after release while the embroidered stitches retain their shape.
This creates visible ripples around the logo.
Correct Hooping Procedure
- Mark the logo placement. Confirm the approved position and orientation before stitching.
- Prepare the backing. Position the stabilizer beneath the embroidery area.
- Lay the fabric flat. Smooth wrinkles without pulling the fabric beyond its relaxed dimensions.
- Secure the hoop evenly. Hold the material firmly enough to prevent shifting, without overstretching it.
- Check the fabric alignment. Confirm the logo area remains flat and correctly positioned.
- Inspect after unhooping. Look for distortion that was not visible while the fabric was secured.
Both conventional hoops and suitable specialty framing systems can produce good results when used correctly.
Avoid assuming that tighter hooping always means better embroidery.
The objective is to stabilize the fabric in a relaxed, even condition.
Step 5: Adjust Thread Tension and Needle Selection
Even with suitable backing and digitizing, incorrect machine setup can cause puckering.
Thread Tension
Excessive thread tension may pull the fabric inward around the embroidery design.
Insufficient tension can cause loose stitches, looping, or inconsistent coverage.
The correct balance should be established through test embroidery, using the actual thread, needle, backing, and fabric combination.
Needle Selection
A suitable ballpoint or knit-compatible embroidery needle may help reduce yarn damage on certain performance knits.
Needle size and point type should be selected according to:
- Fabric construction
- Thread weight
- Embroidery design
- Machine compatibility
There is no universal needle size or tension setting that guarantees puckering-free embroidery on every golf polo.
Factory tip: When puckering occurs, adjust one variable at a time where practical. This helps identify the cause rather than introducing several changes that are difficult to evaluate.
Step 6: Test the Embroidery Before Bulk Production
A clean embroidery strike-off is one of the most important approval checkpoints.
A strike-off is a test embroidery produced to evaluate the logo, fabric, backing, and machine settings before full production.
Ideally, it should use the same materials and relevant production conditions intended for bulk manufacturing.
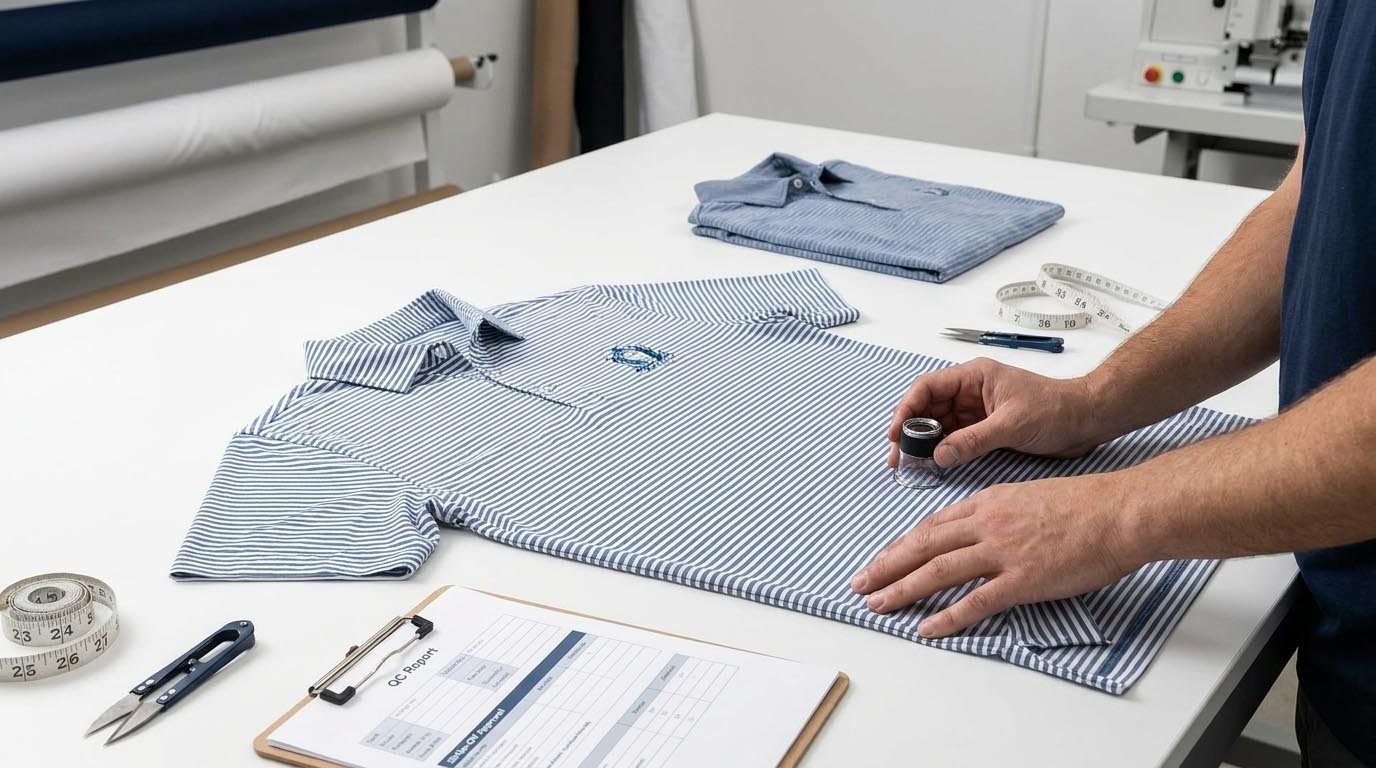
Pre-Production Embroidery Checklist
| Inspection Item | What to Check |
|---|---|
| Surface appearance | No unacceptable rippling or fabric gathering |
| Logo shape | Matches approved dimensions and artwork |
| Stitch coverage | No significant gaps or excessive density |
| Backing | Provides support without unacceptable stiffness |
| Placement | Matches the approved specification |
| After unhooping | Fabric remains smooth around the logo |
| After washing | No unacceptable new puckering or distortion |
Wash testing should follow the agreed care conditions and evaluation criteria for the garment.
If the embroidery fails, the factory should correct the relevant variables and submit another strike-off before approval.
A successful test does not guarantee every bulk garment will be identical, but it establishes a reference that production can follow.
For the broader sample approval process, see our Golf Polo Shirt Sampling Process Guide.
How to Troubleshoot Existing Golf Polo Embroidery Puckering
When puckering appears, identify when and where it occurs before changing the embroidery settings.
Different symptoms suggest different causes.
| Problem | Possible Cause | First Action |
|---|---|---|
| Fabric wrinkles immediately after stitching | Excessive stitch density or insufficient stabilization | Review digitizing and backing |
| Puckering appears after removing the hoop | Fabric stretched during hooping | Correct hooping technique |
| Logo edges pull inward or become distorted | Pull compensation or stitch direction issue | Review digitizing settings |
| Logo appears bulky and stiff | Excessive stitching or backing | Reduce unnecessary material buildup |
| Puckering appears after washing | Fabric and embroidery materials respond differently to laundering | Review materials and wash-test results |
| Some bulk garments pucker while others do not | Inconsistent hooping, tension, or material handling | Compare production settings and inspect first pieces |
Can Existing Embroidery Puckering Be Fixed?
Minor surface wrinkles may sometimes improve with appropriate garment finishing, following the fabric's care and heat limitations.
However, finishing does not reliably correct structural distortion caused by excessive stitches, inappropriate backing, or stretched fabric.
For severe puckering, the safer production decision may be to revise the embroidery process and make a new sample.
Attempting to remove dense embroidery from lightweight performance fabric can also leave needle holes or damage the knit.
The priority should therefore be preventing puckering during sampling, rather than relying on corrective finishing after production.
How Can Brands Prevent Embroidery Puckering in Bulk Production?
A single successful sample is not enough to ensure consistency across an entire order.
Bulk production introduces additional variables, including operator handling, different machine heads, fabric lots, and machine adjustments.
To reduce these risks, brands and manufacturers should establish embroidery-specific production controls.
Key Bulk Production Controls
1. Retain an approved embroidery reference
Keep the approved strike-off or garment sample available for comparison during production.
2. Confirm the production setup
Record the approved embroidery file, backing, thread, needle selection, and relevant machine settings.
3. Inspect initial production pieces
Check embroidery appearance after stitching and after the garments are removed from their hoops.
4. Monitor consistency during production
Compare selected pieces with the approved reference, especially after material changes or production adjustments.
5. Identify defects before final packing
Inspect visible puckering, logo distortion, placement, and the inside finish according to the agreed quality requirements.
These checks focus specifically on embroidery performance rather than replacing the manufacturer's complete garment inspection system.
For the broader pre-production, in-line, and final inspection framework, read our Golf Apparel Quality Control Guide.
Frequently Asked Questions
1. What Is the Best Backing for Embroidery on Stretch Golf Polos?
A suitable cutaway backing is often a good starting point for stretch performance polos because it continues supporting the stitches after embroidery.
No-show mesh cutaway may be useful when a lighter, more flexible feel is important. The final choice should be verified through actual embroidery testing.
2. Does Lower Stitch Density Always Prevent Puckering?
No. Reducing excessive stitch density can help, but overly light stitching may create poor logo coverage or an uneven appearance.
Backing, underlay, stitch direction, thread tension, and hooping must also be considered.
3. Why Does Embroidery Look Flat in the Hoop but Pucker Afterwards?
The fabric may have been stretched during hooping.
When the garment is released, the knit returns toward its relaxed dimensions while the embroidery restricts movement, causing rippling around the design.
Correct hooping and adequate stabilization can reduce this problem.
4. Is Embroidery Suitable for Lightweight Golf Polos?
Yes, some lightweight golf polos can be embroidered successfully using an appropriate design, backing, and production setup.
However, highly elastic or delicate fabrics may require a simplified logo or a different decoration method.
If the design remains unsuitable for direct embroidery after testing, brands can compare alternatives in our Best Logo Methods for Golf Apparel guide.
Conclusion
Preventing embroidery puckering on golf polos requires more than adjusting a single machine setting.
The most reliable approach is to coordinate fabric selection, logo digitizing, backing, hooping, needle selection, and thread tension, then validate the complete setup through actual embroidery samples.
For golf apparel brands, the key is to approve a smooth, comfortable embroidered logo and maintain that standard throughout bulk production.
If you are developing custom embroidered golf polos, contact FUWAY to discuss your fabric, logo artwork, and production requirements before sampling.