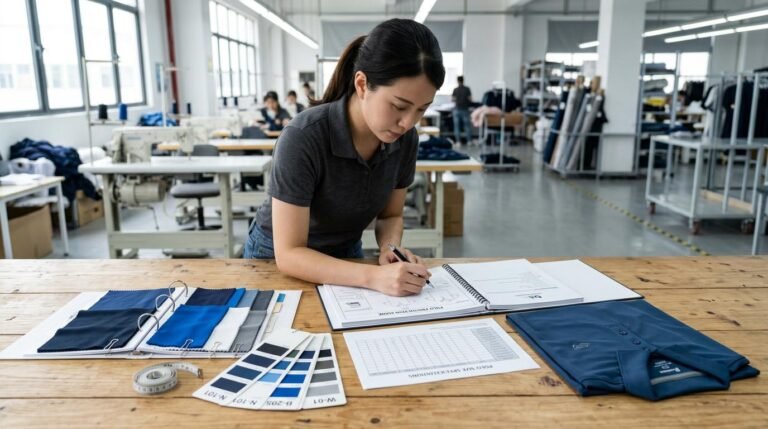
I've seen too many new brands lose money on rework orders. The problem? They picked trims by price alone. The result? Zippers puckered, buttons fell off, and elastics broke after a few washes.
The right trim isn't the cheapest one—it's the one that matches your fabric weight, stretch, and wash method. Choose trims that fit your fabric specs, usage scenario, and care instructions, or you'll pay more in rework costs than you saved on cheaper parts.
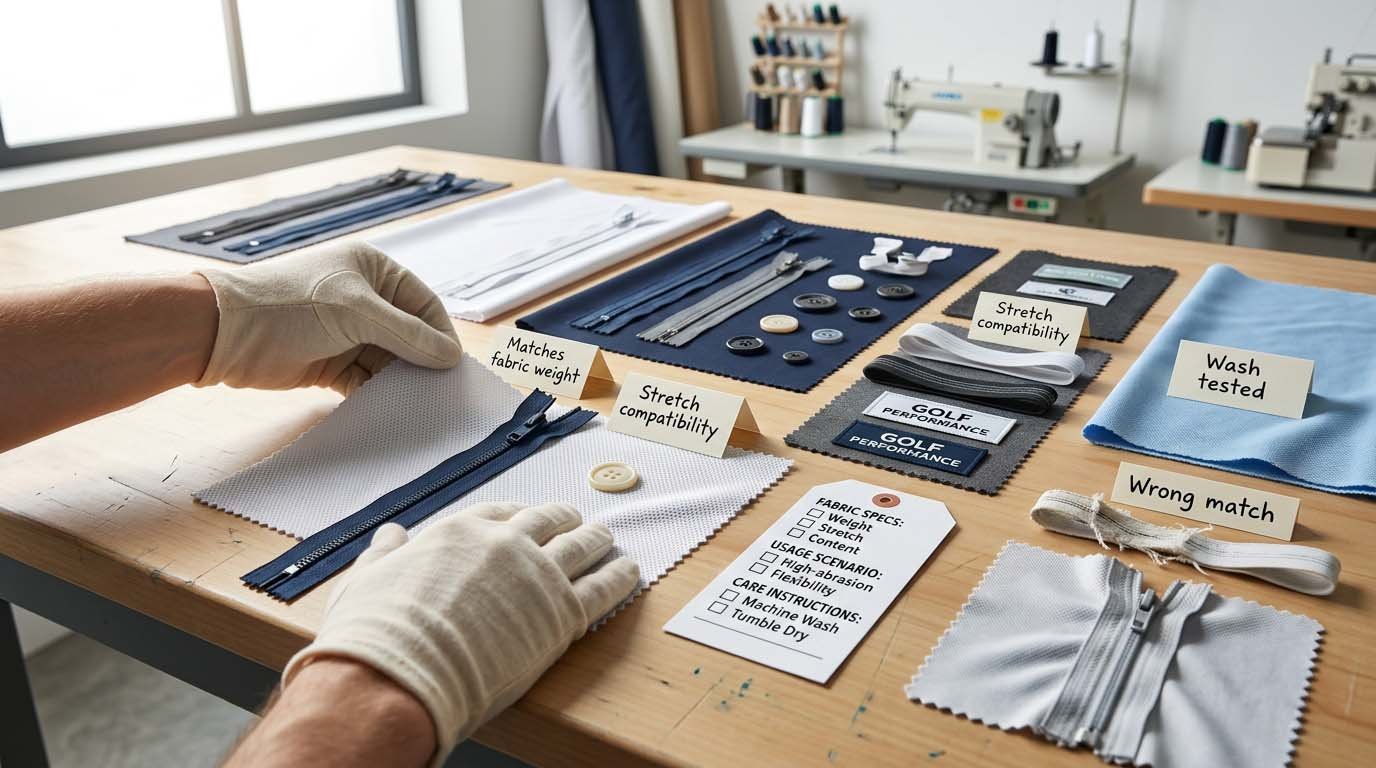
I handle trim sourcing and rework orders at FUWAY. Most trim failures I've dealt with weren't caused by "low quality"—they happened because the trim didn't physically match the fabric. Let me walk you through what actually matters when you're choosing trims for golf apparel.
Quick Answers: Golf Apparel Trims in 60 Seconds
What's the most common trim mistake new brands make?
Picking trims before confirming fabric stretch, weight, and shrinkage rate—then discovering the zipper puckers or the elastic snaps during wear.
Which zipper type works best for golf outerwear?
Coil zippers for lightweight stretch jackets (smoother, flexible). Vislon zippers for heavier windbreakers (stronger, more visible). Both need anti-corrosion coating if the garment gets washed frequently.
How do I know if a button will stay attached?
Check the attachment method: sewn-through buttons need reinforcement backing on stretch fabrics. Shank buttons work better on polos because they sit away from the fabric and handle tension better.
What makes an elastic "good enough" for golf bottoms?
Recovery rate above 90% after stretch, silicone gripper if it's a waistband that needs to stay in place during swings, and stitch construction that won't cut into the elastic and weaken it.
Do I really need woven labels, or can I just print on the fabric?
Woven labels look more premium and last longer through washes. Tagless printing works for moisture-wicking gear, but it fades faster—around 30-50 washes vs. 100+ for woven labels.
Why Do Trims Matter in Golf Apparel: Performance, Comfort, and Brand Identity?
Trims aren't decorative—they're structural. A mismatched zipper can ruin a jacket's drape. A weak elastic can make shorts slide down mid-swing. A scratchy label can make a customer return a perfectly good polo.
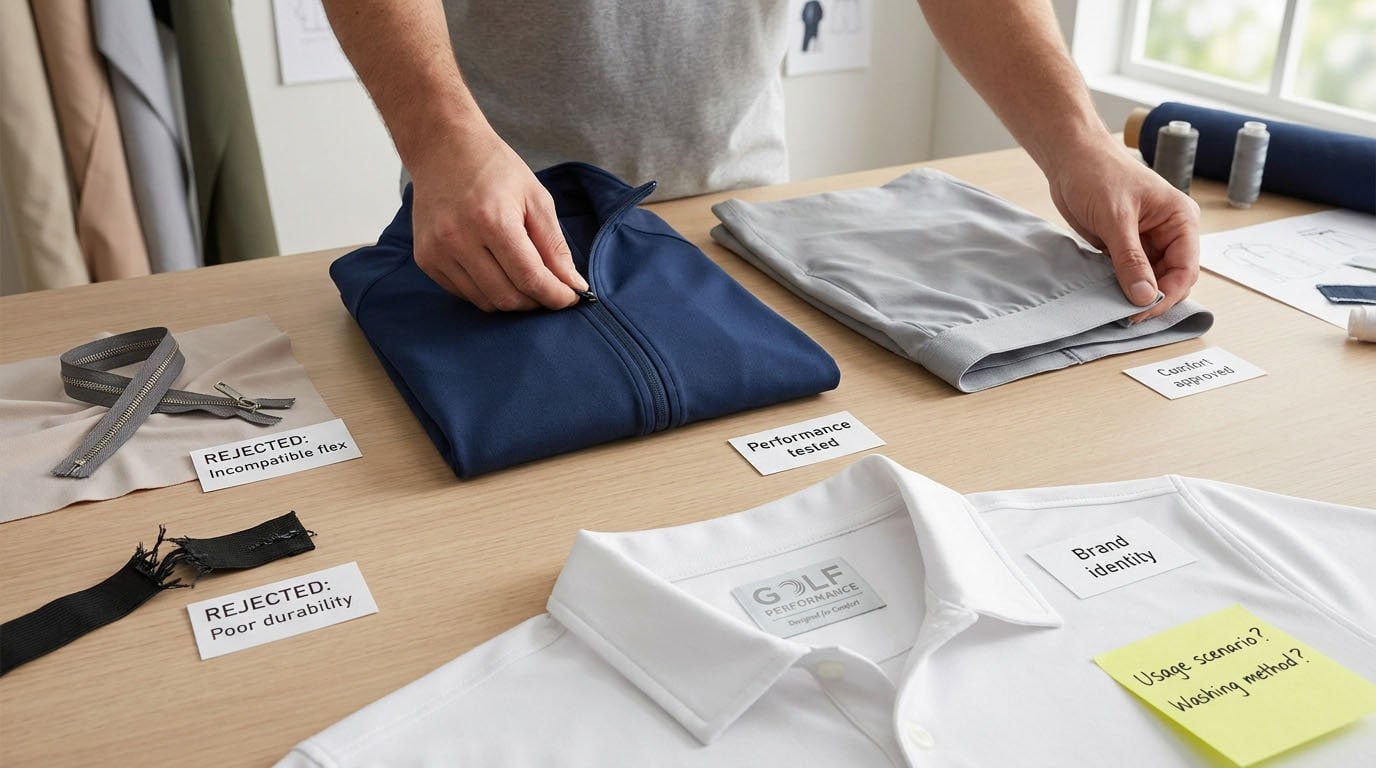
I've processed rework orders where the only problem was the trim. The fabric was fine. The cut was fine. But the coil zipper twisted on a stretch midlayer, or the non-stretch elastic broke after the customer bent down a few times. These aren't manufacturing errors—they're matching errors.
Here's what trims actually do in golf apparel:
- Zippers control ventilation and layering—they need to flex with the fabric, not fight it
- Buttons and snaps handle repeated stress from bending and reaching—they need attachment strength, not just surface durability
- Elastics manage fit during movement—they need stretch AND recovery, not just one or the other
- Woven labels communicate your brand and care info—they need to stay readable after 50+ washes without irritating skin
The Two Questions You Must Answer Before Choosing Trims
I ask every brand the same two questions before we finalize trim specs:
1. What's the main usage scenario? Practice range (high movement, frequent washing)? Tournament play (lower movement, occasional washing)? Casual wear (moderate movement, mixed washing)?
2. How will your customer wash this garment? Machine wash cold? Tumble dry? Hang dry? The washing method determines whether you need reinforced stitching, anti-corrosion coatings, or heat-resistant materials.
You can't answer these by guessing. You need to know your target customer's behavior—and then match trims to that behavior.
Zippers for Outerwear and Midlayers: Coil vs. Vislon, Sliders, Pullers, and Coatings?
For golf outerwear, use coil zippers on stretch fabrics (they flex) and Vislon zippers on non-stretch windbreakers (they're stronger). Add auto-lock sliders if the garment gets worn during active movement, and anti-corrosion coating if it's washed more than 20 times.
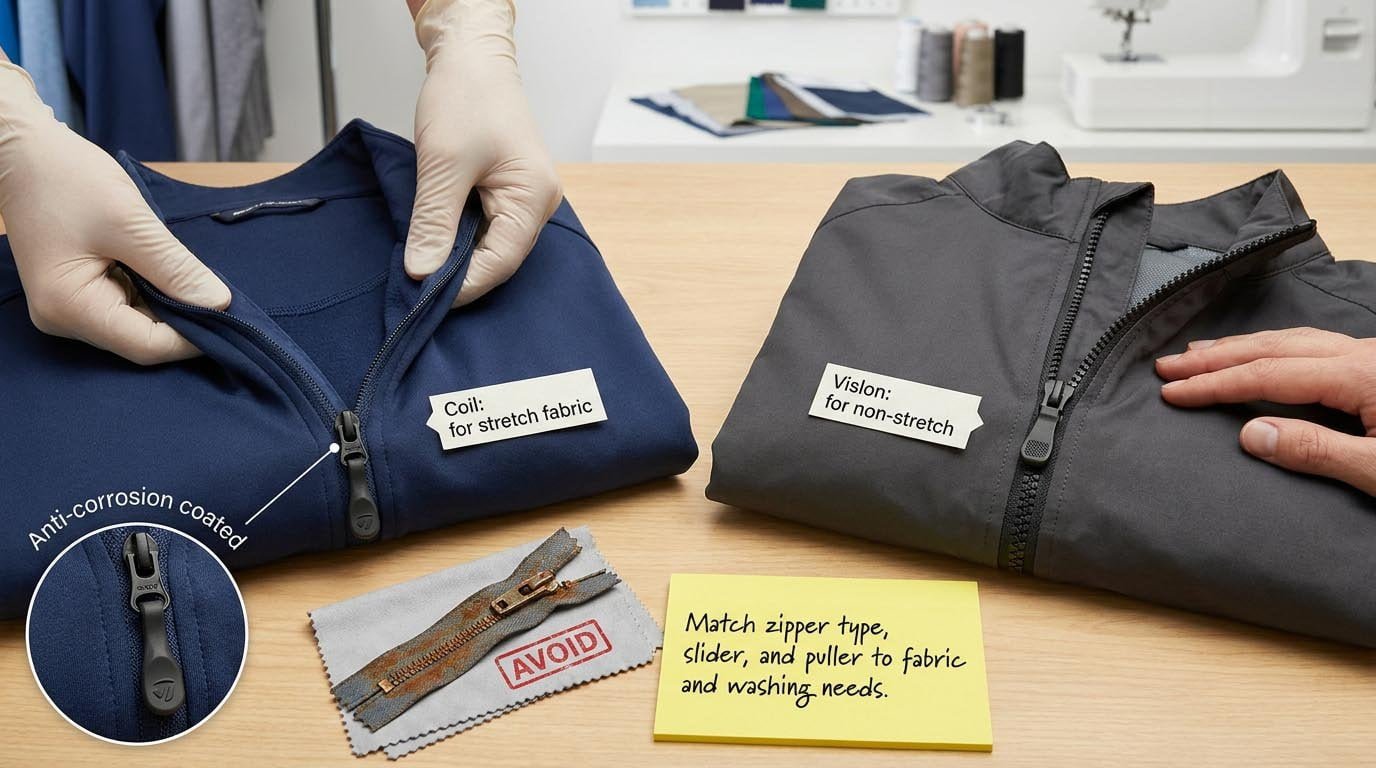
I've seen brands pick metal zippers for golf jackets because they "look premium." Then the zipper corroded after three washes and the teeth broke. Metal zippers don't belong on golf apparel unless you're making a heritage-style piece that won't be washed often.
Coil vs. Vislon: Which One Fits Your Fabric?
Here's the difference that actually matters:
| Zipper Type | Best For | Why It Works | Watch Out For |
|---|---|---|---|
| Coil | Stretch midlayers, lightweight jackets | Flexible, smooth, won't pucker on stretch fabric | Weaker than Vislon—don't use on heavy fabrics (over 300 gsm) |
| Vislon | Windbreakers, non-stretch outerwear | Stronger teeth, visible design element | Stiffer—will fight stretch fabrics and cause puckering |
The matching logic is simple: coil zippers bend with the fabric, Vislon zippers don't. If your fabric has more than 15% stretch, use coil. If your fabric is stiff and doesn't stretch, Vislon is fine.
Sliders, Pullers, and Coatings: The Parts Nobody Talks About
The zipper tape isn't the only thing that matters. I've processed returns where the slider was too tight and the zipper wouldn't close smoothly. Or the puller broke off after a few uses. Or the coating flaked off after washing.
Here's what to specify:
- Auto-lock sliders: The zipper stays where you put it. Essential for half-zip midlayers that get adjusted mid-round.
- Two-way zippers: You can open from the bottom for ventilation. Useful for long golf jackets.
- Anti-corrosion coating: Protects the zipper from sweat and frequent washing. Necessary if the garment gets washed 20+ times per season.
- Soft rubber pullers: Easier to grip than metal pullers, especially with gloves on.
Don't skip these details. A $0.10 difference in slider quality can make your zipper unusable.
Buttons and Snaps for Polos and Bottoms: Materials, Attachment, and Durability?
Buttons on golf polos need shank construction (sits away from fabric) and reinforcement backing if the fabric stretches. Snaps need post diameter above 8mm for bottoms that handle repeated stress. Cheap buttons fall off—not because of the button, but because of wrong attachment method.
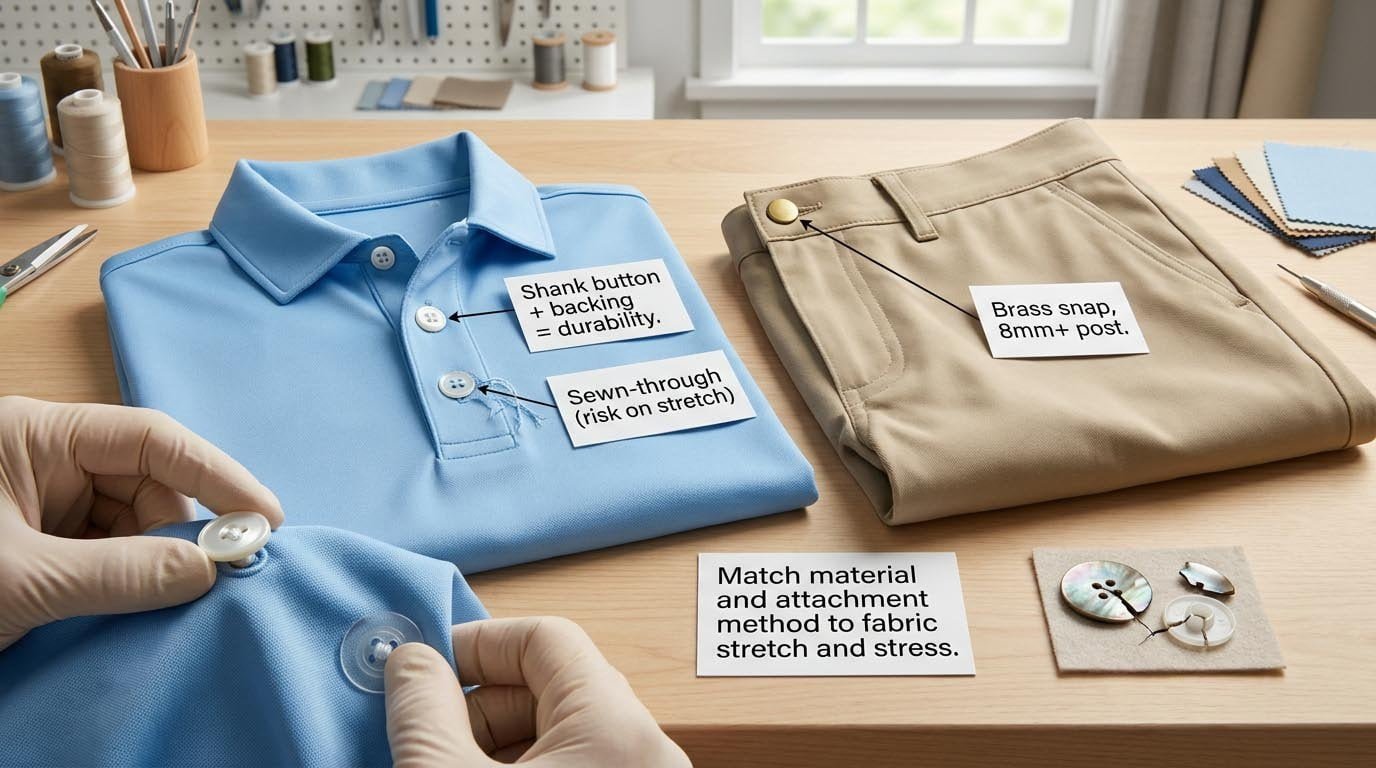
I've dealt with an order where 200+ polos came back because the buttons fell off after the first wash. The buttons themselves were fine—4-hole polyester resin buttons, standard for golf wear. The problem? They were sewn through stretch pique fabric without backing reinforcement. The stitching cut through the fabric after a few washes.
Sewn-Through vs. Shank Buttons: Which One Holds Better?
Most new brands don't know there are two types of button attachment:
- Sewn-through buttons: Holes go through the entire button. Thread passes through fabric and button directly.
- Shank buttons: A loop on the back of the button. Thread wraps around the shank, creating space between button and fabric.
For golf polos, use shank buttons. Here's why:
When you bend or reach, the fabric around the button stretches. Sewn-through buttons pull tight against the fabric—the stitching bears all the stress. Shank buttons have a gap between button and fabric, so the fabric can stretch without pulling the stitching apart.
Materials and Durability: What Actually Breaks
I've seen buttons break in two ways:
- The button material cracks: Usually happens with cheap shell buttons or ceramic buttons in the dryer.
- The attachment fails: The stitching tears through the fabric or the button shank snaps off.
For golf apparel, stick with polyester resin buttons. They don't crack in the wash, they're lightweight, and they can be dyed to match your fabric. Avoid shell buttons (they crack) and metal buttons (they corrode and get hot in the sun).
For snaps on shorts or skorts, use brass snaps with nickel-free coating. The post diameter should be 8mm or larger—smaller snaps don't hold through repeated stress.
Elastics, Grippers, and Waistbands: Stretch, Recovery, Silicone, and Construction?
Golf bottoms need elastics with 90%+ recovery rate (they snap back after stretching) and silicone grippers if the waistband must stay in place during swings. Check stitch construction—stitching through the elastic weakens it. Bartack or cover-stitch the edges instead.
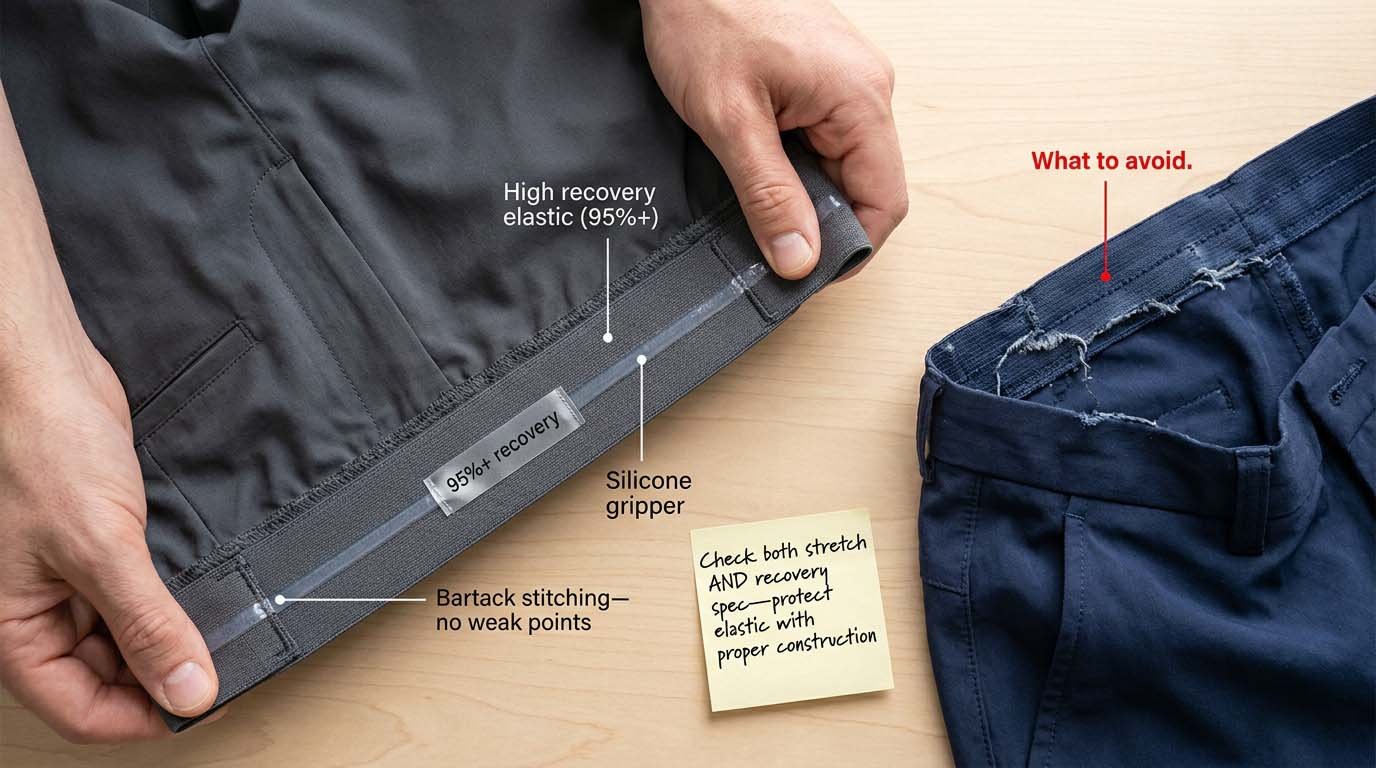
I've processed a rework order where the elastic in golf shorts broke after 10 wears. The fabric was fine. The stitching was fine. The elastic itself snapped. The reason? The brand picked a low-recovery elastic (below 80% recovery rate) and the stitching went straight through the elastic, cutting into it with every stretch.
Stretch vs. Recovery: Why Both Numbers Matter
Every elastic has two specs:
- Stretch: How far it can extend (usually 100%-150% of original length)
- Recovery: How much it returns to original length after stretching (measured as a percentage)
Most new brands only look at stretch. But golf bottoms need high recovery—above 90%. If the recovery rate is 80%, the waistband will loosen after a few wears. If it's 70%, the waistband will sag.
Here's the difference:
| Recovery Rate | What Happens After 20 Wears | Use For |
|---|---|---|
| 95%+ | Waistband stays snug, minimal loosening | Tournament shorts, performance pants |
| 85-90% | Slight loosening, still wearable | Casual golf pants, practice shorts |
| Below 85% | Noticeable sagging, waistband slides down | Avoid for golf bottoms |
You can't guess recovery rate by feel. Ask your supplier for the spec—if they don't know, find a different supplier.
Silicone Grippers and Stitch Construction
If your golf bottoms have a slim fit or need to stay in place during a full swing, add silicone grippers to the waistband. These are thin strips of silicone bonded to the inside of the waistband—they grip the shirt or skin and prevent the waistband from sliding.
But watch the stitch construction. I've seen brands stitch straight through the elastic, which creates a weak point. Every time the elastic stretches, the stitching cuts deeper into the elastic fibers. After 20-30 wears, the elastic snaps at the stitch line.
The better method:
- Bartack the edges: Stitch only at the start and end of the elastic, not through the middle.
- Cover-stitch the edges: Use a cover-stitch machine to enclose the elastic edge without penetrating the elastic body.
This adds $0.05-0.10 per unit to the construction cost—but it prevents the elastic from breaking.
Woven Labels and Branding Trims: Main/Size/Care, Patches, and Tagless Options?
Woven labels last 100+ washes vs. 30-50 for printed labels. Use satin weave for soft feel (polos, base layers), taffeta weave for durability (outerwear). Position main labels at center back neck (fold and stitch edges), size labels at side seam, care labels inside back (heat-cut edges to prevent scratching).
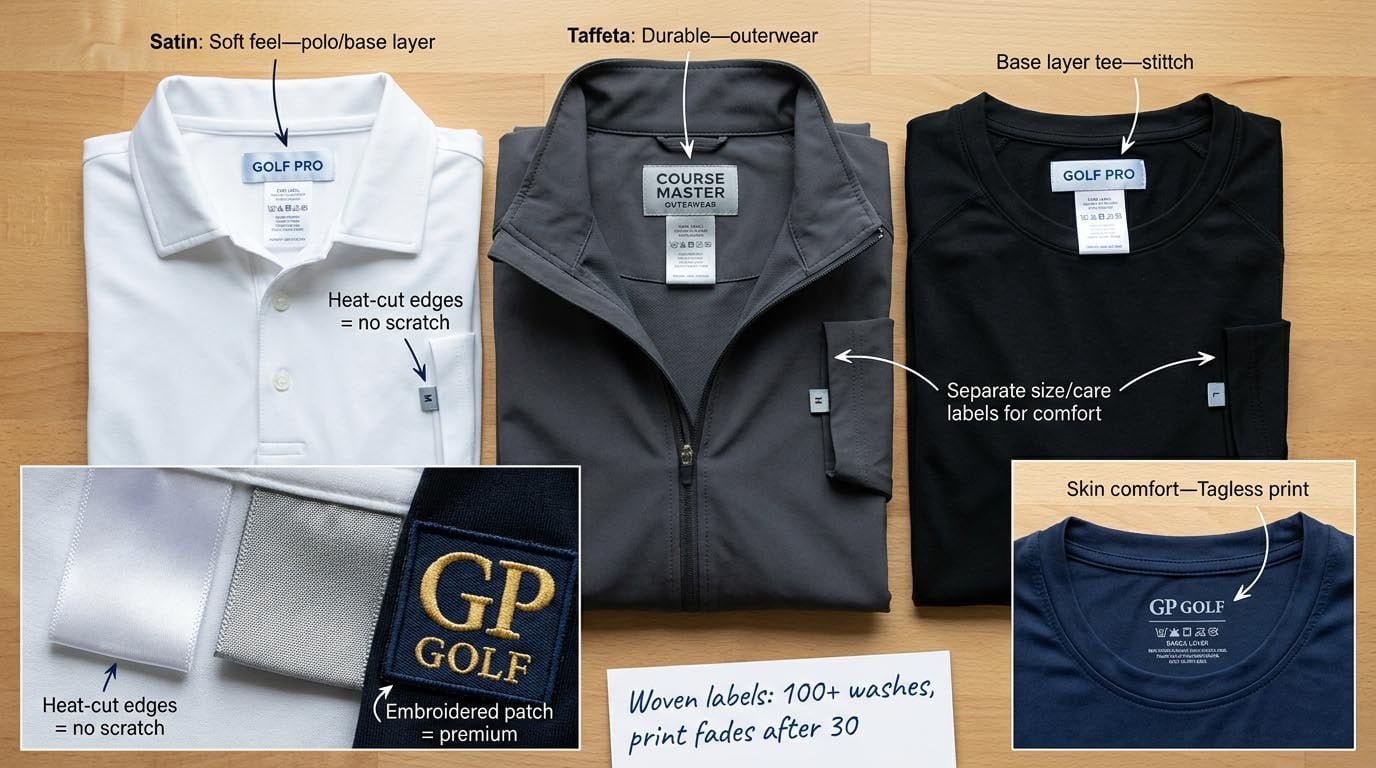
I've had customers ask whether they can skip woven labels and just print on the fabric. You can—but printed labels fade faster. After 30-40 washes, the text becomes hard to read. Woven labels stay sharp for 100+ washes, and they feel more premium.
Main Labels, Size Labels, Care Labels: Where to Place Them
There are three types of labels in most golf garments:
- Main label: Your brand name and logo. Goes at center back neck.
- Size label: Garment size (S, M, L, XL). Goes at side seam or below main label.
- Care label: Washing instructions and fiber content. Goes inside back, below main label.
The placement matters. I've seen brands put all three labels at the back neck—it feels bulky and scratches the skin. Separate them:
- Main label at center back neck (fold the edges and stitch down—don't leave raw edges)
- Size label at left side seam (inside the garment, not visible when worn)
- Care label inside back, stitched below main label (heat-cut the edges so they don't scratch)
Satin vs. Taffeta Weave: Soft vs. Durable
Woven labels come in two weaves:
- Satin weave: Soft, smooth surface. Feels comfortable against skin. Use for polos and base layers.
- Taffeta weave: Tighter, more durable. Stiffer feel but lasts longer. Use for outerwear and bottoms.
Most golf brands use satin weave for main labels (comfort) and taffeta weave for care labels (durability). Don't mix them up—a stiff main label will irritate customers.
Patches and Tagless Printing: When to Use Each
Some brands want embroidered patches or screen-printed labels instead of woven labels. Here's when each makes sense:
- Embroidered patches: More expensive ($0.30-0.80 per patch) but very durable. Use for premium lines or heritage branding.
- Tagless printing: Cheaper ($0.05-0.10 per garment) and no scratching. Use for moisture-wicking base layers where labels irritate skin. But printed labels fade faster.
I tell brands: if your target price is above $50 per unit, use woven labels and embroidered patches. If you're targeting $30-40 per unit, use woven labels for branding and tagless printing for care info. Below $30, tagless printing is fine.
FAQ: Golf Apparel Trims—Specs, Testing, Sourcing, and Compliance?
What Trim Specs Should I Ask My Supplier For?
Don't just ask "what zippers do you recommend?" Ask for these specs:
- Zippers: Type (coil/Vislon), tape width (usually 5mm for golf apparel), coating (anti-corrosion Y/N), slider type (auto-lock Y/N)
- Buttons: Material (polyester resin/metal/shell), attachment (sewn-through/shank), hole count (2-hole/4-hole)
- Elastics: Width, stretch percentage, recovery rate, silicone gripper (Y/N)
- Woven labels: Weave (satin/taffeta), width, fold type (end-fold/center-fold), edge finish (heat-cut/ultrasonic-cut)
If the supplier can't answer these, they're guessing. Find a different supplier.
How Do I Know If a Trim Will Pass Testing?
Most golf brands need trims to pass these tests:
- Colorfastness: Trim color shouldn't bleed onto fabric after washing (test: ISO 105-C06)
- Tensile strength: Buttons and snaps shouldn't break under normal stress (test: ASTM D2061)
- Nickel release: Metal parts shouldn't release nickel (skin irritation risk) (test: EN 1811)
Ask your supplier if their trims have been tested. If they say "yes," ask for the test reports. If they can't provide reports, assume the trims haven't been tested.
Should I Source Trims Myself or Let the Factory Handle It?
Most new brands let the factory source trims—it's simpler. But you give up control over quality and cost. I've seen factories mark up trim costs by 30-50% (they buy a zipper for $0.20 and charge you $0.30).
If you're ordering 1,000+ units per style, consider sourcing trims yourself. You'll save 10-20% on trim costs and you control the quality. But you'll need to manage logistics—delivering trims to the factory on time.
If you're ordering 300-500 units per style, let the factory handle it. The markup is smaller than the logistics headache.
What Happens If I Pick the Wrong Trim?
You'll either need to rework the order (replace all the trims and re-sew) or scrap the garments. I've handled both scenarios. Rework costs $3-5 per unit (labor + new trims). Scrap means you lose the entire fabric and construction cost.
The real cost of wrong trims isn't the $0.10-0.20 you saved on cheaper parts. It's the $3-5 per unit rework cost or the $8-12 per unit scrap cost. Always spec trims based on matching logic, not just price.
Conclusion
Choose trims that match your fabric specs and usage scenario—not just the lowest price. Test samples before production, specify the right attachment methods, and ask suppliers for test reports. Your trims either support your garment or ruin it.