
Designing golf apparel that looks sharp on a mood board is easy. Getting the first sample to fit correctly is harder. A polo can look clean on a hanger and still feel tight across the shoulders, loose at the waist, or restrictive at the top of the backswing.
For golf apparel brands, fit is not just about static measurements. It is about balancing three technical goals at the same time: swing mobility, a modern silhouette, and all-day comfort. The brands that get this right do not rely on vague fit comments like “fitted but functional.” They define measurable fit standards, test them in motion, and refine patterns before bulk production.
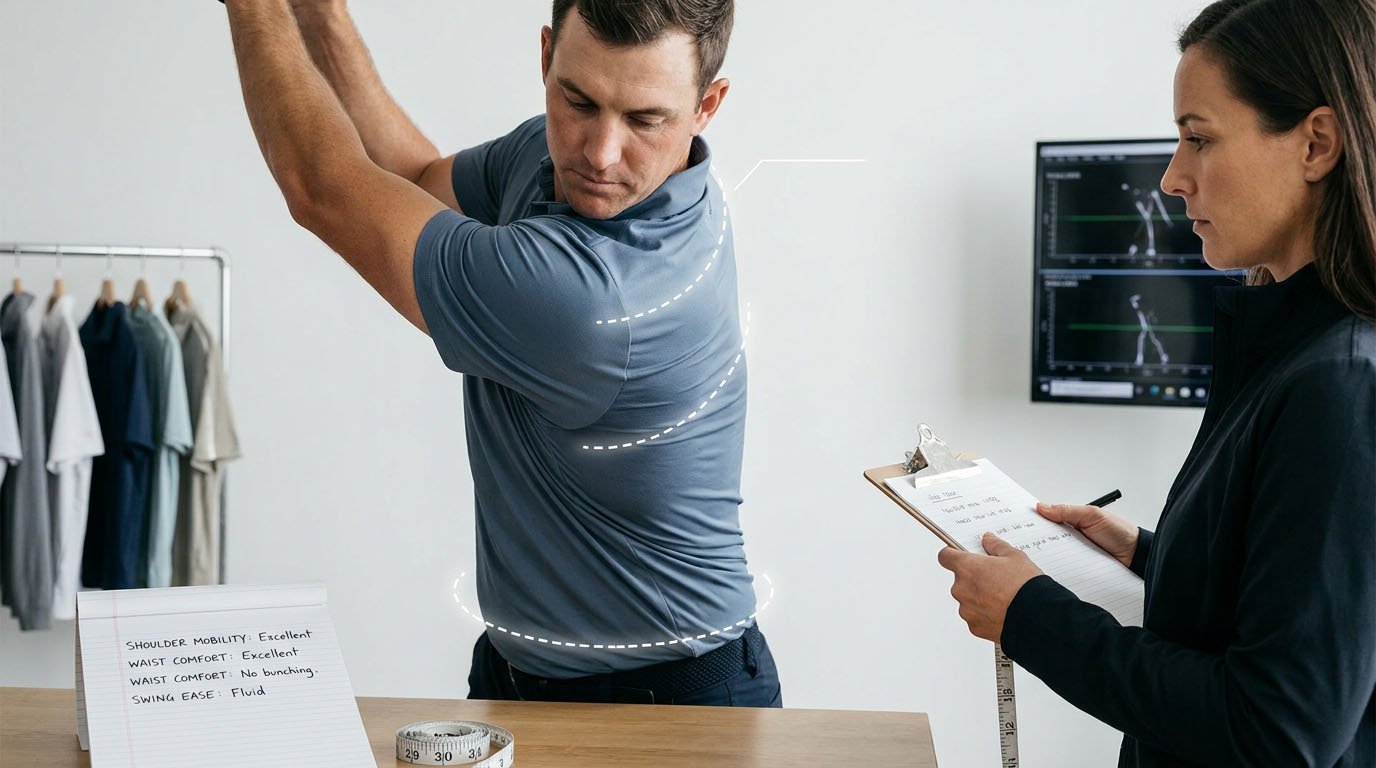
This guide explains how brands and product teams can build better-fitting golf apparel by focusing on the right fit zones, grading logic, and sample testing methods.
Fit is only one part of the launch process. If you also need help with product selection, fabrics, MOQ, and rollout planning, read how to start a golf apparel line.
Quick Answers: Golf Apparel Fit Essentials for Brands
Q1: What makes golf apparel fit different from regular apparel?
Golf apparel must perform during rotational movement, not just standing posture. A garment can match the size chart and still restrict shoulder turn or torso twist.
Q2: Which fit zones matter most for golf swing mobility?
The three highest-impact areas are shoulder slope, armhole shape and depth, and back width distribution.
Q3: What is the difference between modern golf fit and traditional golf fit?
Modern golf fit uses stretch fabric, engineered seam placement, and more precise ease allocation. Traditional golf fit relies more on excess room through the body.
Q4: What is the most common sizing mistake in golf apparel development?
Using woven ease standards for stretch knits, or grading all sizes proportionally without validating fit on real bodies.
Q5: How should brands test golf apparel fit before production?
Use a structured process that includes static fitting, movement testing, golf swing video analysis, and extended wear testing.
Why Golf Apparel Fit Requires a Different Development Approach
Golf apparel fit must be evaluated in motion, because the garment experiences rotational stress that standard casualwear fit methods do not fully account for.
Fit performance depends heavily on fabric behavior, so teams should review the best fabrics for golf apparel before finalizing mobility standards.
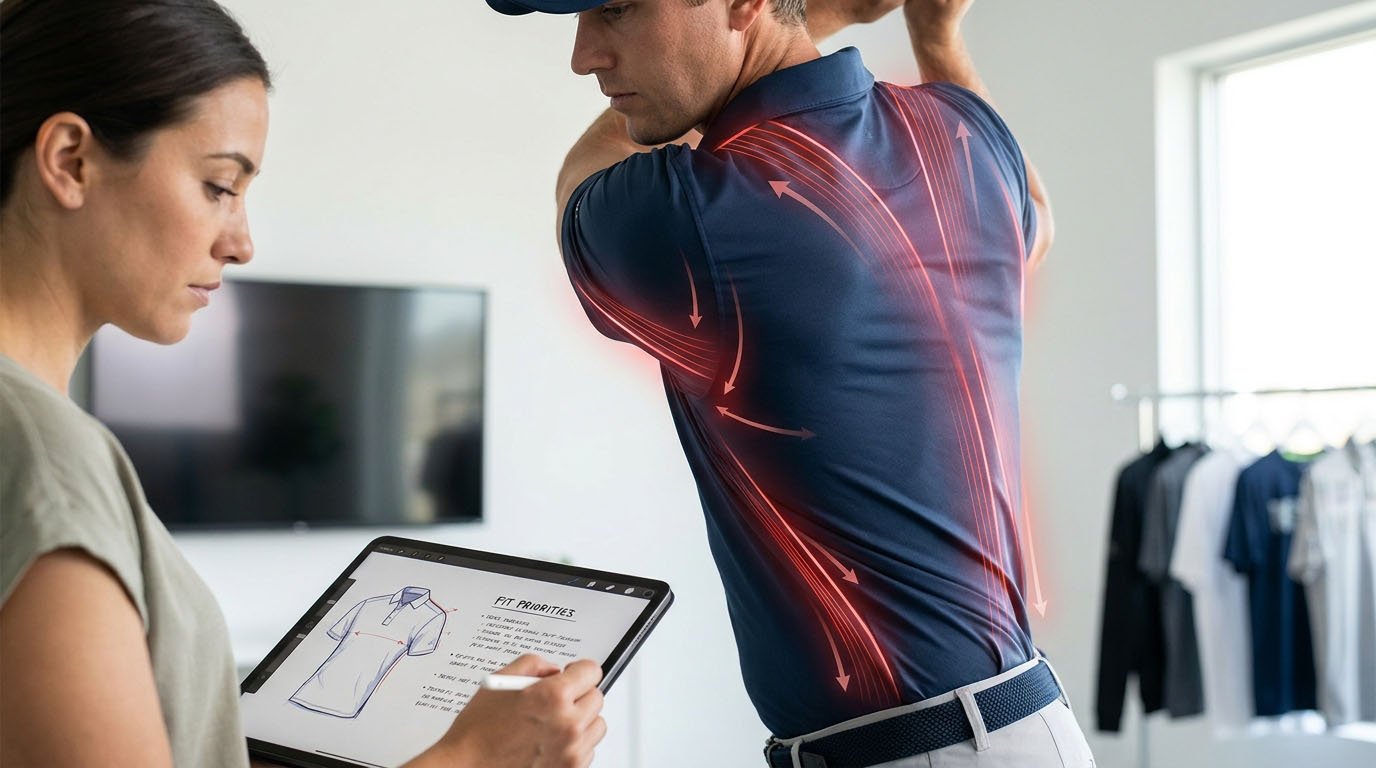
In golf, the body does not simply reach, bend, or walk. During the swing, the lead shoulder rotates down and back, the torso twists significantly, and the arms move through a fast and extended range of motion. For many players, torso rotation can approach 90 degrees from address position, and this happens quickly.
That creates a development problem for brands: a sample can measure correctly on the table and still fail on the body in motion.
This is one of the most common reasons first prototypes disappoint. Flat measurements may match the spec sheet, but the tester feels:
- tightness across the upper back
- drag lines at the armhole
- excessive hem lift during swing
- side seams shifting off balance
- a silhouette that looks good standing still but breaks down during movement
Traditional apparel fit standards mainly account for postural ease. Golf apparel needs rotational ease on top of that.
That is why brands should define fit goals in technical terms before sampling:
- How much chest ease is needed for the target silhouette?
- How much additional back width is required for shoulder rotation?
- How much hem lift is acceptable during motion testing?
- Should the fit rely on fabric stretch, pattern shaping, or both?
Without these decisions, fit comments stay subjective and revision cycles get expensive.
A useful decision framework for golf apparel brands
| Fit Priority | Technical Approach | Typical Trade-Off |
|---|---|---|
| Maximum mobility | More back ease, lower armhole pressure points, action construction | Looser silhouette |
| Modern silhouette | Stretch fabric, shaped side seams, controlled chest ease | Higher precision required in sizing and pattern |
| All-day comfort | Softer waistband, balanced body length, lower irritation seams | Slightly less structured look |
Most brands want all three at the maximum level. In practice, that rarely happens with a single fit block. The better approach is to prioritize one primary outcome, then engineer the pattern around it.
How Should Golf Apparel Fit for Swing Mobility?
Golf apparel should look controlled in a static fit but stay stable during shoulder rotation, torso twist, and arm extension.
For B2B product development, “good fit” should be translated into testable standards. A golf polo or quarter-zip should not simply look slim. It should also:
- maintain shoulder seam balance during backswing
- avoid visible pulling across the shoulder blades
- limit hem lift during arm raise and rotation
- keep side seams relatively stable
- allow full motion without changing swing path
A modern golf fit usually works best when:
- the front body stays visually clean
- mobility is built into the back, armhole, sleeve, and seam geometry
- ease is controlled rather than added uniformly everywhere
This is the difference between visual ease and functional ease. Brands often reduce one and accidentally remove both.
Key Golf Apparel Fit Zones: Shoulders, Armholes and Back Width
If your golf sample restricts swing motion, the root cause is usually in one of three zones: shoulder slope, armhole construction, or back width distribution.
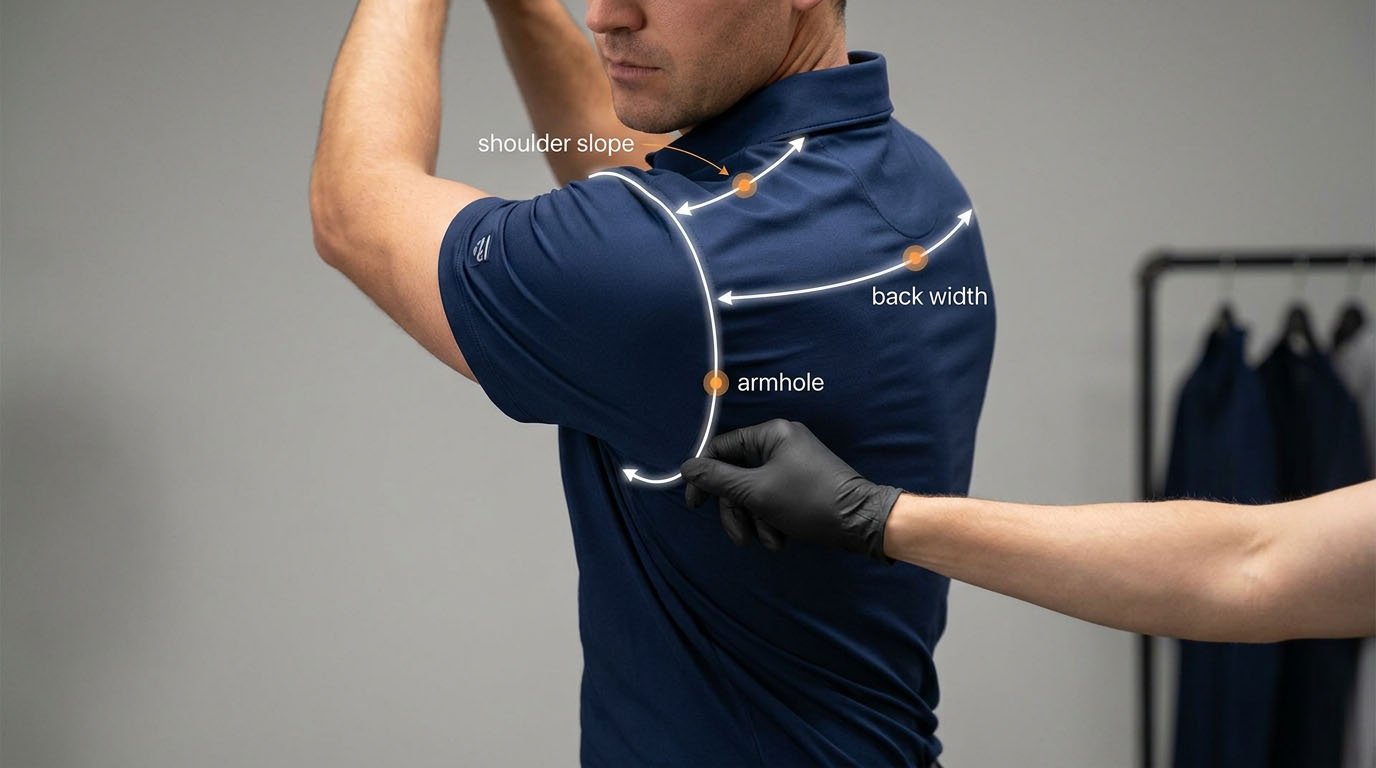
In our experience, these areas account for most fit-related mobility failures in golf tops.
1. Shoulder slope
Shoulder slope strongly affects how the garment reacts when the lead shoulder drops during the backswing.
A standard shirt pattern may use a shoulder slope around 20 to 22 degrees from horizontal. For golf-specific tops, product teams often need to adjust that to approximately 23 to 25 degrees, depending on the target body type, fabrication, and intended fit profile.
A small slope adjustment can reduce:
- upper back tension
- shoulder seam displacement
- neckline distortion during swing
If the slope is too flat, the fabric tends to fight the shoulder’s natural movement and creates drag across the upper back.
2. Armhole depth and shape
Armhole balance is one of the biggest differences between fashion fit and functional athletic fit.
- A very deep armhole may improve range but often looks sloppy.
- A very high and tight armhole can look modern but restrict rotation.
For golf apparel, many brands find the best balance with the armhole bottom approximately 1.5 to 2 inches below the natural underarm point, depending on style category and fabric stretch.
Just as important as depth is curve shape. A golf-specific armhole often requires:
- slightly more back armhole curve length
- slightly less front curve pressure
- sleeve geometry that follows shoulder blade movement more naturally
In practice, brands may add roughly 0.5 to 0.75 inches to the back armhole curve while controlling the front. On paper this can look asymmetric, but in wear it often feels more natural.
3. Back width distribution
Back mobility is frequently under-engineered because teams focus too much on chest circumference and waist shaping.
In golf tops, the body needs room to rotate through the back. Many successful fit blocks shift more width toward the center back and upper back zone, instead of distributing it evenly across the front and back panels.
Typical adjustment strategies include:
- adding 1 to 1.5 inches to total back width
- reducing excess front panel ease
- slightly rebalancing side seam position
- introducing back seam or yoke structures that support expansion
This helps reduce the common problem where the front looks acceptable but the back locks during motion.
A practical fit check for these three zones
During sample reviews, product teams should verify:
- Shoulder seam position: seam should stay near the natural shoulder during backswing
- Arm raise test: raising both arms should not create major hem lift; around 1 inch is usually acceptable for close-fitting tops
- Back mobility test: crossing arms in front should not create aggressive pull lines across the shoulder blades
- Torso twist test: side seams should remain relatively balanced during left and right rotation
If your brand can only afford one fit revision, these are the first zones to address.
Modern Golf Fit vs Traditional Golf Fit
Modern golf fit achieves mobility through fabric performance and pattern engineering. Traditional golf fit relies more on excess ease.
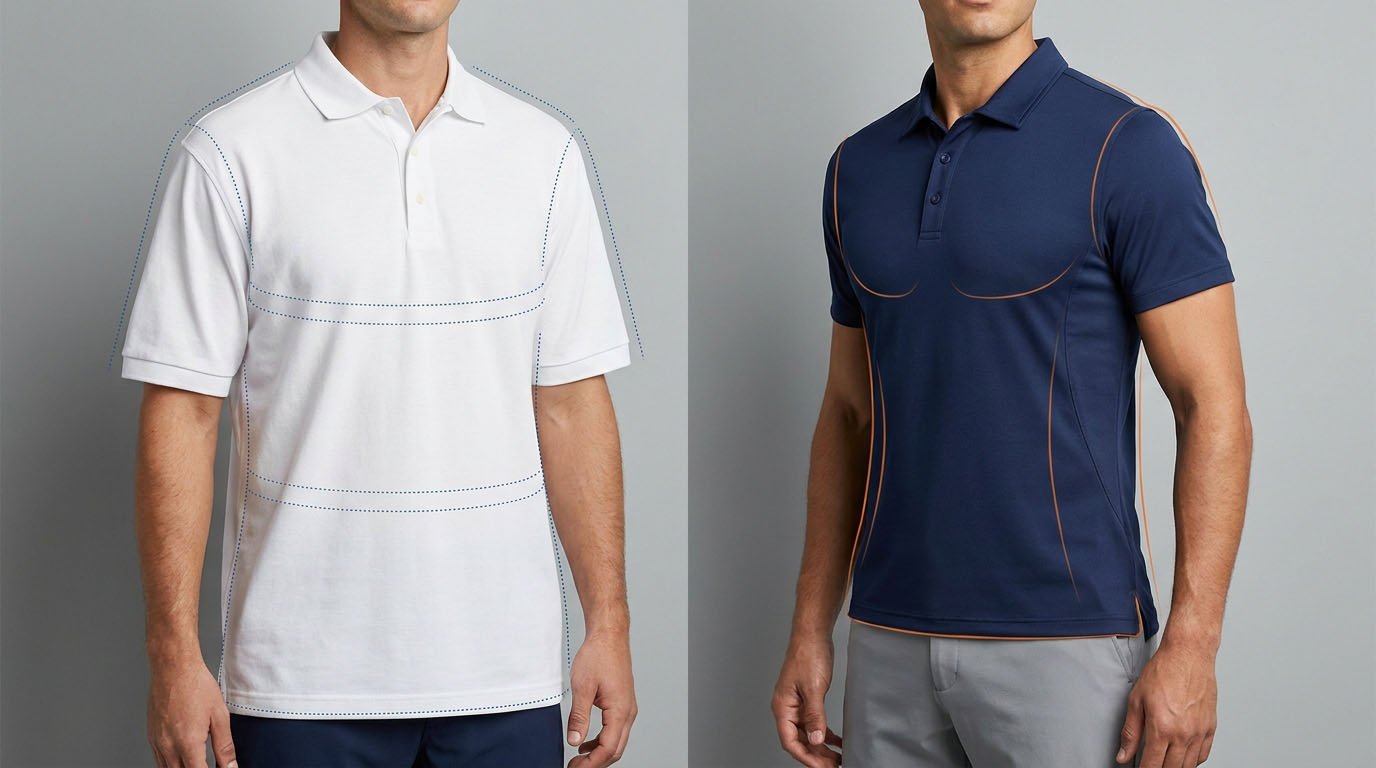
For many brands, the market has shifted. Consumers still expect comfort, but they also expect a cleaner silhouette that can work both on course and off course.
That changes the technical approach.
Traditional golf fit
A more traditional golf fit often includes:
- larger chest ease
- straighter side seams
- longer, looser body
- limited contouring
- mobility created by extra volume
This approach is functional and forgiving, especially in low-stretch woven fabrics. It also reduces size sensitivity, which can help with broad-market products.
Modern golf fit
Modern golf fit is more precise. It usually includes:
- lower total ease through chest and waist
- shaped side seams
- cleaner shoulder and sleeve profile
- stretch performance fabrics
- seam placement that helps manage stress during motion
Rather than adding room everywhere, modern fit allocates ease where movement needs it most.
Pattern construction differences
| Pattern Element | Traditional Golf Fit | Modern Golf Fit |
|---|---|---|
| Chest ease | Higher, often +4 to 5 inches | Lower, often +2 to 3 inches in stretch polos |
| Side seam | Straight or lightly shaped | More contoured |
| Hem profile | Longer and straighter | Controlled length, sometimes curved |
| Sleeve setup | Looser set-in sleeve | Close but engineered sleeve or raglan option |
| Back construction | Basic back panel or yoke | Action back, split back, shaped yoke, or mobility seam |
Why this matters for brands
Modern fit usually offers:
- stronger brand perception
- higher perceived value
- better lifestyle crossover appeal
But it also requires:
- better fabric selection
- more accurate size grading
- more disciplined fit testing
- tighter manufacturing control
For many brands, a smart range strategy is:
- premium line: modern fit with engineered mobility
- entry or value line: modified traditional fit with easier size tolerance
Recommended Fit Standards for a Modern Golf Polo
Brands should define measurable fit standards before sample approval.
For polo-specific material trade-offs, see our guide to the best fabrics for golf shirts.
These standards vary by category and target customer, but for a modern performance golf polo, many teams use benchmarks like these:
- Shoulder seam stays near the natural shoulder in static fit and does not shift significantly during backswing
- No strong drag lines across upper back during 75% speed swing testing
- Hem lift during arm raise stays within about 1 inch
- Hem lift during controlled swing testing stays within about 2 inches
- Chest ease stays controlled, often in the 2 to 3 inch range for stretch performance fabrics
- Side seams remain reasonably balanced during torso rotation
- Collar remains stable and does not collapse or twist excessively during wear
- Garment allows full swing path without the tester shortening motion
These are not universal rules, but they create a much clearer approval standard than general comments like “looks a little tight.”
How to Fit Test Golf Apparel for Swing Mobility and Comfort
Static try-ons are not enough. Brands should validate golf apparel in motion and document the results with photos and video.
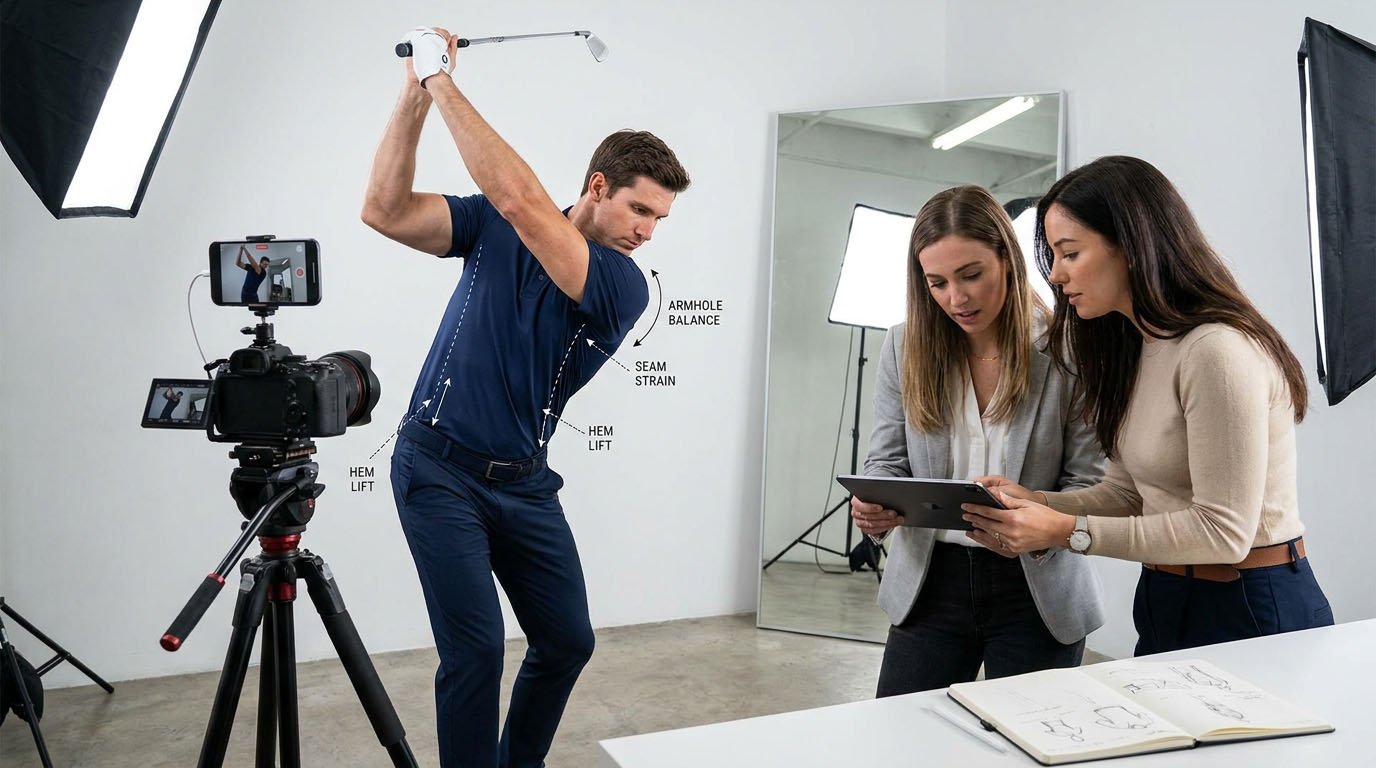
A structured fit testing process reduces revision cycles and gives factories clearer correction instructions.
Step 1: Establish the static fit baseline
Start with a fit model who matches the intended size and target customer profile as closely as possible.
Capture photos from:
- front
- back
- left side
- right side
Check:
- shoulder seam placement
- chest smoothness
- waist and hip balance
- body length
- sleeve length
- collar position
This baseline matters because movement issues are easier to diagnose when the static fit is already documented.
Step 2: Run a basic movement sequence
Before swing testing, evaluate simple motion:
- raise both arms overhead
- cross arms in front of chest
- twist torso left and right
- bend forward at the waist
These movements reveal many failures early, including:
- poor armhole balance
- insufficient back width
- excessive hem movement
- torso length problems
Step 3: Test real swing motion
Have the fit model perform 5 to 7 practice swings at roughly 75% speed.
Capture at least:
- face-on view
- down-the-line view
- rear view
Review the footage in slow motion if possible.
Look for:
- diagonal pull lines
- seam displacement
- hem lift
- collar collapse
- visible restriction in the tester’s swing path
Common issues and likely causes
| Observed Issue | Likely Cause | Typical Pattern Adjustment |
|---|---|---|
| Back pulls at top of backswing | Back too narrow, slope too flat | Add back width, adjust shoulder slope |
| Excessive hem lift | Insufficient body length or poor balance | Add length, review hem weight and distribution |
| Armhole cuts during rotation | Armhole too high or back curve too tight | Lower armhole slightly, reshape back armhole |
| Side seams shift forward | Front/back balance issue | Redistribute ease toward back panels |
Step 4: Add extended wear testing
Short fittings do not always reveal comfort issues.
When possible, have the tester wear the garment for 2 to 3 hours of normal use and note:
- waistband pressure
- seam irritation
- collar behavior
- fabric recovery
- shape retention
This step is especially important for:
- polos with stretch rib or waistband details
- quarter-zips
- skorts or pants with elasticized waist systems
- garments intended for travel or all-day wear
Step 5: Document every fit round
For each sample, brands should keep:
- static fit photos
- movement test notes
- swing test clips
- measurement deviations
- revision requests
- comparison against previous sample rounds
This creates a fit history that improves future seasons and reduces repeated mistakes.
Common Golf Apparel Sizing and Grading Mistakes
Most golf sizing problems happen because brands apply the wrong grading logic for stretch fabrics or fail to validate size progression on body.
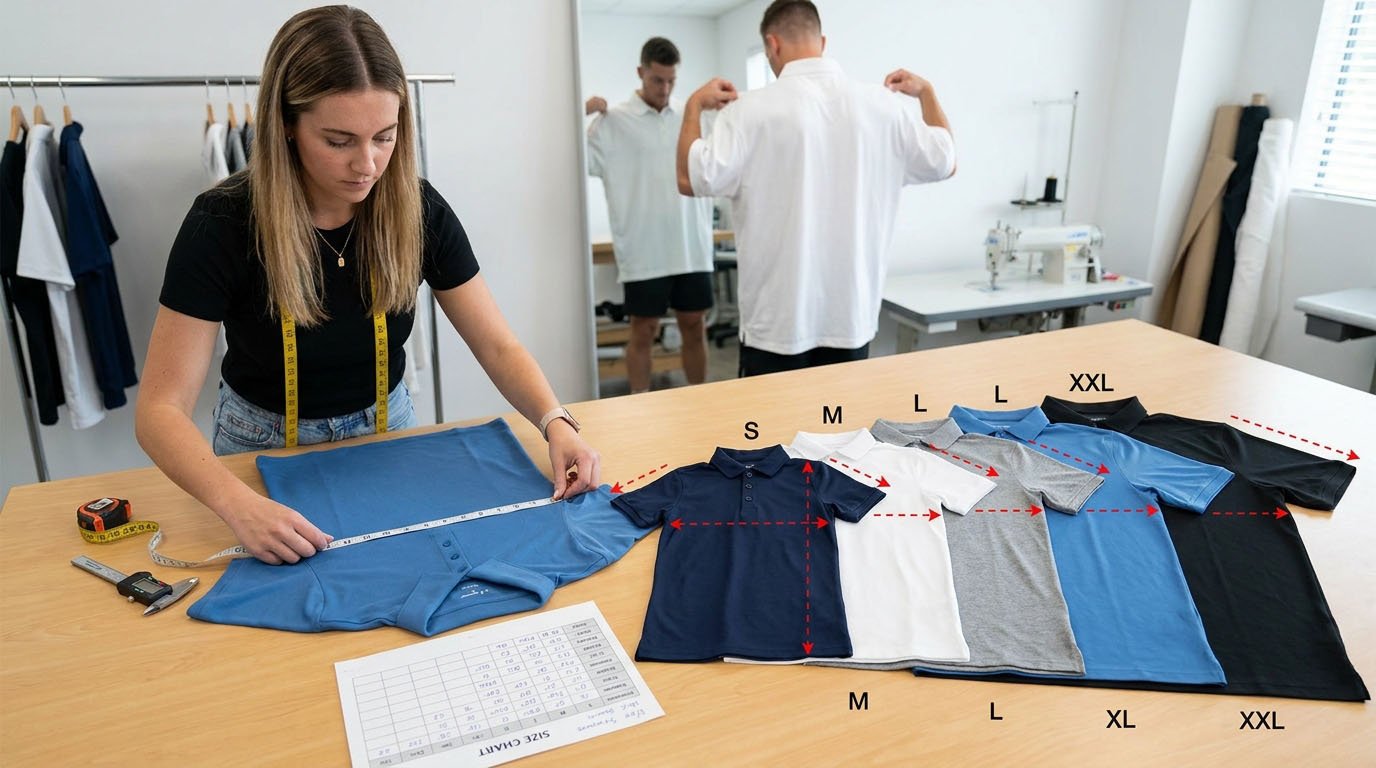
Mistake 1: Using the same ease logic across all sizes
A fixed ease amount does not create a consistent visual fit across the size range.
For example, if all sizes receive the same chest ease:
- smaller sizes may look appropriate
- larger sizes may look too loose and boxy
Many brands get better results by reducing ease proportionally in larger sizes.
A common approach is:
- S to M: approximately +3 to 4 inches of ease
- L to XL: approximately +3 to 3.5 inches
- XXL and above: approximately +2.5 to 3 inches
The exact values depend on category and fabric, but the principle is important: ease should be visually calibrated, not copied equally.
Mistake 2: Grading stretch knits like woven garments
Performance golf polos and mid-layers often use fabrics with meaningful mechanical stretch. If brands apply woven grading increments, size jumps can become too large.
For stretch categories, many teams use tighter increments, often around:
- 0.75 to 1 inch for circumference progression between sizes
That improves:
- size consistency
- customer selection accuracy
- return rate performance
Mistake 3: Scaling all measurements proportionally
Real bodies do not scale evenly in all dimensions.
Circumference usually changes more than:
- body length
- sleeve length
- shoulder width
A more realistic grading system often looks like this:
- Chest, waist, hip: grade more aggressively
- Body length, sleeve length: grade more lightly
- Shoulder and back width: use moderate progression
This avoids larger sizes becoming too long or unbalanced.
Mistake 4: Ignoring target market body proportions
Different customer groups may share the same nominal size labels but differ in proportion:
- torso length relative to chest
- shoulder breadth relative to waist
- sleeve length relative to body length
For brands selling internationally, this may require:
- regional grading adjustments
- separate fit blocks
- market-specific size chart communication
Mistake 5: Finalizing size charts without physical validation
Mathematical grading is not enough.
At minimum, brands should test:
- one core size
- one smaller size
- one larger size
This reveals whether the progression still looks and performs consistently on body.
How to Build a Better Golf Apparel Size Chart for Customers
A customer-facing size chart should support both conversion and fit accuracy. For brands, this means separating internal technical specs from public buying guidance.
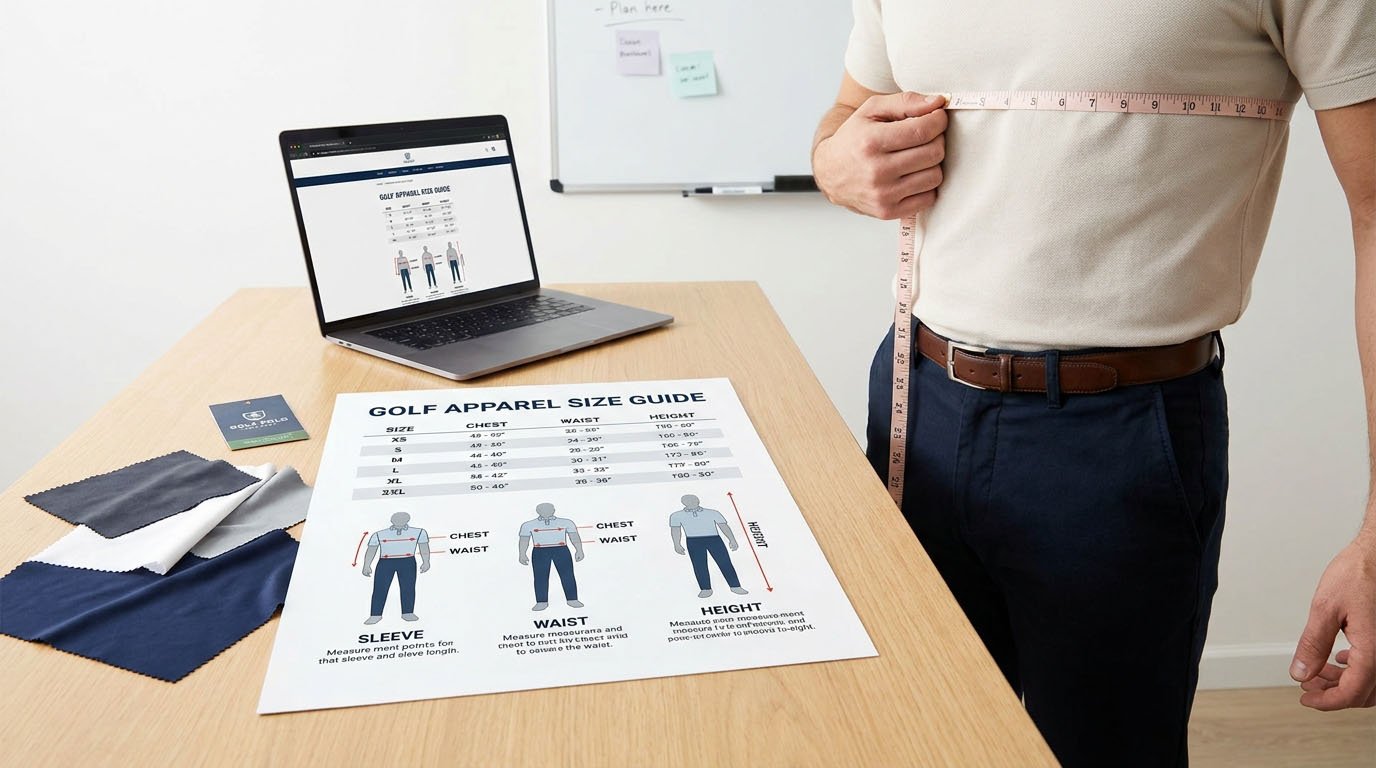
Many brands make the mistake of publishing a factory-oriented measurement table that ordinary customers do not understand.
What to include in a customer-facing size chart
1. Body measurements first
Lead with body measurements, not garment measurements.
| Size | Chest (Body) | Waist (Body) | Height Range |
|---|---|---|---|
| S | 34 to 36 in | 28 to 30 in | 5'6" to 5'9" |
| M | 38 to 40 in | 31 to 33 in | 5'8" to 5'11" |
| L | 41 to 43 in | 34 to 36 in | 5'10" to 6'1" |
| XL | 44 to 46 in | 37 to 39 in | 5'11" to 6'2" |
2. Fit intent language
Tell the customer how the garment is supposed to feel.
Example:
This golf polo is designed with a modern athletic fit. It sits close to the body without restricting shoulder rotation or torso movement. Customers who prefer a more relaxed fit should consider sizing up.
3. Measurement instructions
Explain how to measure:
- chest
- waist
- sleeve
- inseam where relevant
Add diagrams if possible.
4. Garment dimensions for comparison shoppers
Some buyers want actual garment specs.
| Size | Garment Chest (Pit to Pit) | Body Length (HPS to Hem) | Sleeve Length (CB to Cuff) |
|---|---|---|---|
| M | 21 in | 29 in | 34 in |
| L | 22 in | 29.5 in | 34.5 in |
5. Fabric and stretch note
If the product uses stretch performance fabric, say so clearly.
Example:
This fabric contains stretch for golf swing mobility and may feel more fitted than a standard cotton polo while still allowing full movement.
A clear size chart reduces returns and increases buyer confidence. For brands, it is both a customer service tool and a profitability tool.
Best Practices for Brands Developing Golf Apparel Fit Blocks
Strong golf fit starts with a reusable fit block, not isolated one-off sample corrections.
Brands that consistently improve fit usually standardize:
- one or more golf-specific fit blocks by category
- approved ease targets by fabric type
- movement testing standards
- grading rules for stretch vs woven
- fit comments terminology used across teams and factories
A useful internal system includes:
- fit block by category: polo, quarter-zip, trouser, skort, outerwear
- fabric class rules: low stretch, moderate stretch, high stretch
- mobility benchmarks: acceptable hem lift, seam shift, pull line severity
- revision log: what changed and why
This helps product developers move faster season to season and creates consistency across factories.
Internal Golf Apparel Fit Checklist for Product Teams
Before approving a pre-production sample, ask:
Static fit
- Does the shoulder seam sit correctly?
- Is the silhouette aligned with the intended market position?
- Is front body appearance clean?
Mobility
- Can the tester rotate fully without visible restriction?
- Does the upper back stay smooth enough during swing?
- Is hem lift within the approved range?
Comfort
- Are there any pressure or irritation points?
- Does the collar remain stable?
- Does the garment recover shape after wear?
Sizing
- Does this sample match the approved grade logic?
- Has the adjacent size been validated?
- Is the public size chart aligned with the actual fit intent?
Production readiness
- Can the factory repeat this fit consistently?
- Are the critical points clearly documented in the tech pack?
- Are revision notes measurable, not subjective?
FAQ: Golf Apparel Fit for Brands
How should a golf polo fit?
A golf polo should feel controlled but not restrictive. It should sit close enough to look modern, while allowing full shoulder rotation, torso twist, and stable hem behavior during swing.
Should golf shirts be slim or loose?
For most premium brands today, the best option is neither overly slim nor loose. A modern athletic fit usually performs best, especially when stretch fabric and proper back mobility are built into the pattern.
What is the most important measurement for golf apparel fit?
There is no single measurement. The most important combination is usually shoulder slope, armhole construction, and back width distribution.
How do you test golf apparel fit correctly?
Use a multi-step process: static fitting, basic movement, swing testing with video, and extended wear testing.
Can stretch fabric replace proper pattern development?
No. Stretch fabric helps reduce excess ease, but it does not eliminate the need for balanced pattern construction and tested grading.
For bottoms, many of the same fit principles apply differently through the waist, crotch, thigh, and knee—see how to design golf shorts and pants.
Conclusion: Better Golf Apparel Fit Starts Before Production
Golf apparel fit is not solved by making garments looser or tighter. It is solved by understanding how swing movement affects the garment and turning that knowledge into measurable development standards.
For brands, the biggest improvements usually come from:
- engineering shoulder, armhole, and back fit more carefully
- separating visual fit from functional fit
- testing in real golf motion, not only static fitting
- grading stretch fabrics correctly
- validating size progression before bulk production
Brands that do this well reduce fit revisions, improve consistency, and create products that perform better both on course and at retail.
Better fit becomes even more valuable when it is built into a realistic first collection plan, which we outline in how to start a golf apparel line.
Need Help Developing Golf Apparel Fit, Sizing or Production Samples?
If your team is building a golf apparel line and needs support with:
- golf polo fit blocks
- swing mobility refinement
- size grading
- fit sample review
- tech pack development
- pre-production fit validation
we can help streamline the process from concept to production-ready approval.
Contact us to review your golf apparel development process or fit standards.