A client sent me a sample they received from another factory. The collar twisted after one wash. The placket puckered. The sleeve seams showed visible pulling. They asked what went wrong. I examined the sample. The factory used unstabilized collar interlining, skipped pre-shrinking the fabric, and cut sleeves off-grain. These are visible quality markers in samples—if you know what to check.
Making a golf polo requires coordinating fabric selection, pattern engineering, collar construction, placket assembly, and finishing—with quality checkpoints at each stage that buyers must verify in samples before authorizing bulk production to avoid receiving defective inventory.

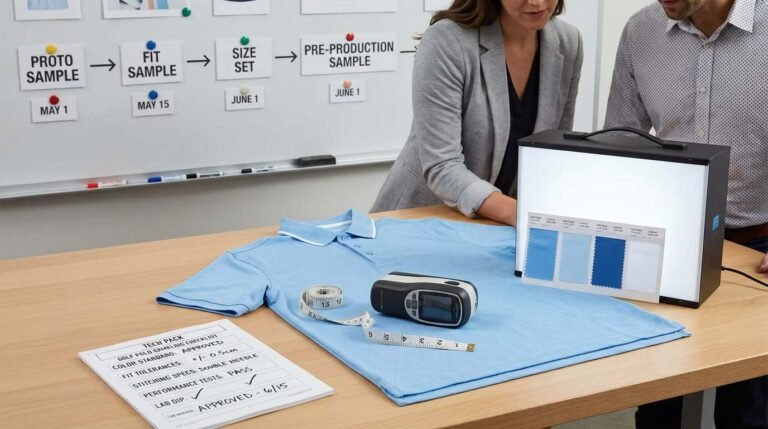
I am Will from FUWAY. I review 200-300 pre-production samples annually for clients placing custom golf polo orders. My role is catching construction defects, fit inconsistencies, and fabric quality issues before bulk production begins. Most buyers approve samples without knowing what to inspect. They check if colors match and logos are positioned correctly, but miss critical construction details that determine whether polos hold up after 20 washes or fall apart after five. This guide shows you what happens at each manufacturing stage and what quality markers to verify so you can evaluate factory capabilities and protect your investment.
Quick Answers: Golf Polo Shirt Manufacturing
What fabric weight is best for golf polos?
140-180 GSM (grams per square meter) for performance golf polos. 160-180 GSM provides better opacity and durability for retail positioning. 140-160 GSM offers lighter weight for hot weather or athletic performance. Below 140 GSM risks sheerness and reduced durability. Above 200 GSM feels heavy and limits stretch.
What is the difference between piqué and jersey knit for golf shirts?
Piqué has textured surface (small raised pattern) that increases breathability and hides wrinkles—traditional for golf polos. Jersey is smooth single-knit that offers more stretch and softer hand feel—common for performance athletic wear. Piqué looks more formal, jersey more casual.
How do you ensure collar quality in custom polo production?
Collar quality depends on interlining selection (fusible vs sewn-in), proper grain alignment when cutting collar pieces, adequate stitching density at collar points, and matching collar curve to neckline curve. Request pre-production samples and wash them twice to verify collar maintains shape and does not twist.
What MOQ do you need to use custom performance fabrics?
500-800 pieces minimum for performance fabrics from factory stock inventory. 1,000-1,500 pieces for semi-custom fabric sourcing from mill partners. 1,500-2,500 pieces for fully custom fabric development with proprietary blends or treatments. Below 500 pieces, you must use whatever fabrics the factory already stocks.
How long does pattern development and sampling take?
2-3 weeks for pattern drafting and first proto sample. Add 1-2 weeks per revision round (typically 2-3 rounds needed). Total: 4-8 weeks from initial tech pack to approved pre-production sample. Rush sampling is possible but costs 20-30% premium and limits revision depth.
What should you check in pre-production samples before approving bulk?
Wash samples twice and check for shrinkage, color fading, and collar/placket stability. Measure across chest, length, and sleeve after washing to verify sizing. Inspect seam quality for puckering or skipped stitches. Check logo placement accuracy. Verify fabric opacity by backlighting. Test all buttons and placket durability.
Can you change design details after sampling without restarting pattern development?
Minor changes (logo size, trim color, label design): no pattern impact, can adjust in bulk production. Moderate changes (collar style, placket type, hem shape): requires new pattern and sampling, add 2-3 weeks. Major changes (fit adjustment, sleeve length, body proportions): requires complete pattern rework, restart sampling process.
What Fabric Performance Features Actually Matter and How Do You Verify Them?
Fabric performance claims require verification through testing or mill documentation before approving samples. Without documented performance specs, you cannot verify the factory delivers what you specified or make substantiated marketing claims.

Fabric Construction Types
Piqué knit:
Raised textured surface created by alternating knit patterns. Creates small air pockets that improve breathability. More structured than jersey. Resists wrinkles better. Traditional choice for golf polos. Weight range: 160-220 GSM.
Common blends: 100% cotton (classic feel, limited stretch), 65% polyester / 35% cotton (moisture-wicking, wrinkle-resistant), 100% polyester (full performance features, synthetic feel).
Jersey knit:
Single-knit smooth surface. Higher stretch than piqué. Softer hand feel. More casual appearance. Better drape and mobility. Weight range: 140-180 GSM.
Common blends: 88% polyester / 12% spandex (4-way stretch), 95% cotton / 5% spandex (natural feel with stretch), 100% polyester (performance-focused).
Interlock knit:
Double-knit construction creating smooth surface both sides. More stable than jersey with less stretch. Heavier weight and better opacity. Less common for golf polos but used in premium lines. Weight range: 180-220 GSM.
Performance Treatments and Verification
Moisture-wicking:
Fabric construction or chemical treatment that pulls moisture away from skin to outer surface for faster evaporation. Verify by requesting lab test reports showing moisture management rate (MMR). Without testing, "moisture-wicking" is just marketing.
Test it yourself: Wet the sample fabric and time how long it takes to dry compared to untreated fabric. True wicking fabrics dry 30-50% faster.
UV protection (UPF rating):
Fabric density and construction that blocks UV rays. UPF 30 blocks 96.7% of UV. UPF 50+ blocks 98%+ UV. Requires third-party testing to substantiate claims. Ask factory for UPF test reports from certified labs.
Cannot verify visually—must rely on documentation. If factory cannot provide test reports, do not make UPF claims.
Anti-microbial treatment:
Chemical treatment that inhibits bacterial growth and reduces odor. Common treatments: silver ion, zinc pyrithione, or proprietary antimicrobial finishes. Verify through AATCC 147 test reports.
Treatment durability matters: ask how many washes the antimicrobial treatment survives. Many treatments wash out after 10-15 cycles.
4-way stretch:
Fabric stretches in both horizontal and vertical directions. Requires spandex or elastane content (typically 5-15%). Test by pulling fabric in both directions—should stretch 30-40% and recover quickly without distortion.
Check recovery after stretching: hold fabric stretched for 30 seconds, release, observe if it returns to original shape within 5-10 seconds.
Questions to Ask Suppliers About Fabric
Before approving fabric selection, ask:
- "What is the exact fabric composition and weight?" (Do not accept vague answers like "performance blend")
- "Can you provide mill specifications or test reports for performance claims?"
- "What is the MOQ for this specific fabric in my color?" (Fabric availability affects MOQ more than garment construction)
- "How much shrinkage should I expect after first wash?" (Acceptable: 3-5%. Concerning: 7%+)
- "Do you stock this fabric or will you order it specifically for my production?" (Stock fabrics reduce lead time and MOQ)
- "Can you send me a fabric swatch before sampling so I can feel hand and weight?" (Saves sampling rounds if fabric is wrong)
I see buyers approve fabrics based on photos or descriptions without touching samples. Fabric hand feel, weight, and stretch cannot be assessed visually. Always request swatches before committing to sampling with any fabric.
How Does Pattern Engineering Affect Fit, Customization Cost, and MOQ?
Pattern complexity determines how much customization is feasible at your MOQ level. Simple modifications work at 300-500 pieces. Complete custom pattern development requires 800-1,500 pieces to justify fixed costs.

Pattern Development Approaches
Using factory's existing pattern block:
Fastest and cheapest option. Factory has proven patterns for standard, slim, or athletic fits. You adjust minor details (sleeve length, hem shape, collar style) without changing core fit. Pattern cost: $0-150. Sampling: 1-2 rounds. Works well for orders under 500 pieces.
Limitation: Fit is predetermined. If factory's athletic fit is not your target fit, adjustments are limited.
Modifying existing pattern:
Factory starts with their base pattern and makes significant modifications—adjusting shoulder slope, armhole depth, torso taper, or sleeve shape. Pattern cost: $200-400. Sampling: 2-4 rounds. Requires 500-800 pieces to justify costs.
Limitation: Still constrained by original pattern structure. Cannot dramatically change proportions.
Custom pattern from scratch:
Factory drafts entirely new pattern based on your measurements and fit specifications. Full control over proportions and fit profile. Pattern cost: $400-800. Sampling: 3-5 rounds with fit adjustments. Requires 1,000+ pieces to justify investment.
Best for: Brands with specific fit identity or targeting body types not served by standard patterns.
Key Pattern Specifications
Fit profile:
Standard fit: 4-6 inches ease at chest (garment measures 4-6 inches larger than body measurement)
Slim fit: 2-4 inches ease at chest
Athletic fit: 3-5 inches at chest, 2-3 inches at waist (tapered torso)
Specify chest, waist, and hip ease in your tech pack. Do not just say "athletic fit"—factories interpret this differently.
Sleeve options:
Set-in sleeve: Traditional construction with shoulder seam at natural shoulder point. Most common for golf polos. Provides formal appearance.
Raglan sleeve: Diagonal seam from underarm to neckline. Allows more shoulder mobility. More casual appearance. Requires different pattern structure.
Short sleeve length: Specify exact length from shoulder seam (typically 7-9 inches for men's polos). Verify on samples worn on body, not laid flat.
Hem shape:
Straight hem: Simple construction, clean appearance, works for tucked or untucked wear.
Curved hem: Side seams curve up 1-2 inches from front/back hem. More flattering untucked. Requires pattern adjustment and slightly higher cost (+$0.15-0.30 per unit).
Pattern Verification in Samples
When you receive fit samples, check:
Shoulder fit: Shoulder seam should sit at natural shoulder point, not drooping down arm or pulling toward neck.
Chest and torso proportions: Measure sample laid flat across chest at 1 inch below armhole. Compare to your spec. Verify sample matches target ease.
Sleeve length and armhole: Sleeves should end mid-bicep for traditional length. Armhole should allow comfortable arm movement without binding.
Hem balance: Lay sample flat and check that front and back hems are equal length. Uneven hems indicate pattern drafting error.
Collar to body proportion: Collar should fit close to neck without gaping or choking. Check both buttoned and unbuttoned.
Do not approve patterns based on photos. Request physical samples and either try them on yourself (if you match target sizing) or have someone in each size range try them. Photos hide fit issues.
What Determines Collar Quality and How Do You Verify It Before Bulk Production?
Collar quality depends on interlining selection, grain-accurate cutting, proper interfacing application, and construction method. These factors are testable in samples before bulk production—washing samples twice reveals whether collars will hold up.

Collar Interlining Options
Fusible interlining:
Thin fabric with heat-activated adhesive on one side. Fused to collar fabric under heat and pressure. Creates smooth, flat collar. Common for performance polos using synthetic fabrics.
Quality check: After washing sample, check if interlining is still firmly bonded. Poor-quality fusible delaminates (separates from fabric) after 3-5 washes.
Sewn-in interlining (collar canvas):
Woven or knit interlining sewn into collar layers without adhesive. More durable than fusible but adds thickness. Traditional method for cotton polos. Maintains shape through 50+ washes.
Quality check: Feel collar stiffness and thickness. Sewn interlining creates slightly thicker, more rigid collar.
No interlining (self-fabric collar):
Two layers of same fabric as body, no stabilization. Very soft collar that maintains knit stretch. Used in ultra-soft performance polos. Less structured appearance.
Quality check: Collar will be very flexible and may roll or curl slightly. This is intentional for soft hand feel.
Collar Construction Method
Standard flat collar:
Two layers of fabric (top and under collar) with interlining between. Stitched around edge, turned right side out, topstitched. Most common construction.
Topstitching is critical: Should be 2-3mm from edge, even spacing, no skipped stitches. Check topstitch quality on samples.
Stand collar with flat collar:
Small stand (1-2cm high band) at neckline with flat collar extending from stand. Creates more formal appearance and helps collar hold shape. Requires more precise construction.
Common defect: Stand height uneven on left and right sides. Check symmetry on samples.
What to Test in Collar Samples
Wash test (most important):
Wash sample twice using warm water and tumble dry. Examine collar after each wash:
- Does collar twist or curl?
- Does interlining separate or bubble?
- Does topstitching remain flat or pucker?
- Do collar points maintain symmetry?
If collar shows any of these issues after two washes, reject the sample and request construction changes before bulk production.
Grain alignment test:
Lay sample flat and look at collar surface. If collar fabric grain (direction of knit ribs) runs at angle instead of straight, collar will twist when washed. This is cutting error, not design issue.
Collar roll test:
Button top button and stand sample upright. Collar should roll smoothly back from button placket. Should not stand straight up or lay completely flat. Check if collar roll is symmetrical on both sides.
How Are Plackets Constructed and What Common Defects Should You Catch in Samples?
Placket quality depends on fabric stabilization, stitch tension, and construction method. Placket defects are highly visible in finished garments and make polos unsellable—but are catchable in pre-production samples if you inspect closely.

Placket Construction Types
Two-piece placket (folded placket):
Most common for golf polos. Single strip of fabric folded and stitched to create placket structure. Simple construction. Works well for stable fabrics.
Construction steps: Fabric strip cut on grain, edges folded inward, strip stitched along center front opening, topstitched along edges.
Common defect: Placket edges curl or ripple if fabric is not stabilized or stitching tension is uneven.
Box placket (traditional placket):
Separate placket piece sewn behind center front opening, creating reinforced button area. More durable than folded placket. Traditional for dress shirts, less common in golf polos.
Construction steps: Rectangular fabric piece with finished edges inserted behind center front slit, topstitched around perimeter.
Common defect: Box placket shifts or twists during wear if not properly reinforced at top and bottom stress points.
Zipper placket:
Lightweight zipper sewn into center front opening instead of buttons. Common for performance golf pullovers. Requires different pattern construction.
Construction: Zipper tape applied to each side of center front opening, topstitched along edges, zipper guard sewn underneath to prevent skin contact.
Common defect: Zipper tape rippling or puckering if not properly stabilized before attaching zipper.
Placket Quality Checkpoints
Stitch density and tension:
Placket topstitching should use 10-12 stitches per inch. Too few stitches (under 8 per inch) weakens placket. Too many stitches creates rigid line prone to puckering.
Check samples: Run your finger along placket topstitching. Should feel smooth without raised ridges or visible thread tension.
Placket reinforcement:
Top and bottom of placket (where stress concentrates) should have bar tack stitching or reinforcement triangle. Without reinforcement, placket tears easily at stress points.
Check samples: Button and unbutton placket multiple times firmly. Check if stitching at top and bottom of placket shows any loosening or stress.
Buttonhole quality:
Buttonholes should be bartacked at both ends and stitched with tight zigzag. Edges should be clean without loose threads. Buttons should fit through holes without excessive force but not slip through easily.
Check samples: Button and unbutton multiple times. Buttonholes should maintain shape without stretching or fraying.
Placket alignment:
When placket is buttoned, center front should be perfectly straight without shifting left or right. Button spacing should be even (typically 3-4 inches between buttons).
Check samples: Button sample and lay flat. Measure from center front line to both side seams—should be equal distance. Indicates proper placket alignment.
Sample Washing and Stress Testing
Do not approve placket construction based on unwashed samples. Wash samples twice and check:
- Does placket pucker, ripple, or distort?
- Do buttonholes maintain shape or stretch out?
- Does center front line stay straight or shift?
- Does placket reinforcement hold or show stress at top and bottom?
If placket shows any issues after washing, request factory adjust construction method before bulk production. Common fixes: use interfacing to stabilize placket, adjust stitch tension, pre-shrink fabric before placket construction.
What Happens During Assembly and How Do You Verify Seam Quality?
Seam quality determines garment durability and appearance. Poor seam construction causes puckering, stretching, and premature failure—but is verifiable in pre-production samples through close inspection and wash testing.

Critical Seam Types
Shoulder seams:
Join front and back body panels at shoulder. Require reinforcement because shoulder seams carry weight of garment. Should use double-needle stitching or serged seam with topstitching.
Quality check: Tug firmly on shoulder seams. Should not stretch or show thread loosening. Measure shoulder width on multiple samples—should be consistent within 3-5mm.
Side seams:
Run from underarm to hem on both sides. Subject to stress during movement. Must use stretch stitch type on knit fabrics to prevent seam breakage.
Quality check: Stretch fabric perpendicular to side seams. Stitching should stretch with fabric without thread breaking or seams puckering.
Sleeve attachment:
Most common defect point. Sleeve must be evenly distributed around armhole without pleating or puckering. Requires careful sewing and proper seam allowance.
Quality check: Turn garment inside out and examine sleeve seam from inside. Should show even fabric distribution with no bunching. Measure sleeve seam length on multiple samples—should be consistent.
Hem finishing:
Bottom hem typically uses blind hem stitch or coverstitch creating clean finished edge. Should lay flat without rippling.
Quality check: Lay garment flat and observe hem. Should be straight line without waves or distortion. Measure hem width—should be consistent around entire hem (typically 2-3cm folded hem).
Seam Defects to Identify in Samples
Puckering:
Seam line ripples or gathers instead of laying flat. Caused by incorrect stitch tension, wrong thread type, or not pre-shrinking fabric.
How to spot: Lay sample flat and look along all seam lines. Puckered seams are visible as wavy distortions along stitch lines.
Skipped stitches:
Sections where needle does not form proper stitch, leaving gaps in seam. Caused by dull needles, incorrect needle type, or improper machine tension.
How to spot: Examine seams closely looking for thread breaks or gaps. Tug gently on seams—skipped stitches will show as weak spots.
Uneven seam allowance:
Seam allowance (fabric width beyond stitch line) varies along seam length. Causes visible uneven seam from outside and affects garment symmetry.
How to spot: Turn sample inside out and measure seam allowance at multiple points along each seam. Should be consistent within 2-3mm.
Raw edge showing:
Seam finishing fails to enclose raw fabric edge, leaving exposed edge that will fray. Common on lower-quality production.
How to spot: Examine seams from inside looking for unfinished fabric edges. All knit fabric edges should be finished with serging or binding.
Final Assembly Quality Checks
Before approving pre-production samples for bulk production, verify:
Logo placement accuracy: Measure from logo center to seam lines and compare against your tech pack specifications. Should match within 3-5mm.
Label positioning: Neck labels, care labels, and size labels should be positioned per your specifications. Check if labels are securely attached.
Thread color matching: All visible stitching should use thread color matching garment or specified contrast color. Check topstitching, buttonholes, and hem stitching.
Button security: Tug firmly on all buttons. Should be securely attached with bartack stitching or reinforcement.
Overall symmetry: Lay sample flat and measure from center line to both sides at multiple points—chest, waist, hem. Should be symmetrical within 5mm.
Wash stability: Wash samples twice and remeasure all critical dimensions. Acceptable shrinkage is 3-5%. Over 7% shrinkage indicates fabric or construction issues.
Conclusion
Manufacturing golf polos requires coordinating fabric selection (verify performance claims through testing, not specs), pattern engineering (choose customization depth based on MOQ constraints), collar construction (wash samples twice to test interlining stability), placket assembly (inspect for puckering and reinforcement quality), and seam finishing (check stitch types and tension through close inspection)—with documented quality verification at pre-production sampling stage preventing costly bulk production defects.